Physical Address
304 North Cardinal St.
Dorchester Center, MA 02124
Physical Address
304 North Cardinal St.
Dorchester Center, MA 02124

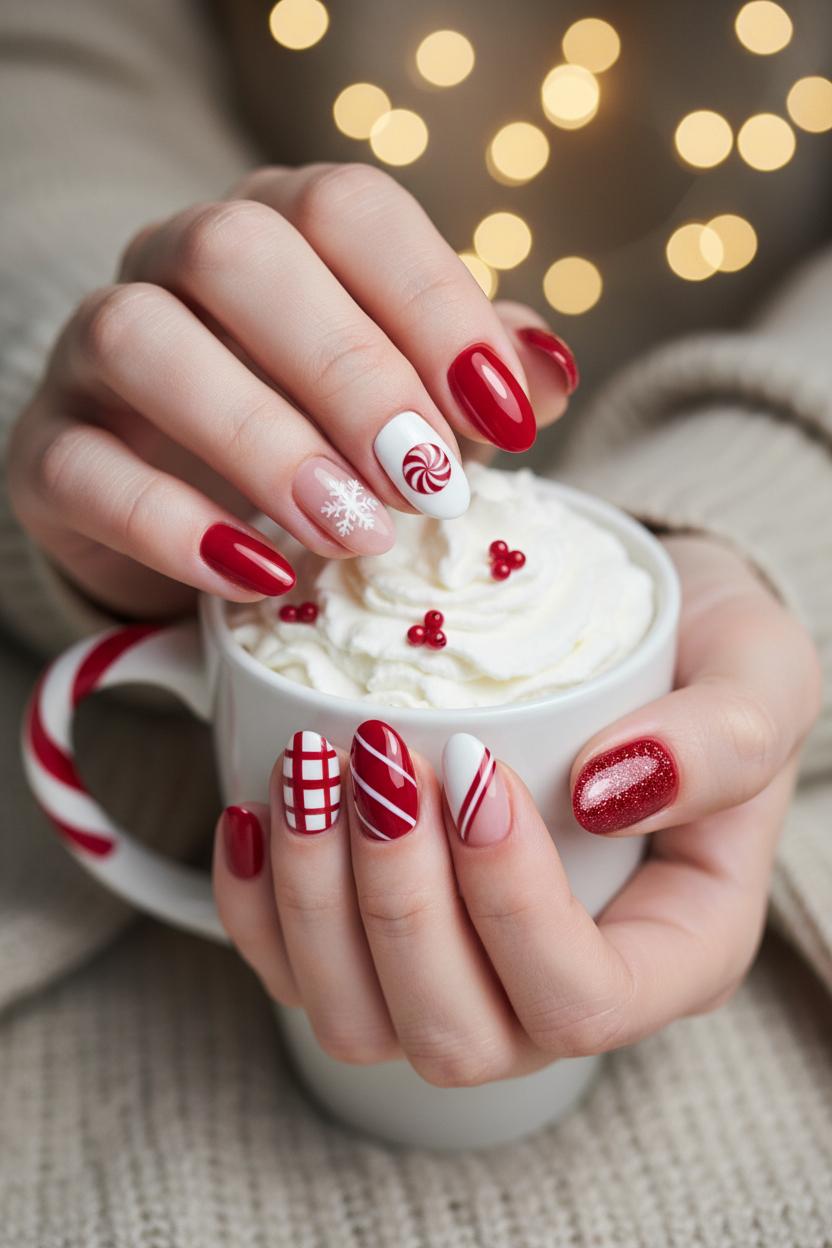
Craving cozy xmas nails that look sweet enough to sip cocoa with? Try these candy cane nails: a simple, festive holiday manicure in classic red and white nails. In this tutorial, we’ll show you easy christmas nail ideas using gel nail polish red, white nail art striping tape for crisp lines, and nail dotting tools for peppermint swirls. Cure each layer under a UV LED nail lamp and finish with snowflake nail stickers for extra sparkle. Quick, chic, and totally merry—your fingertips will be the cutest treat under the tree.

If your winter vibe is all hot cocoa and twinkle lights, these cozy candy cane nails are the sweetest way to dress up your xmas nails without feeling overdone. Think classic red and white nails with peppermint swirls that look adorable wrapped around a mug or peeking out of fluffy sleeves. It’s a timeless twist on christmas nail ideas: playful enough for cookie swaps, chic enough for office parties, and so photogenic that they basically beg to be pinned. The beauty is in the contrast—crisp snowy white against glossy cherry stripes—so even a simple accent nail feels festive and fresh for your holiday manicure.
Here’s how I like to do it the easy way. Start with a smoothing base and two coats of gel nail polish red or bright white, curing each layer under a UV LED nail lamp for that glassy, long-wear finish. For the candy cane nails, lay down white nail art striping tape at a soft diagonal to map out your lines, then paint alternating red-and-white bands between the tape for ultra-clean edges before curing again. Prefer freehand? A fine liner or nail dotting tools give you control for skinny stripes and tiny peppermint dots at the cuticle. Leave one nail plain and pop on a few delicate snowflake nail stickers for a cozy, North-Pole-meets-minimalist moment. Seal everything with a glossy top coat, cap the tips, and cure—your stripes will look like hard candy you could almost crack with a bite.
To style the set, mix finishes: keep most nails shiny and add a matte top coat on one striped accent for that sweater-weather feel. Short square or soft almond shapes look especially sweet and wearable day to night. If you want even more dimension, add a micro-sparkle topper over the non-striped nails so the candy cane nails stay the star. A swipe of cuticle oil keeps everything looking salon-fresh, and the pattern is forgiving—tiny chips hide in the striping so your holiday manicure lasts through gift wrapping and gingerbread baking. Cozy, classic, and cheerful, these red and white nails are the definition of easy christmas nail ideas you’ll come back to every year.
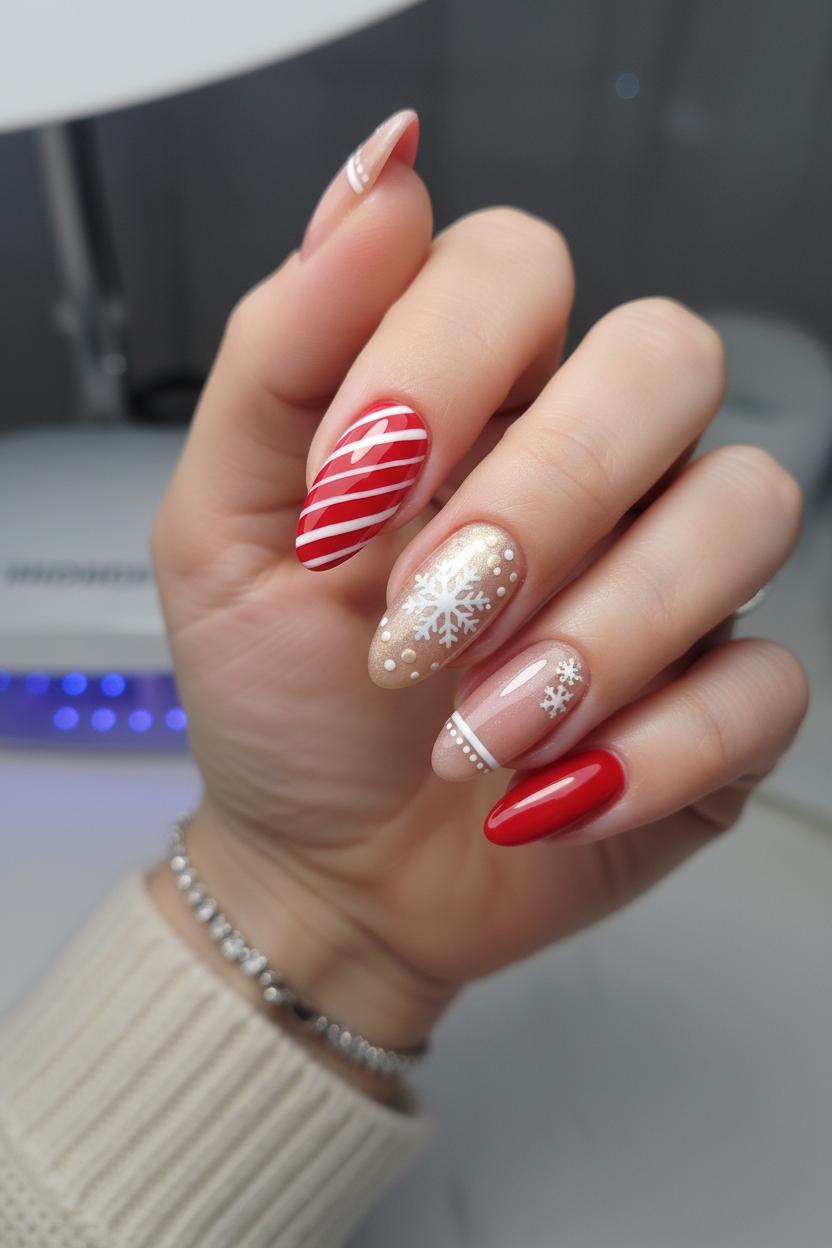
Picture your fingertips like a little tray of peppermint bark: glossy red and white nails, crisp stripes, and a hint of sparkle that catches the twinkle lights. For an easy starting point, paint two nails in a classic gel nail polish red and leave the others neutral or sheer. Then bring in candy cane nails with skinny, clean lines—use white nail art striping tape as your guide or as the stripes themselves for that perfectly barber-pole twist. A diagonal French tip looks so chic here: a sheer base, a swoop of red, and a whisper-thin white line framing it. If you love the peppermint swirl look, paint a soft pinky nude, add a circular swirl of red, and outline with white for a sweet-shop vibe that still feels grown up. Think of this as your wearable holiday manicure mood board: polished, playful, and cozy, like a scarf wrapped around your nails.
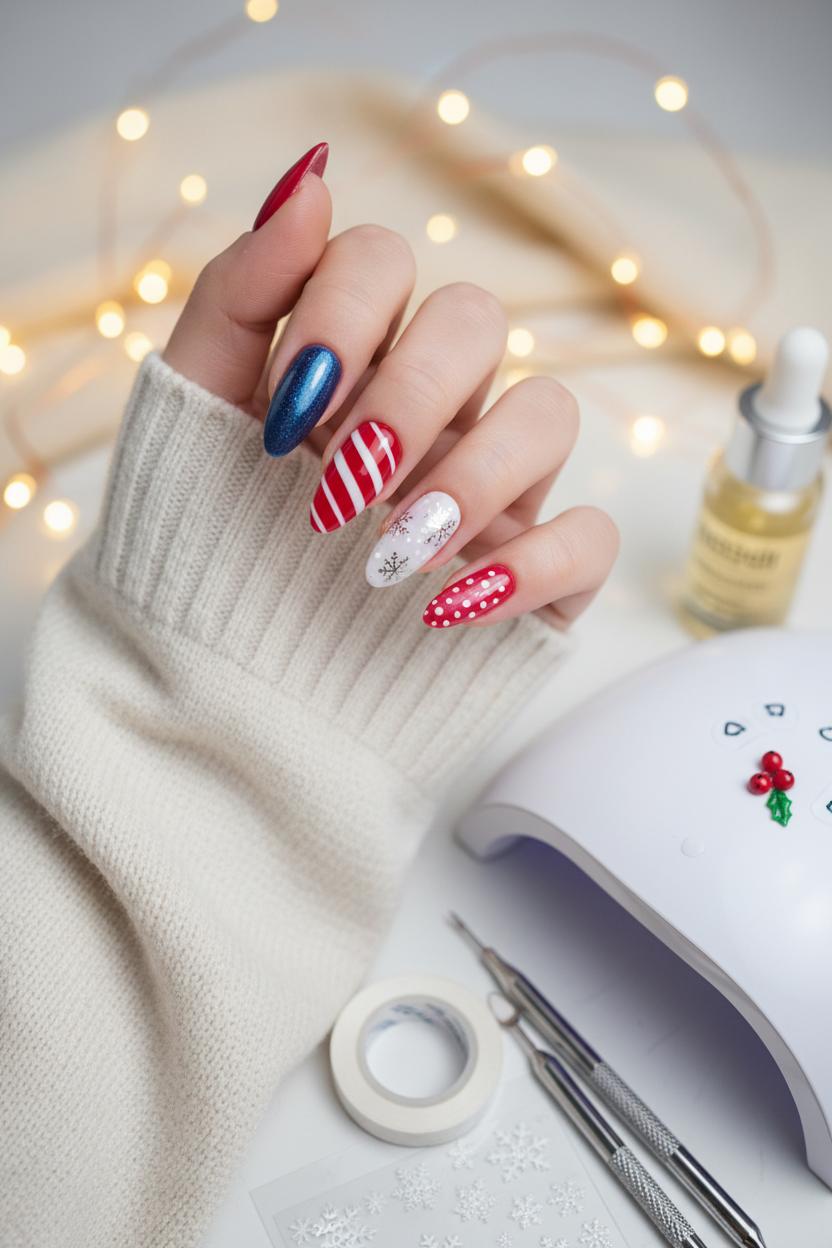
Layer in winter magic without overthinking it. Pop a single snowflake on an accent nail with snowflake nail stickers and top with a glossy gel topcoat; cure under a UV LED nail lamp for that glassy, salon shine. Add micro dots along the cuticle or in a cluster like holly berries using nail dotting tools—tiny details make simple xmas nails feel curated. If you’re into mixed-and-matched christmas nail ideas, try this combo: two candy cane nails, one full glitter red, one sheer with a single snowflake, and one solid snowy white. Short nails? Go slimmer with the stripes and keep the palette clean. Longer nails? Play with negative space swirls and a peppermint French on the tips for maximum impact.
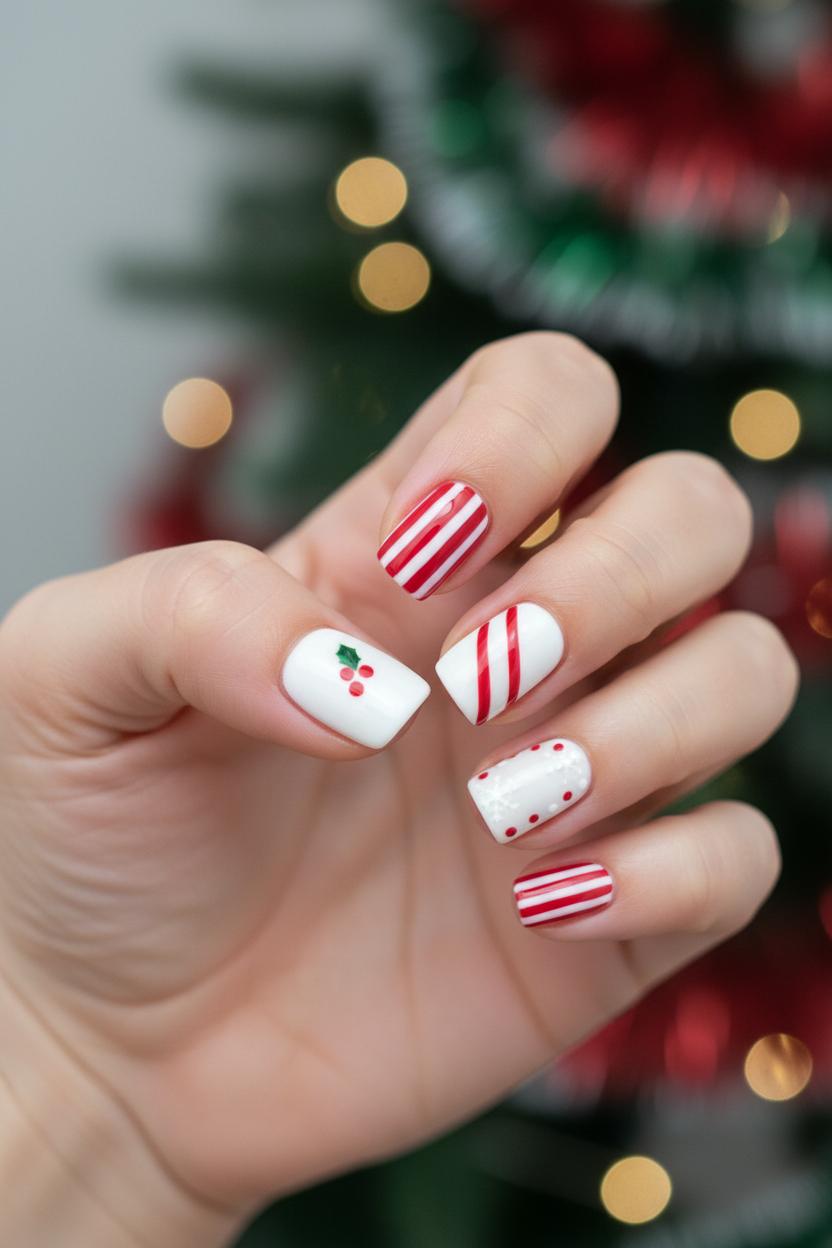
Minimalists can keep it crisp: a single mini candy cane on one nail, a velvet matte red next to a glossy white, and you’re done. Maximalists might add a plaid moment—start with red, mask with striping tape, and weave in white lines for a cozy flannel effect. However you style it, the charm is in the contrast and the candy-shop color story. These candy cane nails are festive without being fussy, the kind of red and white nails you’ll want to wrap around a mug of cocoa while you scroll for more inspiration—and they slot right into any holiday manicure lineup you’re planning this season.
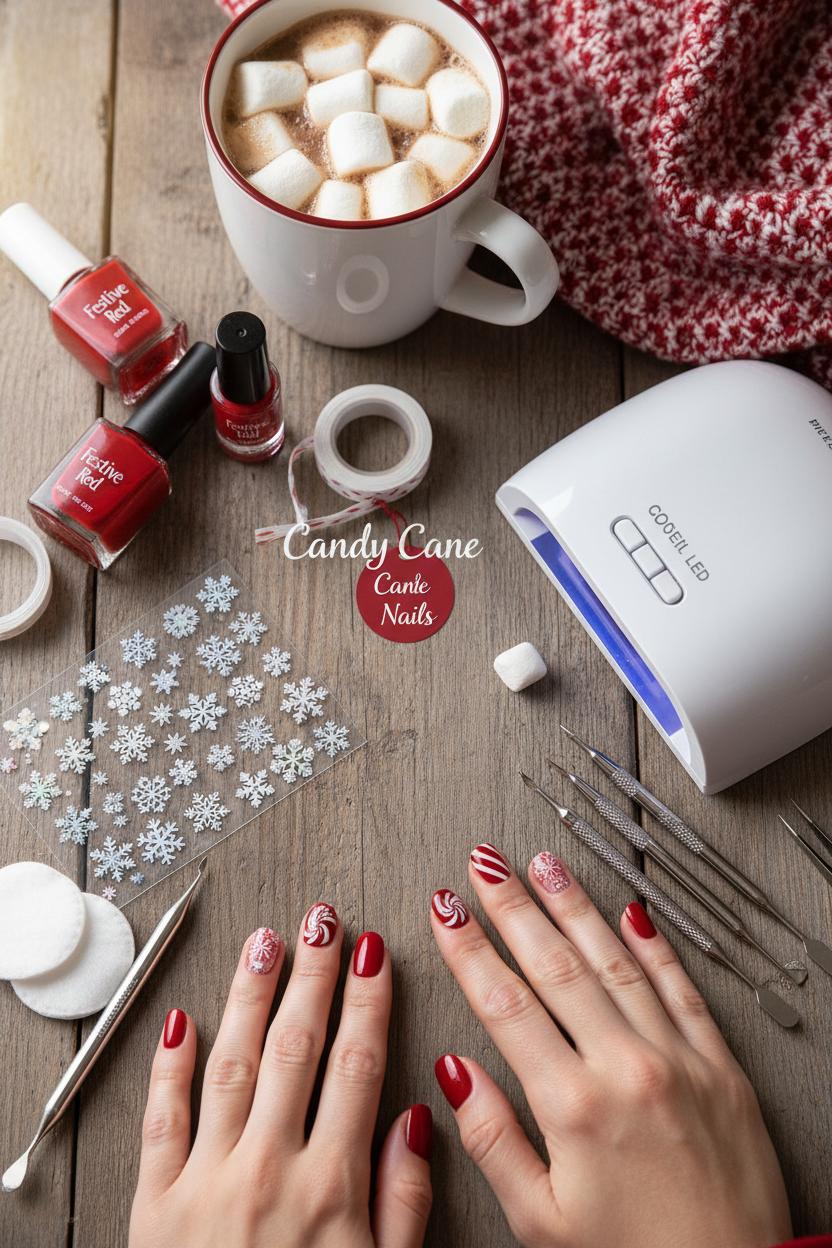
Before you start, gather a little kit that feels as cozy as a cup of cocoa: a glossy gel nail polish red for that classic candy-stripe hue, white nail art striping tape to get razor-sharp lines, a sheet of delicate snowflake nail stickers for wintry accents, a reliable UV LED nail lamp to cure everything quickly, and a set of nail dotting tools for peppermint swirls and teeny “sugar” dots. Add your usual base and top coat, a nail cleanser or alcohol wipes to remove the tacky layer, and a pair of tweezers for sticker placement. With these on hand, you’ll have everything you need to turn simple red and white nails into the cutest candy cane nails—no salon visit required.
Each item plays a role. The gel nail polish red gives you a rich, shiny backdrop that screams festive without trying too hard. The white nail art striping tape is your secret for crisp, even diagonal stripes—lay it down, paint between, peel back, and boom: instant candy-cane perfection. Use tweezers for precision and press the tape ends firmly so polish doesn’t sneak underneath. Pop your nails under the UV LED nail lamp for speedy, durable curing between steps, which keeps things smudge-free while you build your design. Snowflake nail stickers make the sweetest accent nail—float a few onto a tacky layer or lightly buffed surface, then seal with a generous top coat so the edges melt right in. Finish with your nail dotting tools to add tiny dots (think sugar sprinkles) or to twirl red and white together into mini peppermint swirls. It’s a simple formula that delivers high-impact xmas nails and checks the box for easy christmas nail ideas.
Pro tips for a flawless holiday manicure: work in thin coats, flash-cure stripes as you go, and stick to a short or softly rounded shape for that cozy-sweater vibe. If you’re new to gels, practice stripe placement on a swatch stick first. Everything here—gel nail polish red, white nail art striping tape, snowflake nail stickers, UV LED nail lamp, nail dotting tools—is easy to find online, so your supplies arrive before your movie night. Seal it all with a glossy top coat and a little cuticle oil, and your red and white nails are ready to sparkle in every photo. Festive, quick, and totally doable: the kind of candy cane nails you’ll want to wear all season.
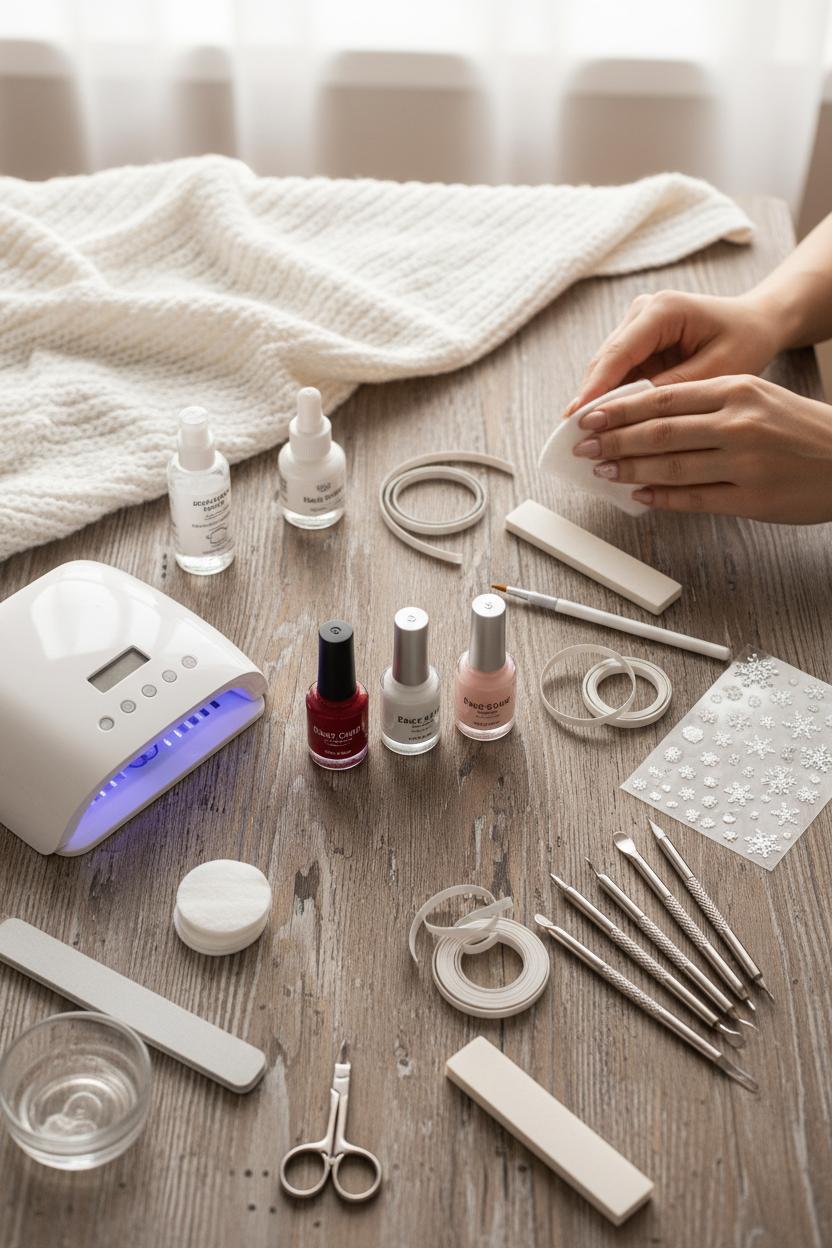
Think of prep as the cozy foundation for everything festive to come—like warming up cocoa before the whipped cream. Start by giving your nails a squeaky-clean slate: wash hands, remove any old polish, and gently push back cuticles with a bit of remover so your color can hug the nail plate without lifting. Trim only hangnails, then file to the shape that flatters your fingertips—squoval for a soft, classic look or almond if you want your candy cane nails to feel extra elegant. Always file in one direction and seal the free edge to prevent snags. A quick, light buff removes surface shine (don’t overdo it), then dust away debris and wipe with alcohol so there’s zero oil left behind. This is the difference between a two-day fling and a holiday manicure that lasts through cookie decorating and gift wrapping.
Now it’s time to prime. Swipe on a nail dehydrator or simple alcohol cleanse, then apply a thin, even base coat and cap the tips. If you’re going gel, cure under a UV LED nail lamp and consider a rubber base for ridges—your red and white nails will look smoother and wear longer. While that sets, stage your supplies so decorating feels easy and fun: pull out your gel nail polish red, crisp white, and any sheer pink you love for a soft milky backdrop. Set aside white nail art striping tape for razor-sharp lines, nail dotting tools for peppermint polka-dots, and snowflake nail stickers for a twinkly accent. Planning your accent nails now (ring finger? thumb?) keeps the design cohesive and stress-free, especially if you’re browsing christmas nail ideas and want to mix stripes with a single snowflake.
One last pro tip: keep everything thin. Thin base, thin color, thin topcoat—capping the edge every time. Skip cuticle oil and heavy hand cream until the very end; oils can sneak under polish and cause chips. If you’re a tidy-up person, apply a peel-off barrier around the nail before you start stripes—your candy cane nails will look salon-clean with zero fuss. With a smooth, primed canvas and your tools at the ready, xmas nails go from “maybe later” to “photo-ready” in minutes—bright, glossy, and perfectly prepped for all your cozy holiday moments.
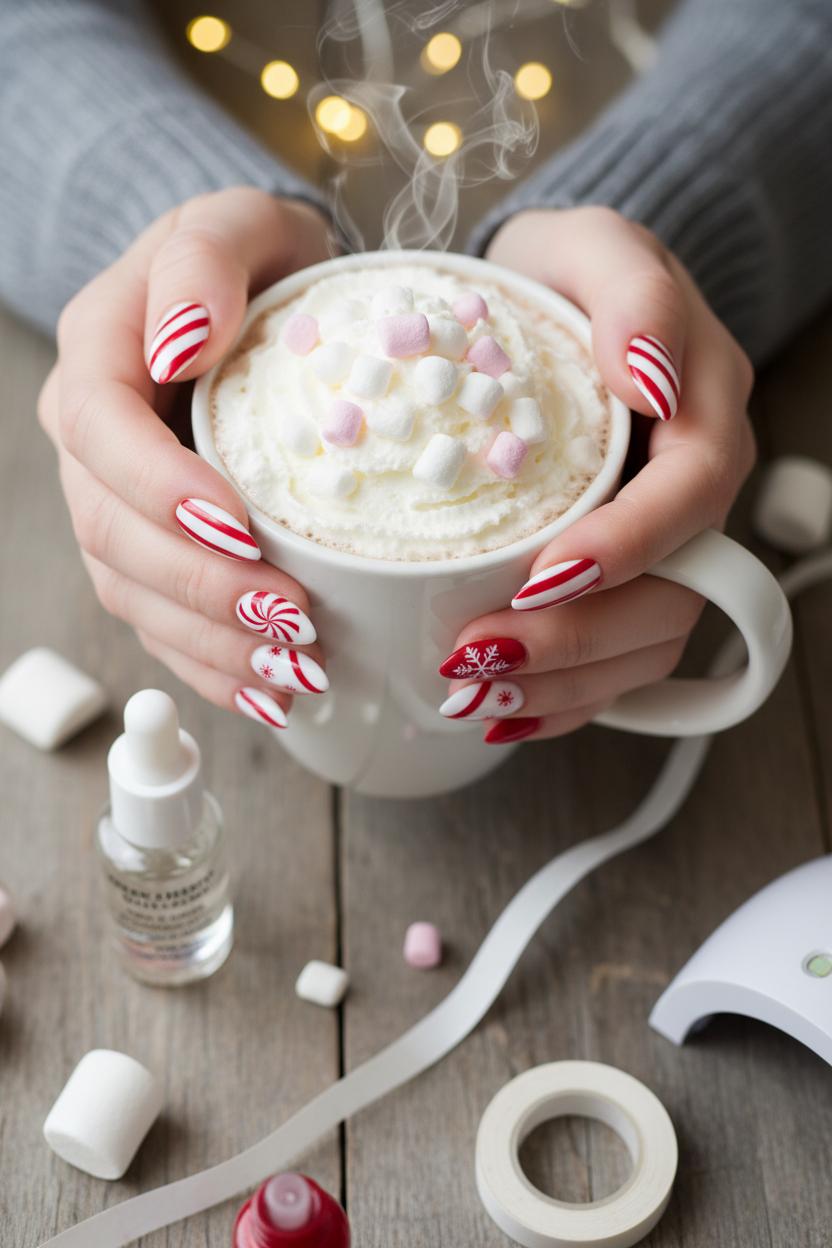
If stripes make you smile, this is the easiest way to get candy cane nails without the salon. Start with clean, shaped tips and a swipe of dehydrator or alcohol so your polish grips. Lay down a thin base coat and cure if you’re using gel, then paint two even coats of crisp white—think fresh snowfall—curing each under your UV LED nail lamp. Now the magic: run white nail art striping tape across each nail in evenly spaced bands, leaving slender gaps for the red. Press the tape down at the edges so nothing bleeds. Brush on a glossy gel nail polish red, working one nail at a time, and peel the tape away while the red is still wet for the sharpest lines. A quick clean-up around the cuticles, then seal with a shiny top coat and cure to lock in those red and white nails that practically twinkle under fairy lights.
Want a sweet accent? On one nail, dot a small white circle and use nail dotting tools to pull curved red spokes from the center for a peppermint swirl; or skip straight to cozy with snowflake nail stickers on a solid red or white base. The contrast keeps your holiday manicure playful and polished, and it’s honestly one of the most foolproof christmas nail ideas to pull off in a single cozy evening. If you prefer a softer vibe for your xmas nails, swap in sheer pink on one finger or add a milky top coat, but keep the rest candy-striped so the theme stays clear. Finish with cuticle oil, a mug of cocoa, and a few photos because these candy cane nails are unbelievably photogenic. Simple steps, zero stress, and maximum cheer—proof that the sweetest seasonal look can come from a couple of colors, a roll of tape, and the little lamp that could.
Once your candy cane base is set, sprinkle in a few cozy accents to make the whole look feel intentional and festive without going overboard. My favorite lazy-girl upgrade is snowflake nail stickers: they’re impossibly cute, perfectly symmetrical, and take seconds. Place a single flake on your ring finger or cluster two tiny ones over a corner of your nail so it looks like they drifted onto your stripes. Press them down firmly, cap the edges with top coat, and if you’re working with gel, give everything a quick cure under your UV LED nail lamp so the flakes melt into the glossy finish. The contrast of crisp white against gel nail polish red is peak xmas nails energy, and it instantly turns simple red and white nails into a Pinterest-ready holiday manicure.
If you want that snowfall look without stickers, polka dots are the easiest detail to DIY. Dip your nail dotting tools into white or a soft champagne and add tiny dots like flurries across a single accent nail, or trace a delicate dotted halo near the cuticle for a subtle twinkle. For a playful take, alternate micro red and white dots down one side of the nail to echo the candy cane stripes without stealing the show. Keep the dots small and spaced out for a minimal vibe; they should feel like confetti, not balloons. A thin layer of top coat smooths everything so your christmas nail ideas look clean and professional.
For ultra-minimal detailing, try negative space and razor-thin lines. Use white nail art striping tape as a guide to outline just one diagonal stripe, or add a skinny “cuff” line at the base of a nude nail to tie your candy cane nails together. A single micro stripe across a blank nail next to your bolder stripes adds chic balance, especially if you’re mixing solids, shimmer, and pattern. Think of it like styling a cozy sweater with delicate jewelry—quiet but intentional. Finish with a high-gloss top coat, seal the tips, and cure if using gel. Between the snowflake nail stickers, airy polka dots, and whisper-thin accents, your red and white nails will look polished, modern, and perfectly merry—aka the easiest upgrade to your holiday manicure that still feels special.
For those candy cane nails to look crisp instead of wobbly, think of striping tape as your secret stencil and dotting tools as your precision pens. Start with a smooth base—file, buff, and lay down a thin base coat. If you’re going gel, a classic gel nail polish red or a creamy white works beautifully; cure each coat under your UV LED nail lamp so your canvas is firm and smudge-proof. Now, measure out pieces of white nail art striping tape and place them exactly where you want your stripes to be. Press each strip down firmly, especially at the edges—use a silicone tool or your fingertip to seal it so polish can’t creep underneath. Paint your contrasting color in thin, confident strokes, then peel the tape away right away while the polish is still wet for the sharpest lines. With gel, you can “flash cure” the base color first, lay the tape, paint the stripes, peel, and then cure fully to lock in those razor edges.
When you’re doing a holiday manicure with lots of red and white nails, try alternating the direction and thickness of the stripes for that chic candy wrapper vibe. A favorite trick: keep one accent nail clean and glossy, then add two diagonal candy cane bands for a minimal, modern take. If a line strays, dip a detail brush in a little alcohol (for gel) or remover (for regular polish) and nudge it back into place before curing or topcoating. And remember thin layers—thick polish loves to pool along tape lines and blur them.
Once your stripes are set, pull out your nail dotting tools to sprinkle in sugary details. Use the smallest tip to add teensy snow dots along a stripe, or cluster three dots into a tiny holly berry moment. If you’re short on time, tuck a few delicate snowflake nail stickers onto a blank space, then gently press them down so there’s no edge lift before sealing. Finish with a glossy top coat, wrapping the free edge to protect all that effort. The result: xmas nails that look salon-sharp, Pinterest-pretty, and totally doable at home—proof that the best christmas nail ideas can be simple, playful, and impeccably neat.
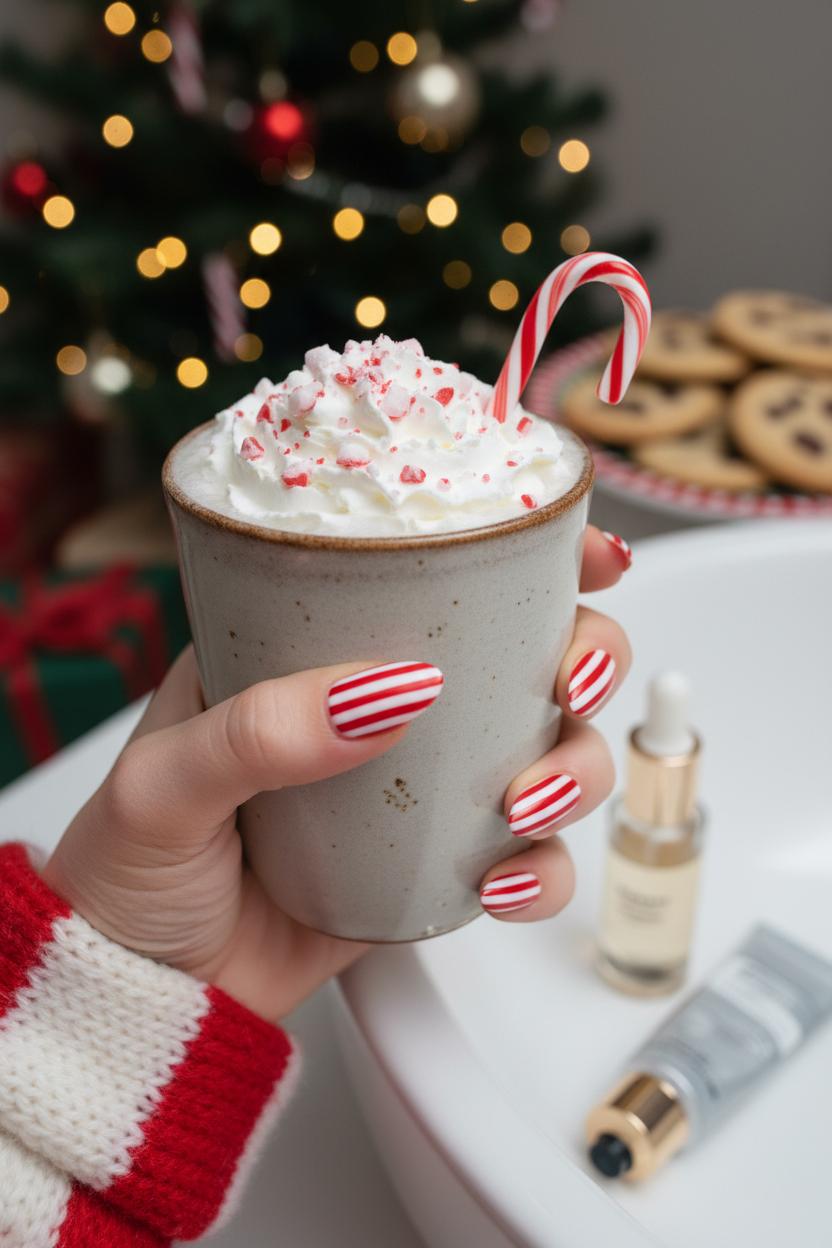
You know that freshly painted feeling when your candy cane nails are crisp, shiny, and begging to hold a mug of peppermint cocoa? Let’s keep that vibe going. Start by sealing your design like a pro: after your color, float a generous but thin layer of glossy top coat over the entire nail and cap the free edge so those red and white nails don’t wear at the tips. Working with gel? Choose a gel nail polish red for extra durability and cure each layer properly under a UV LED nail lamp to lock in that glassy finish. If you used white nail art striping tape for those perfect peppermint lines or added snowflake nail stickers, press them down firmly and double-topcoat to prevent any sneaky lifting—one layer to bond, a second to smooth.
Everyday habits matter more than you’d think. Keep a mini cuticle oil and hand cream by the sink and in your bag—winter air is drying, and hydrated nails flex instead of cracking. Slip on dish gloves for chores, avoid long soaks in super-hot water, and swap harsh sanitizer for a gentler option when possible. If you snag a corner, use a fine glass file to softly round it before it becomes a chip. Refresh shine with a thin top coat every 3 to 4 days for regular polish; for gels, lightly cleanse the surface, then add a wafer-thin top coat and cure. These tiny rituals stretch your holiday manicure well past the first round of cookie baking.
Got a little ding? Turn it into a moment. Tap on a dot or two with nail dotting tools to camouflage a nick, or cluster a few tiny dots into a faux snowflake that ties right into your christmas nail ideas. You can even add a single snowflake sticker near the cuticle to disguise growth while keeping the design cohesive. If a stripe lifts, trim the end, press it back, and reseal with top coat. With mindful care, your xmas nails stay polished and photo-ready, and those cozy candy cane nails deliver merry, match-with-the-scarf energy all season long—proof that simple, sweet details can last from the first carols to the New Year’s countdown.
If you’re shopping the look for these Cozy Candy Cane Xmas Nails, start with the star: a gel nail polish red that looks juicy and glossy under every twinkle light. I love a blue‑toned cherry for that classic, teeth‑whitening pop; a true candy‑apple red for vintage vibe; and a deeper cranberry with micro‑shimmer for a fireside glow. If you prefer something soft and sweet, try a sheer jelly red layered in two coats for that candy glaze effect. Most budget gel sets cure beautifully under a UV LED nail lamp, and if you’re doing red and white nails, pair your red with a bright, opaque white so the stripes look crisp. Thin coats, a no‑wipe top coat, and a quick flash cure between layers will keep everything smooth and shiny for a long‑wear holiday manicure.
For the details that make candy cane nails effortless, grab white nail art striping tape to “cheat” perfectly even lines—no shaky hands required. Lay it down on fully cured color, press the edges, then seal with two thin layers of top coat so it wears like gel art. Nail dotting tools are a tiny investment with a big payoff: use them for peppermint swirls, snowy polka dots, and holly berries. If you’re in a hurry, snowflake nail stickers are pure magic—float them over a milky white accent nail or scatter them across a red base for instant xmas nails that look hand‑painted. These little add‑ons are budget friendly and make your christmas nail ideas feel boutique without the salon price tag.
On a tight budget? Build a mini kit with one high‑shine gel nail polish red, a small bottle of opaque white, white nail art striping tape, snowflake nail stickers, nail dotting tools, and a compact UV LED nail lamp. That handful of basics will cover classic candy cane nails, cozy sweater‑inspired accents, and festive French tips all season long. Pro tip: keep isopropyl alcohol on hand to wipe any sticky layer, and finish with cuticle oil for that fresh, glossy finish. Simple, sweet, and totally giftable—to yourself or your bestie—these pieces make it easy to switch up your red and white nails from subtle to show‑stopping all December.
From simple stripes to glitter tips, your candy cane nails are the sweetest, coziest way to celebrate. Whether you’re sipping cocoa or trimming the tree, these xmas nails prove that red and white nails can feel both classic and playful. Pin this for later, try one of these christmas nail ideas this weekend, and enjoy a stress-free holiday manicure that looks salon-worthy in minutes. Share your spin on candy cane nails and keep the cheer at your fingertips all season long.