Physical Address
304 North Cardinal St.
Dorchester Center, MA 02124
Physical Address
304 North Cardinal St.
Dorchester Center, MA 02124

Ready to sleigh your manicure? Discover chic Christmas nail designs that blend classic candy cane stripes with delicate snowflakes. From cozy winter nails to glossy gel nail designs, these festive nail art ideas are easy, polished, and Pinterest-perfect. Grab red gel nail polish, white nail striping tape, snowflake nail stickers, and a nail art brush set to create crisp lines and icy details, then seal with a glossy top coat. Scroll for holiday manicure ideas you can DIY in minutes—sweet, sparkling, and totally season-ready.

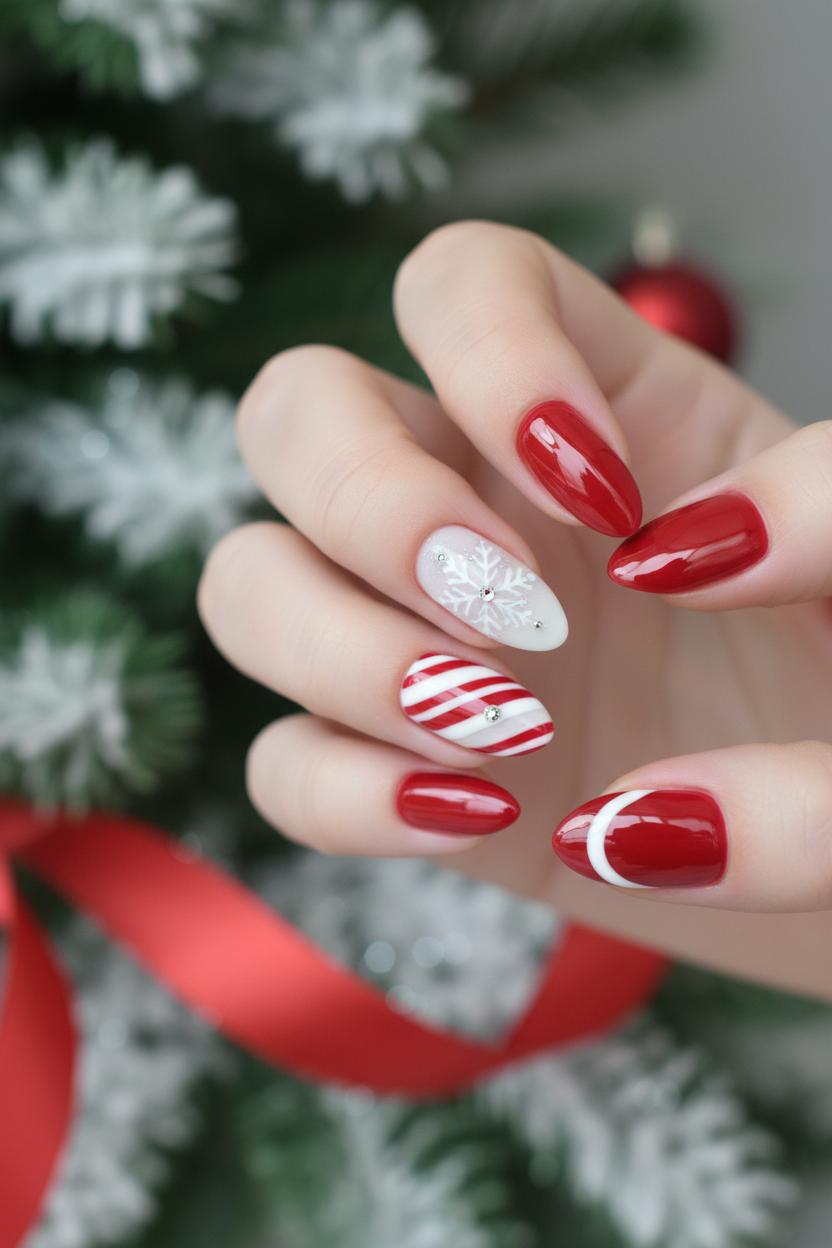
If you love your seasonal style with a sleek, modern twist, candy cane stripes and airy snowflakes are the perfect duo for chic Christmas nail designs. Think crisp red-and-white accents, soft shimmer, and clean negative space that feels more runway than novelty sweater. Candy canes bring that graphic pop we crave in winter nails, while snowflakes add a whisper of frost that catches the light just right. Together they create festive nail art that’s playful but polished, ideal for office parties, cozy brunches, and everything in between. Whether you prefer short, neat ovals or elegant almond tips, this pairing flatters every shape and works beautifully with gel nail designs for that glassy, long-wear finish.
For candy cane moments, start with a sheer nude or deep red base and layer diagonal stripes for a tailored look. A classic approach uses red gel nail polish for the base and ultra-crisp lines made with white nail striping tape; the edges look impossibly clean without any stress. If you love a minimalist vibe, try a negative-space French where a single candy cane stripe arcs along the tip—so chic with a glossy top coat. Feeling artsy? A nail art brush set lets you hand-paint micro stripes or mix in metallic accents for a couture touch. Keep the palette tight—scarlet, snow white, and maybe a hint of chrome—so your stripes read bold, not busy.
Then let snowflakes soften the story. A milky base with icy sparkle, a whisper of silver at the cuticle, or a subtle ombré from blush to vanilla sets the stage. If you’re short on time, snowflake nail stickers look delicate and intricate in seconds; layer them over a translucent wash, seal with a glossy top coat, and you’ve got a salon-level result. For maximum impact, alternate nails: candy cane accents on two fingers, airy flakes on the others—an instant upgrade to your holiday manicure ideas that still feels cohesive and luxe. Mix and match textures (creamy reds against pearly whites, hint of glitter on one finger) and you’ll land on a look that photographs beautifully and wears even better through the festivities.
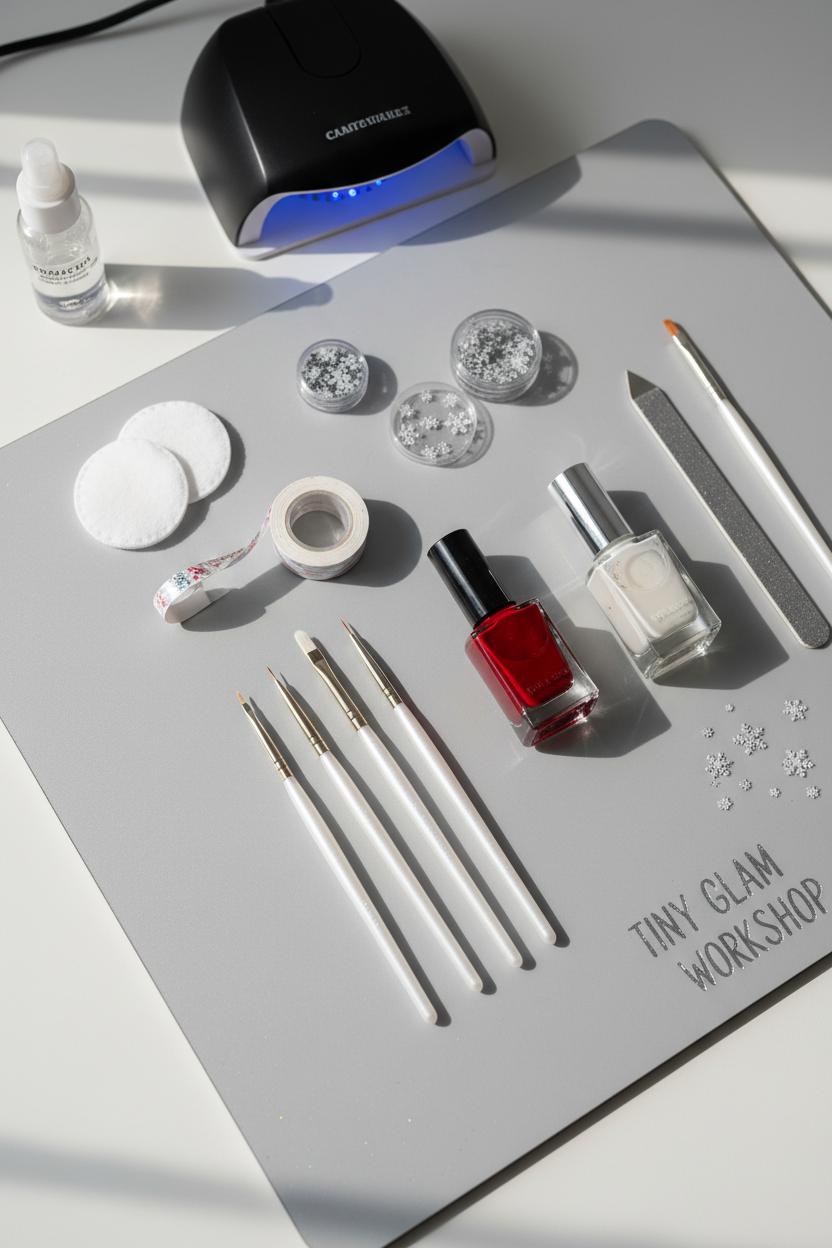
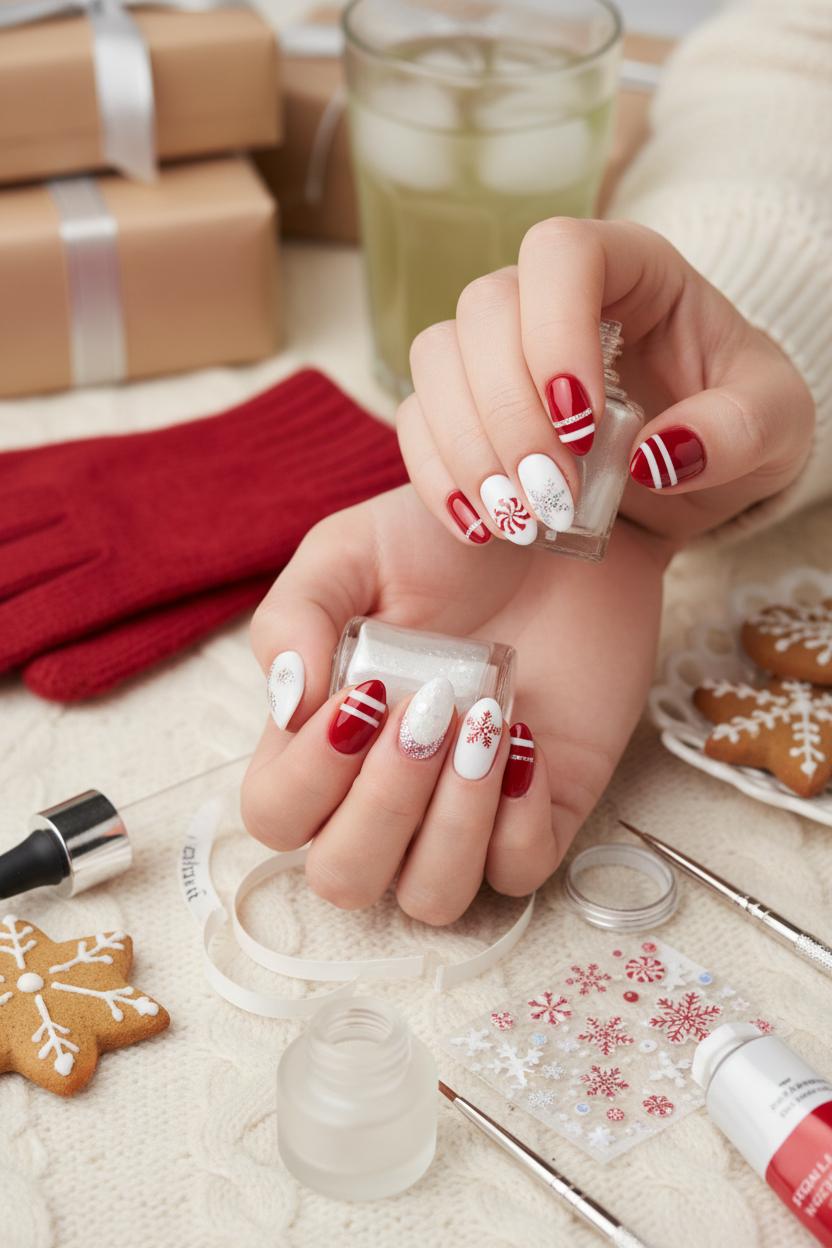
Before the fun starts, lay out your tools like a tiny glam workshop. A good nail art brush set is your MVP for crisp lines and delicate details—reach for a fine liner for those candy cane swirls and a tiny detailer for snowflake arms and dots. If you’re going the sleek route, keep white nail striping tape nearby for instant, razor-sharp stripes over a cured red gel nail polish base; it’s a shortcut that looks impossibly precise. I like to prep by shaping, gently buffing, and cleansing the nail plate, then applying a thin gel base coat and curing so your canvas is smooth and ready. For color, a rich red gel nail polish brings the candy-cane vibes, while a soft milky white or sheer pink sets the perfect backdrop for snowflakes. If hand-painting snowflakes intimidates you, snowflake nail stickers are a festive nail art lifesaver—place, press, and you’re halfway to chic winter nails with zero stress.
Application is all about patience and thin layers. Paint and cure your color coats, then map out candy cane accents with the striping tape—press edges firmly, trim neatly, and seal them in. For snowflakes, use your liner brush to sketch delicate six-point stars and add tiny dot clusters for that frosty sparkle, or mix stickers with a few hand-painted accents for a custom look. The final, non-negotiable step is a glossy top coat; it melts everything together, smooths tape edges, and gives that glassy, salon shine that makes gel nail designs feel extra luxe. Cap the free edge and cure fully for a chip-resistant finish that lasts through cookie baking and cocktail clinking. This little toolkit—nail art brush set, white nail striping tape, glossy top coat, plus your favorite red gel—makes these Christmas nail designs totally doable at home and opens the door to so many holiday manicure ideas. Think of it as your seasonal capsule wardrobe for nails: simple pieces, endless festive combinations.
When you’re dreaming up candy cane swirls and delicate snowflakes, start with a palette that never fails: juicy red gel nail polish against crisp winter whites. It’s the kind of classic contrast that feels both nostalgic and fresh, like stepping into a snowy evening with a ribboned gift in hand. For a sleek, modern base, try a sheer milky white or a soft pink, then layer on bold cherry or cranberry reds for the stripes. If you want ultra-clean lines, lay down white nail striping tape before painting your curves and diagonals—peel it away to reveal razor-sharp candy cane edges. Prefer a softer take on Christmas nail designs? Alternate solid cherry nails with frosted white accents, or add a hint of negative space at the cuticle for airy winter nails that still read festive. This palette thrives on shine, so keep the finish luminous with a glossy top coat to amplify that candy-like sheen.
For the snowflake moment, mix textures and scales so it feels curated rather than matchy-matchy. A micro-glitter white on one accent nail makes the red pop, while tiny silver studs or a whisper of shimmer look like frost kissed your fingertips. If freehand isn’t your thing, snowflake nail stickers are a quick, elegant shortcut—press them onto your cured color and seal them in. Hand-painters can grab a nail art brush set to sketch fine branches and dot icy centers; the contrast of bright white against deep red makes even simple strokes look intricate. Keep everything cohesive with repeating elements: a candy cane stripe on the ring finger, a single snowflake on the middle, and glossy red bookends. These choices translate beautifully across shapes—short square, medium almond, or long coffin—and they slot right into your lineup of holiday manicure ideas and festive nail art without feeling fussy. Best of all, the durability and depth of gel nail designs mean your candy cane sparkle and snowflake detail stay crisp from tree trimming to New Year’s cheers.
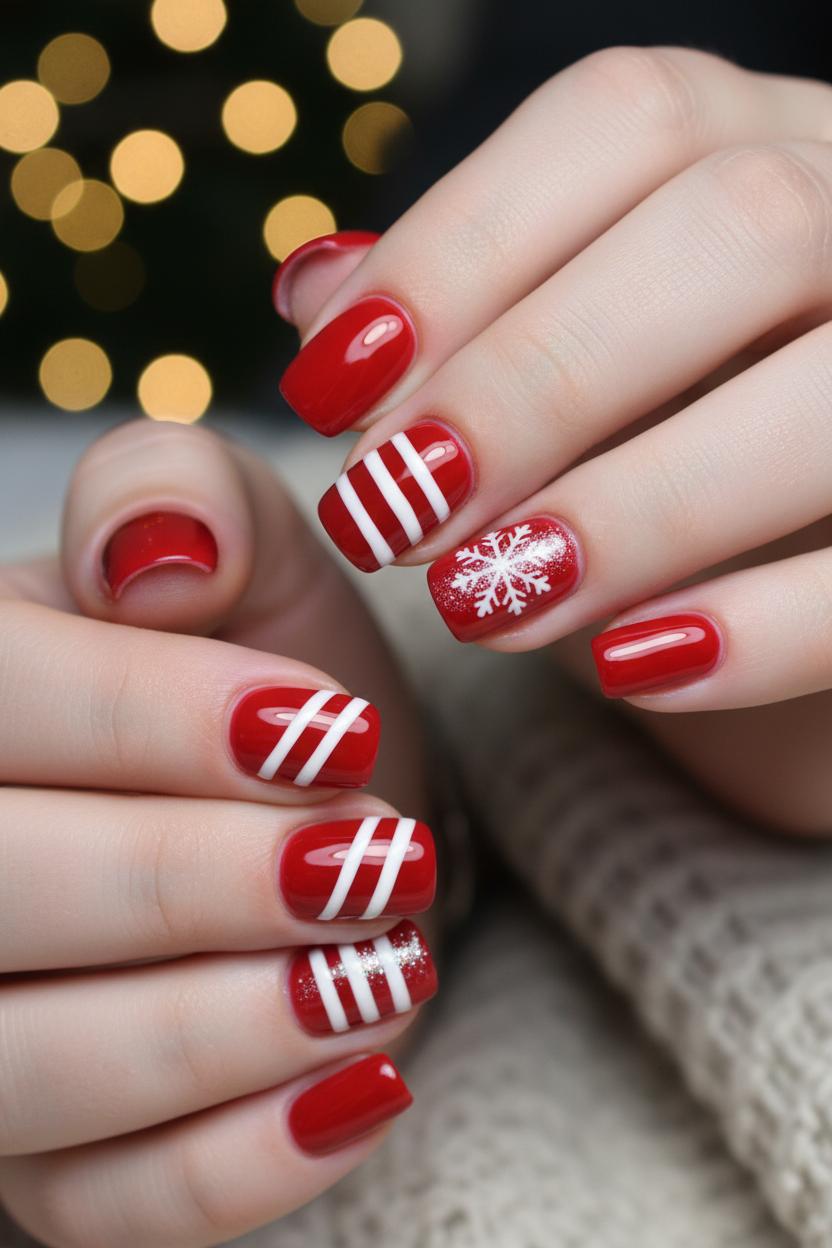
Nothing says candy-cane chic like crisp diagonal lines over a glossy cherry base, and the easiest way to get them picture-perfect is with white nail striping tape. Start by shaping and gently buffing your nails, then wipe with alcohol to remove oils. For that classic candy hue, apply two thin coats of red gel nail polish, curing between layers for a smooth, glassy base that’s the foundation of so many gel nail designs. If you prefer a softer look for your winter nails, try a cranberry or deep berry red—both still feel festive. Once your color is fully cured, remove any tacky layer so the tape grips firmly.
Cut several pieces of white nail striping tape and place them diagonally across each nail, spacing them evenly for a darling barber-pole effect. Press along every edge to lock them in; a silicone tool or the angled brush from a nail art brush set helps tuck the tape flush to the sides so nothing lifts. For bold stripes, cluster two pieces of tape together, then leave a slightly wider gap before the next set—this alternating rhythm looks so chic in photos and feels straight from your favorite board of holiday manicure ideas. When you’re happy with the pattern, seal everything in with two coats of a glossy top coat, floating the brush so you don’t drag the tape. Cap the free edge and cure thoroughly to encase those snowy lines for maximum wear.
Want to tie in the snowflake theme of your festive nail art? Keep the candy stripes on most nails, then add a single accent nail with snowflake nail stickers over the red base—one delicate decal near the cuticle looks effortlessly elegant. If you love a sugar-frosted finish, tap a whisper of fine iridescent glitter onto just one white stripe before your final top coat for a subtle sparkle that catches the tree lights. These candy cane stripes slot beautifully into your lineup of Christmas nail designs, and the best part is how quickly they come together with simple tools like white nail striping tape and a trusty glossy top coat. Sweet, polished, and oh-so-seasonal—this is the kind of festive flourish your winter nails will wear on repeat.

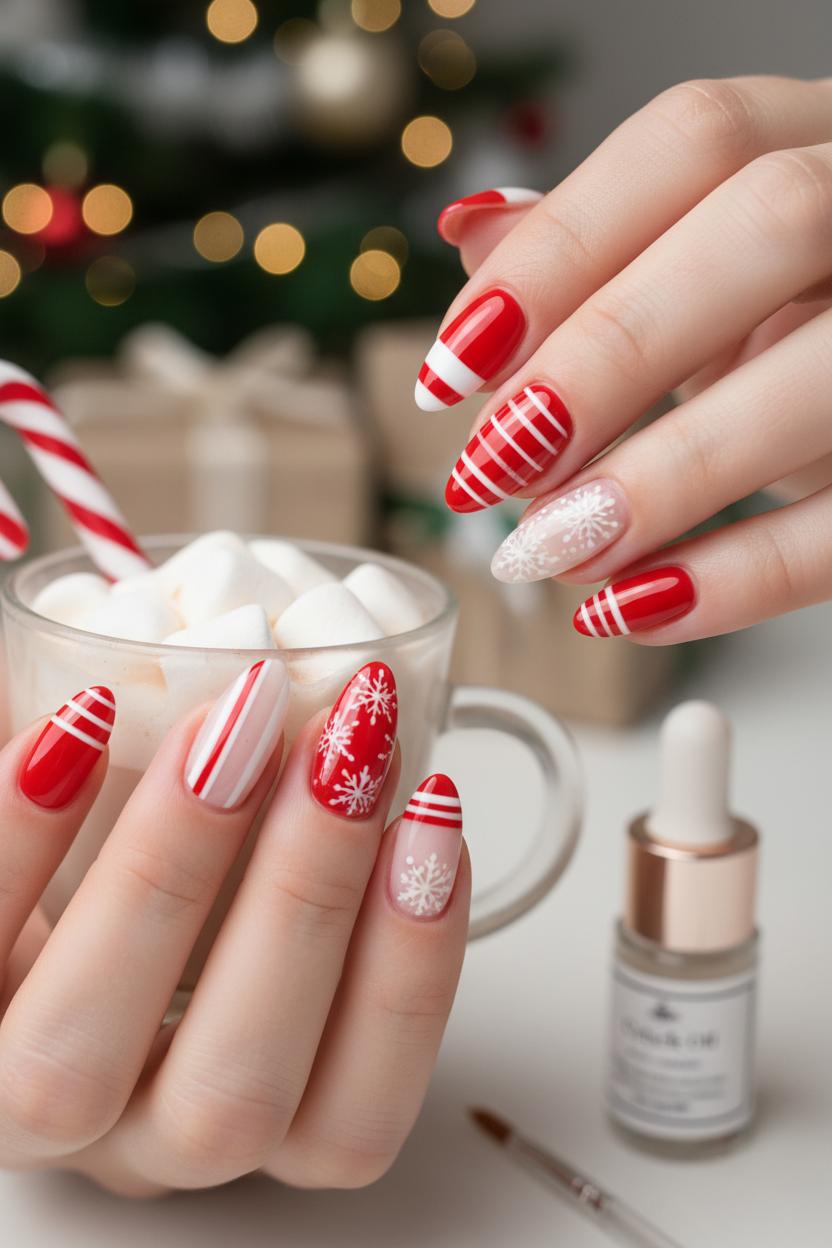
If you want your candy cane stripes and snow-kissed snowflakes to stay flawless from the tree lighting to New Year’s brunch, gel is the secret. Gel nail designs lock in that glassy glow and resist chipping through gift wrapping, cocoa sipping, and all the merry moments in between. Think of them as your long-wear shortcut to cozy, polished winter nails: a candy-apple red, icy white accents, and a high-shine finish that reflects twinkle lights like a mirror. This look taps into classic Christmas nail designs without feeling fussy—just clean lines, delicate details, and a luminous, salon-worthy sheen you can create at home.
Start with a neat prep and a base coat, then sweep on a rich red gel nail polish as your main shade. For perfect candy cane stripes, lay down white nail striping tape over cured red to map out crisp lines, then fill with white using a steady hand or a fine brush from a nail art brush set. Alternate a couple of accent nails with a soft sheer base and press on snowflake nail stickers for a lace-like, frosted effect—seal each layer as you go for that smooth, capsule-like finish. The final touch is a glossy top coat that turns everything ultra-reflective and keeps edges wrapped and protected. Cure thoroughly, add cuticle oil, and admire how those peppermint swirls and delicate flakes look freshly done day after day.
To switch up the vibe, try negative space stripes, a single snowflake on a deep-red base, or a subtle ombré that fades from cranberry to clear, then dot in micro-sparkle for starry-night depth. These holiday manicure ideas lean festive without overwhelming your outfit, and they photograph beautifully for your feed. Whether you’re pinning new festive nail art inspo or curating a capsule of go-to looks, this combo is timeless, wearable, and party-proof. From office gatherings to cozy movie nights, gel nail designs keep the magic intact so you can focus on the moments—not touch-ups. Consider it your merry-making uniform for the season: shiny, chic, and ready for every clink, cuddle, and carol.
Time to lock in that candy cane magic and make those delicate snowflakes gleam like fresh frost: a glossy top coat is your secret to that liquid-glass finish. After you’ve painted your stripes with red gel nail polish and traced the tiny curves with a steady hand (or white nail striping tape if you love crisp, quick lines), pause for a breath and let everything settle. Then float your glossy top coat over the design—don’t press the brush down like you would with color. Think of it as gliding a clear sheet of ice over your festive nail art, keeping every detail crisp while dialing up the shine. This is the step that transforms cute into luxe, turning your Christmas nail designs into high-shine winter nails that catch every twinkle light.
If you’re working with gel nail designs, flash-cure each nail for a few seconds before moving to the next to keep the top coat from running into the cuticles, then fully cure according to your lamp. Cap the free edge to seal in the candy cane tips so they don’t chip when you’re wrapping gifts or clinking mugs of cocoa. Layered details like snowflake nail stickers or striping tape love a double top coat—one thin “grip” layer, then a second slightly thicker float for that ultra-smooth finish. Notice a tiny bubble or a wavy edge? A clean-up pass with a fine brush from your nail art brush set (dipped lightly in alcohol or acetone, depending on your system) will refine the outline before curing, so everything looks salon-level.
When the final cure is done, wipe any tacky layer if your top coat isn’t no-wipe, and admire that glassy reflection. The high-gloss sheen amplifies contrast between candy-cane reds and snowy whites, making even minimalist holiday manicure ideas look intentional and polished. Finish with cuticle oil to revive winter-worn skin and extend wear—gloves for dish duty are the ultimate insurance policy. With a durable glossy top coat sealing every stripe and snowflake, your festive nail art is ready for days of celebrating, from cozy movie nights to glittering parties. It’s the easiest way to make your seasonal set feel expensive, last longer, and sparkle just a little brighter under the tree.
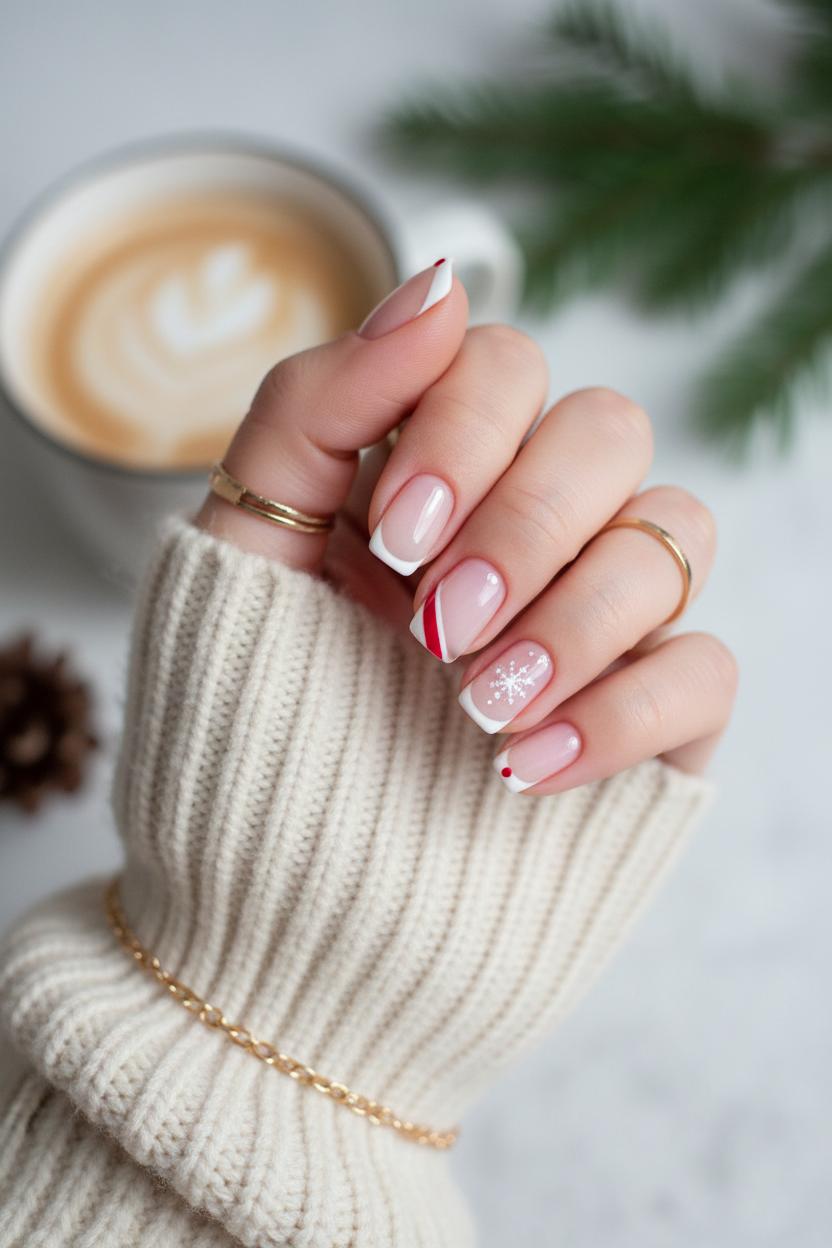
If your vibe is minimalist, think of Christmas nail designs that whisper rather than shout. Start with a sheer milky base or a cool-pink gel and add one delicate candy cane stripe on a single accent nail—white nail striping tape makes that crisp diagonal effortless, and a swipe of red gel nail polish brings the peppermint pop without overwhelming the hand. A micro French in snowy white with a tiny dot of ruby at the corner looks chic for everyday winter nails, and a single starburst from snowflake nail stickers on the ring finger delivers just enough sparkle. Negative space is your friend here: try a half-moon left bare, a tiny constellation of icing-sugar dots painted with a fine tip from a nail art brush set, then seal everything in a glossy top coat for that just-froze-over sheen. These pared-back holiday manicure ideas pair beautifully with chunky knits, gold jewelry, and latte runs.
Craving a little more? Go mid-max with candy cane tips that curve like ribbon, or alternate peppermint swirls and soft snowflake accents across the hand. Layer a blush-nude base, paint thin red-and-white twirls using your nail art brush set, and place a few delicate snowflake nail stickers so they look scattered by a winter breeze. Add a faint silver shimmer wash to one nail per hand for dimension, then lock it down with a glassy glossy top coat. This level of festive nail art still feels wearable, but photographs like a dream under twinkle lights.
For full-on maximal magic, lean into statement gel nail designs that mix textures and patterns—think skittle nails where every finger tells a story. Try a candy-cane spiral, a glitter-dipped snowstorm, a plaid created with white nail striping tape, and a bold red gel nail polish solid on the thumb to anchor it all. Layer fine iridescent flakes over snowflake nail stickers for depth, add a whisper of chrome at the cuticle, and finish with two coats of glossy top coat for mirror shine and weeklong wear. From minimal to maximal, these holiday manicure ideas let you customize your festive nail art to match your mood—cozy, classic, or all-out merry.

If your candy cane stripes look more wobbly than whimsical, start with prep: a gentle buff, a swipe of alcohol to remove oils, and a smooth base color. For this look, a classic red gel nail polish lays the sweetest foundation. Map out your lines first—lightly sketch with a fine brush from your nail art brush set, then commit with a steady pull rather than short strokes. White nail striping tape is a secret weapon here: lay it down to mark crisp boundaries, paint the white between the tape, and pull the tape off before curing so the gel can self-level into razor-sharp edges. Flash cure stripes for 5–10 seconds to lock them in place, then move to the next nail. If a line bleeds, clean it up with a tiny brush dipped in a touch of alcohol before curing. For freehand snowflakes, anchor your hand on the table and make the center lines first; add delicate branches after a quick flash cure so nothing smears.
Clean cures are all about thin, even layers. Gel can wrinkle or stay gummy if it’s too thick, especially with opaque whites and deep reds common in Christmas nail designs. Apply in sheer veils, cap the free edge, and cure fully according to your lamp. Roll, don’t shake, your bottles to avoid bubbles; if you do see micro-bubbles, pause a few seconds before brushing. Keep nails flat in the lamp and double-check bulbs or wattage if the finish feels soft. A tidy nail plate means better bonding, so keep dust away and try not to touch the surface between layers. These little details make your festive nail art look salon-smooth and camera-ready for all your holiday manicure ideas.
For sticker seal that lasts through gift wrapping and cocoa mugs, place snowflake nail stickers onto a cured color with the tacky layer still intact, then press firmly—especially at the tips and sides. Avoid placing stickers too close to the edge, where lifting starts. Float a glossy top coat over the art without pressing too hard, then cap the free edge. For extra durability on winter nails, add a second thin layer of top coat or a whisper of builder gel before the final seal. With these gel nail designs tricks, your candy canes stay crisp, your cures stay clean, and every snowflake shines until the New Year.
Between salon visits, your winter nails will look their best with a little moisture, mindful wear, and quick touch-ups that keep the magic alive. Cold air, constant handwashing, and cozy knit season can be rough on gel nail designs, so pamper them daily: massage cuticle oil along the sidewalls, follow with a rich hand cream, and slip on gloves before heading out. When you’re cleaning or doing dishes, rubber gloves are non-negotiable—detergents are sneaky shine-sappers. If your hands run cold, keep them warm; sudden temperature swings can stress polish and toppers. And as tempting as it is to pick at a lifted corner, resist—file any snag gently and schedule that fill instead.
Shine refreshes are your secret weapon. Swipe a thin layer of glossy top coat every three or four days, capping the free edge to keep candy-cane reds vibrant and snowflake whites crisp. If a stripe chips, a quick fix with white nail striping tape is so satisfying—trim to fit, press, seal, done. A nail art brush set lets you sharpen lines on a peppermint swirl with a touch of red gel nail polish, tidy a snowflake’s arms, or soften a grow-out ridge with a whisper of sheer shimmer. For tiny nicks on detailed Christmas nail designs, place snowflake nail stickers over the spot, then top coat to blend; no one will ever know you patched it. Keep your length practical for gift-wrapping and baking marathons, and use a soft 180–240 grit file to smooth edges in one direction.
Camouflage grow-out with a chic trick: add a delicate crescent of micro-glitter or pearly white near the cuticle to create a fresh “negative space” vibe, or place a single dainty sticker at the base to draw the eye upward. Mix-and-match accents also extend festive nail art—rotate which nails get the snowflake spotlight so your set feels intentional as it evolves. Tuck a mini rescue kit in your bag—glossy top coat, a petite file, a strip of tape, and a few stickers—and you’re holiday-party proof. Between fills every two to three weeks, these easy rituals keep your holiday manicure ideas glossy, neat, and photo-ready, so your candy cane and snowflake story stays the star of your winter nails all season long.
From candy cane stripes to delicate snowflakes, these chic Christmas nail designs prove that small details make the season sparkle. Whether you’re craving classic red-and-white or icy blue winter nails, let these holiday manicure ideas inspire your next salon visit or DIY moment. Save your favorite festive nail art, experiment with glossy toppers, and try long-lasting gel nail designs for extra cheer. Cozy up with hot cocoa, cue the carols, and let your fingertips tell the story—merry, modern, and magical.