Physical Address
304 North Cardinal St.
Dorchester Center, MA 02124
Physical Address
304 North Cardinal St.
Dorchester Center, MA 02124
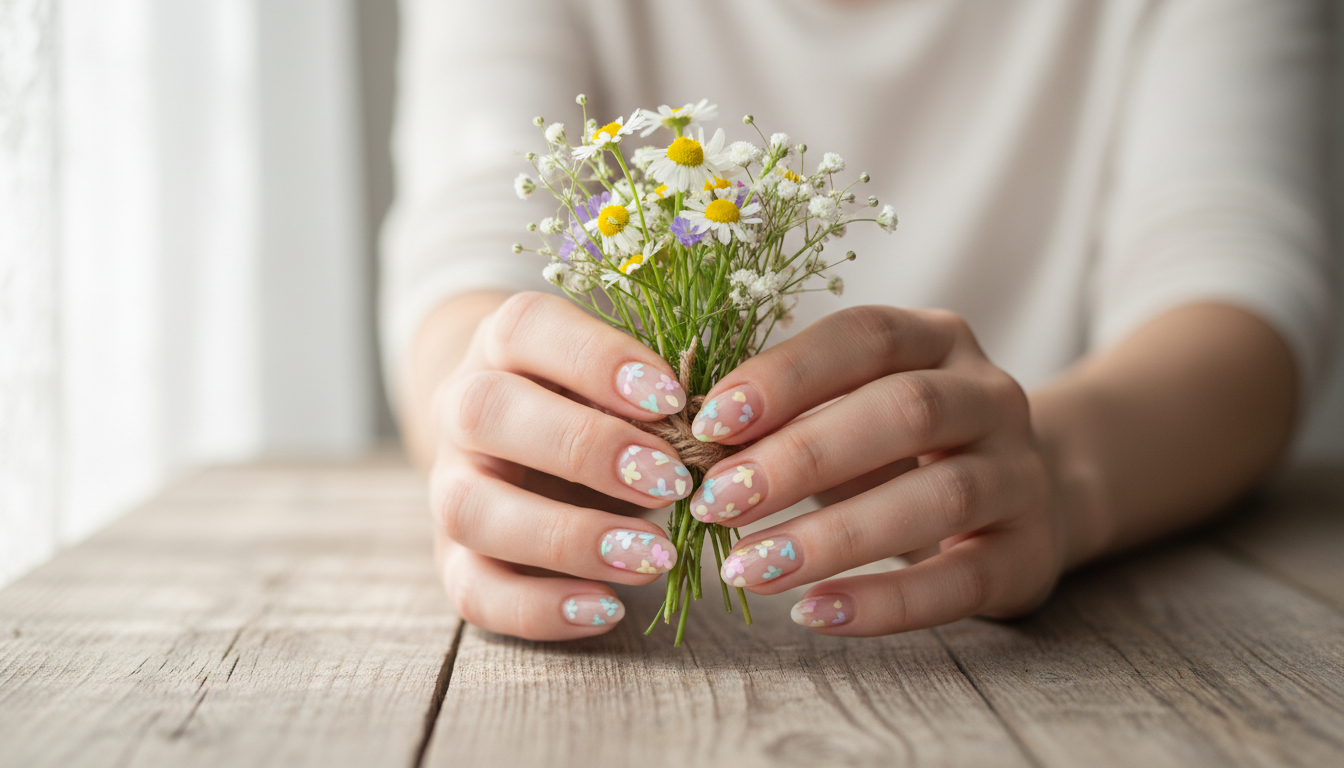
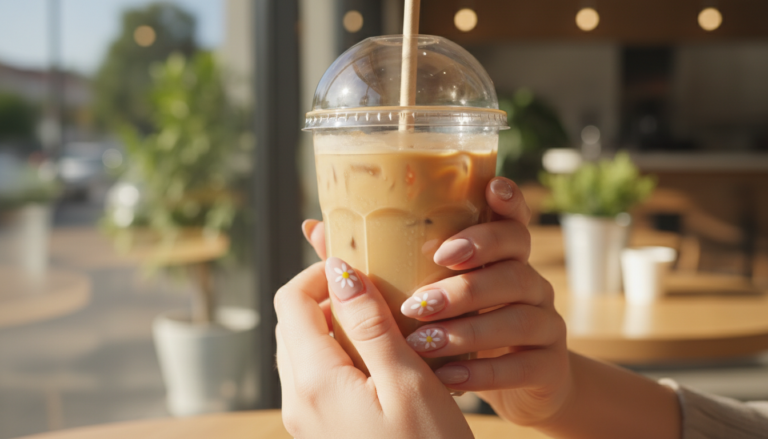
Say hello to wildflower nails—the dreamy, soft-bloom look your spring manicure has been waiting for. Think airy pastel nails sprinkled with delicate floral nail art and sweet daisy nails that feel like a meadow at your fingertips. In this guide, we’ll share easy designs, color combos, and pro tips using wildflower nail stickers, a pastel gel polish set, and precision nail art brushes. Cure like a pro with a UV LED nail lamp and seal with a glossy top coat for petal-perfect shine. Ready to let your fingertips blossom?

Wildflower nails are the breezy, meadow-inspired cousin of traditional floral nail art—think tiny, scattered blooms and airy sprigs that look like they were picked on a morning walk and pressed into a fresh mani. Instead of a perfect bouquet on every finger, this look embraces variety: a petite daisy here, a whispery stem there, maybe a single bud floating over sheer polish. The overall vibe is light, modern, and a little whimsical—perfect for a spring manicure, but charming any time you want something soft and romantic. With a palette of pastel nails—butter yellow, blush pink, cornflower blue, and a touch of sage—wildflower nails feel delicate yet effortless, and a nod to daisy nails gives the whole design that sweet, nostalgic finish.
What sets this style apart is its mix-and-match approach. Some nails can be nearly bare with just a tiny bloom near the cuticle; others can showcase a mini cluster, or a slender green stem trailing from a French tip. If you’re DIY-ing, grab a pastel gel polish set for those dreamy shades, then decide if you want to freehand or fast-track. Wildflower nail stickers offer instant detail with zero stress, while fine nail art brushes let you paint micro petals and leaves for a custom, painterly effect. Cure your layers under a UV LED nail lamp and seal everything with a glossy top coat so the blooms look fresh-picked for days. This look loves all lengths and shapes—from short squares to soft almonds—and pairs just as easily with a sundress as it does with a chunky knit.
The best part is how personal it can be. Keep it minimal with one tiny daisy per hand, or go full meadow with scattered blossoms across every fingertip. Play with negative space, layer translucent washes, and mix subtle color stories to suit your mood. Wildflower nails are floral nail art with room to breathe—soft, joyful, and endlessly wearable.
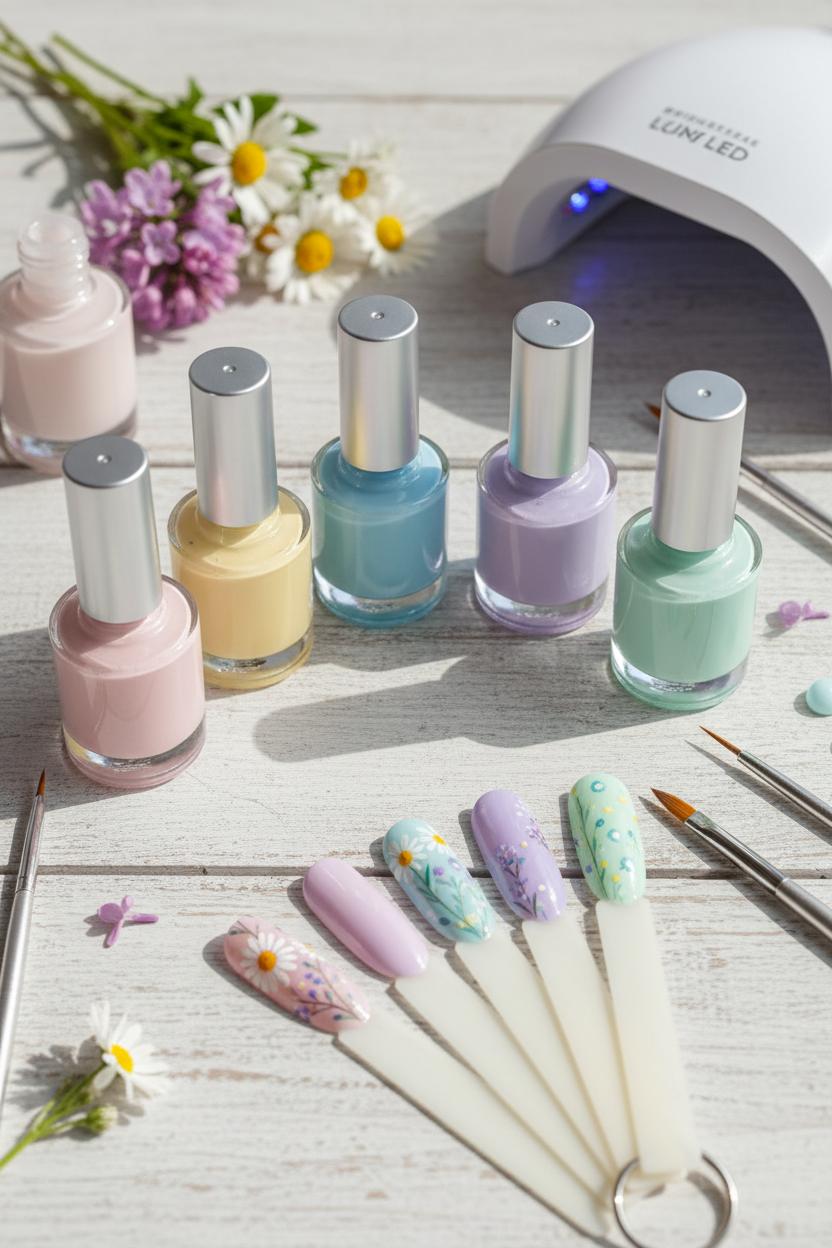
Think of your pastel nails palette as the soft bouquet that sets the mood for your entire spring manicure—every shade should feel like a petal you picked on a morning walk. When you’re choosing a pastel gel polish set, look for a curated range that plays nicely together: a milky blush, a buttercup yellow, a cloudless baby blue, a lilac haze, and a fresh sprig of mint or sage. That balance gives you endless options for skittle manis, French tips, and delicate accents that read like wildflower nails without overwhelming the hand. Pay attention to undertones—cool lilacs and periwinkles flatter rosy skin, while peachy pinks and warm mints glow on golden tones. A crisp soft white is essential for dotting centers on daisy nails or brightening any shade beneath sheer layers. If you love floral nail art, mix a few opaque creams (for clean petals and stripes) with jelly-milky shades (for that watercolor wash), and consider adding one dusty neutral to anchor the look so the pastels feel airy, not sugary.
Formula matters just as much as color. The best pastel gel polishes are self-leveling, non-chalky, and give even coverage in two thin coats—streaky pastels can sabotage the most delicate daisies. Scan reviews for sets that include a fine brush and a true leafy green; those little details make stems and leaves effortless. If you’re shopping Amazon, a pastel gel polish set that cures smoothly under a UV LED nail lamp saves time and reduces smudges, especially when you’re layering petals. Keep nail art brushes nearby for tiny dots and micro-strokes, and don’t shy away from wildflower nail stickers when you want a breeze-through accent nail—they blend beautifully with hand-painted touches. Finish with a glossy top coat for that dew-drop shine that makes every color look fresh-picked (and locks in wear). With a thoughtful palette and a few smart tools, your pastel nails become a serene meadow: soft white daisies, whispery lilac sprigs, and minty stems dancing together—a simple, dreamy ode to spring that looks as sweet up close as it does in a sunlit selfie.
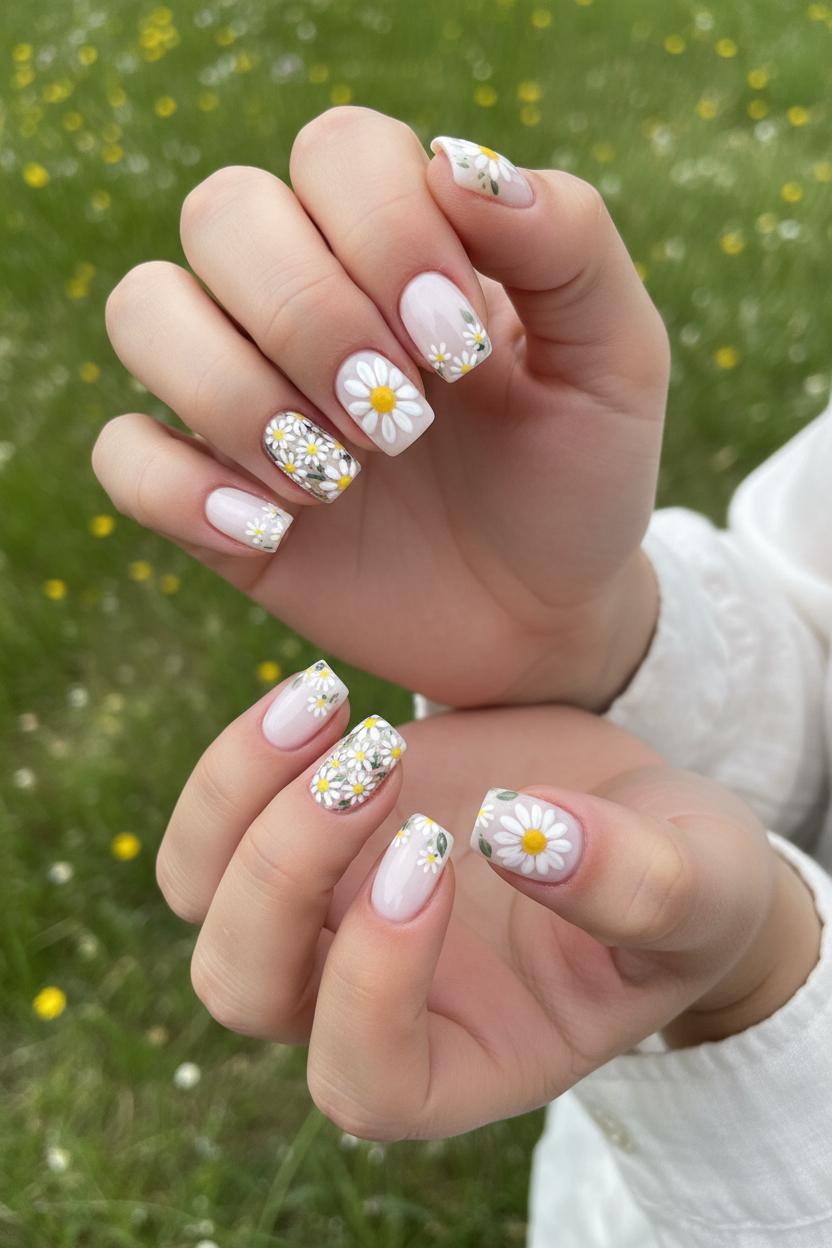
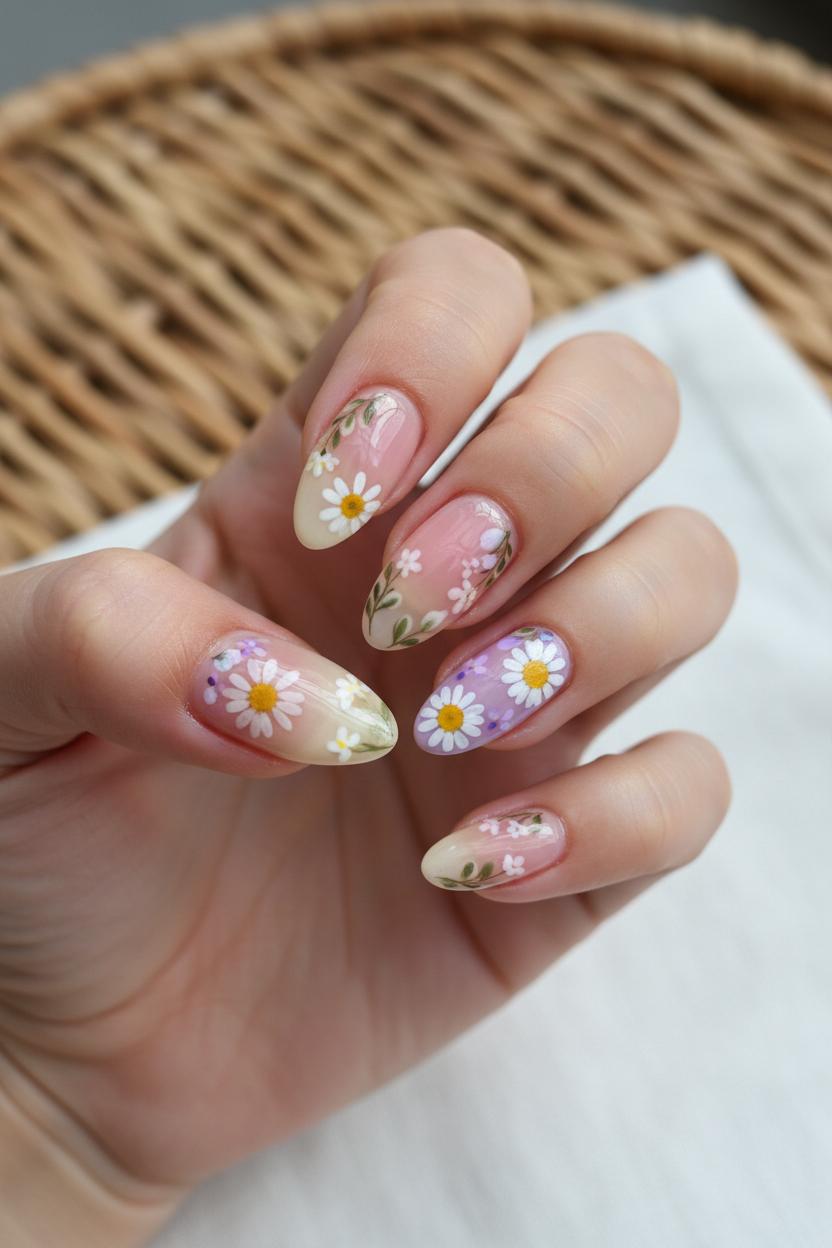
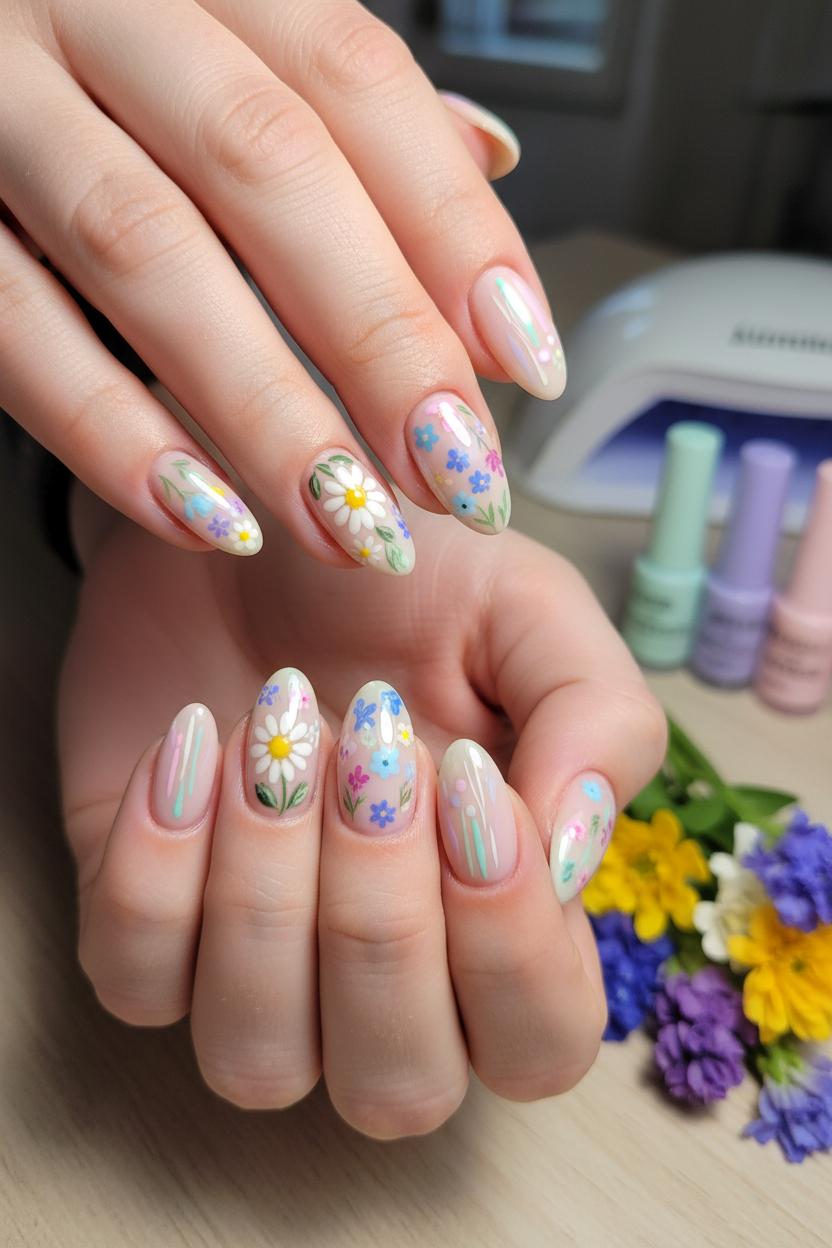
There’s something irresistibly fresh about tiny daisies sprinkled across a soft, milky base—like a morning walk through a dewy meadow, but on your fingertips. If you’re easing into the wildflower nails trend, daisy nails are the simplest, sweetest way to start. They read clean and airy, with crisp white petals and a cheerful dot of sunshine at the center, and they pair beautifully with pastel nails in buttercream, cloud pink, pistachio, cornflower, or lavender. Keep the look minimal with one daisy per nail, float a few micro-blooms along a negative-space French, or scatter a “field” across just two accent nails to keep it breezy. The result is floral nail art that feels light and wearable—perfect for a spring manicure that goes with everything from a white tee to a linen dress.
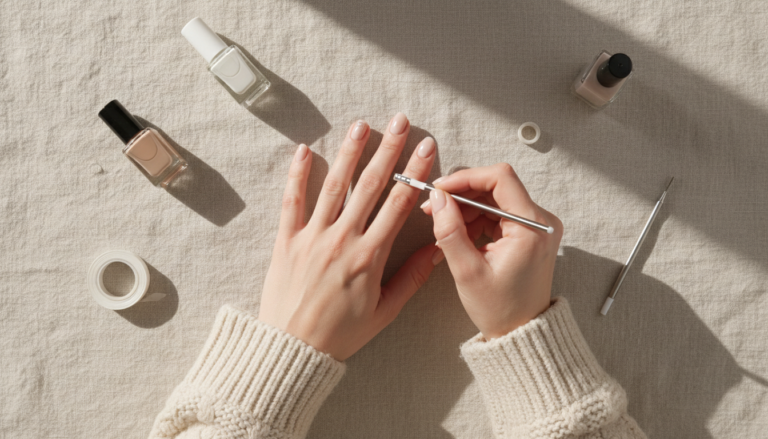
To get the look at home, start with a sheer nude or a shade from a pastel gel polish set for that soft-focus base. If you’re working with gel, cure each coat under a UV LED nail lamp for a smooth, plush finish. Then, using nail art brushes or a dotting tool (a bobby pin works in a pinch), place five tiny white dots in a loose circle and add a petite yellow center—imperfection makes them extra charming. For a five-minute shortcut, press on a few wildflower nail stickers and mix them with hand-painted blooms for dimension. A glossy top coat will seal everything in and make the petals look freshly picked. Try alternating bare nails and daisy nails for a modern, airy feel, or tuck a single daisy near the cuticle like a tiny corsage. Add a sage-green leaf here and there, or stack micro-daisies along a French tip for that delicate “garden edge.” However you style it, these simple blooms deliver the soft, fresh vibe of wildflower nails without a lot of effort—and they’re bound to become your go-to floral nail art for spring.
To bring your soft bloom mani to life, gather a few trusty tools and let them do the pretty work for you. A simple set of nail art brushes is the secret to delicate petals and whisper-thin stems—think a fine liner for vines and outlines, a tiny detail brush for petals and leaves, and a dotting tool for dainty pollen centers. Start with a pastel gel polish set to lay down those creamy, meadow-inspired bases; pastel nails instantly cue a spring manicure and make every tiny flower pop. For effortless daisy nails, paint five small petal strokes around a sunny dot, then add the faintest flicks of green to suggest wild stems. If freehand isn’t your thing, wildflower nail stickers are such a sweet shortcut—layer them over your color and mix sizes for that breezy, gathered-in-the-fields look that defines wildflower nails and floral nail art.
A good UV LED nail lamp is non-negotiable if you’re using gel. Thin coats are your best friend: apply color, flash-cure for a few seconds to lock it in place, then move on. When you’re drawing petals or outlining leaves, cure each detail as you go so nothing smears while you work on the next bloom. If you’re using wildflower nail stickers, press them flat and encapsulate with a sheer layer of clear gel before a full cure; this gives your surface that smooth, professional feel. Work one nail at a time, and don’t be tempted to glob on thicker coats—your art will look crisper and your mani will last longer with tidy, thin layers under that steady glow of the UV LED nail lamp.
Finish with a glossy top coat for that dew-kissed shine that makes every petal look fresh. Float the brush so you don’t drag your art, cap the free edge, and give it a full cure for a gleam that reads “salon,” even if you painted at your kitchen table. A glossy top coat turns soft pastels saturated and makes tiny petals and daisies shimmer just enough—like sunlight on morning flowers. Whether you freehand every stem or sprinkle on stickers for a collage of blooms, these tools keep your floral nail art neat, durable, and ready for compliments. Consider it your recipe for endlessly wearable wildflower nails, perfect for any spring manicure daydream.
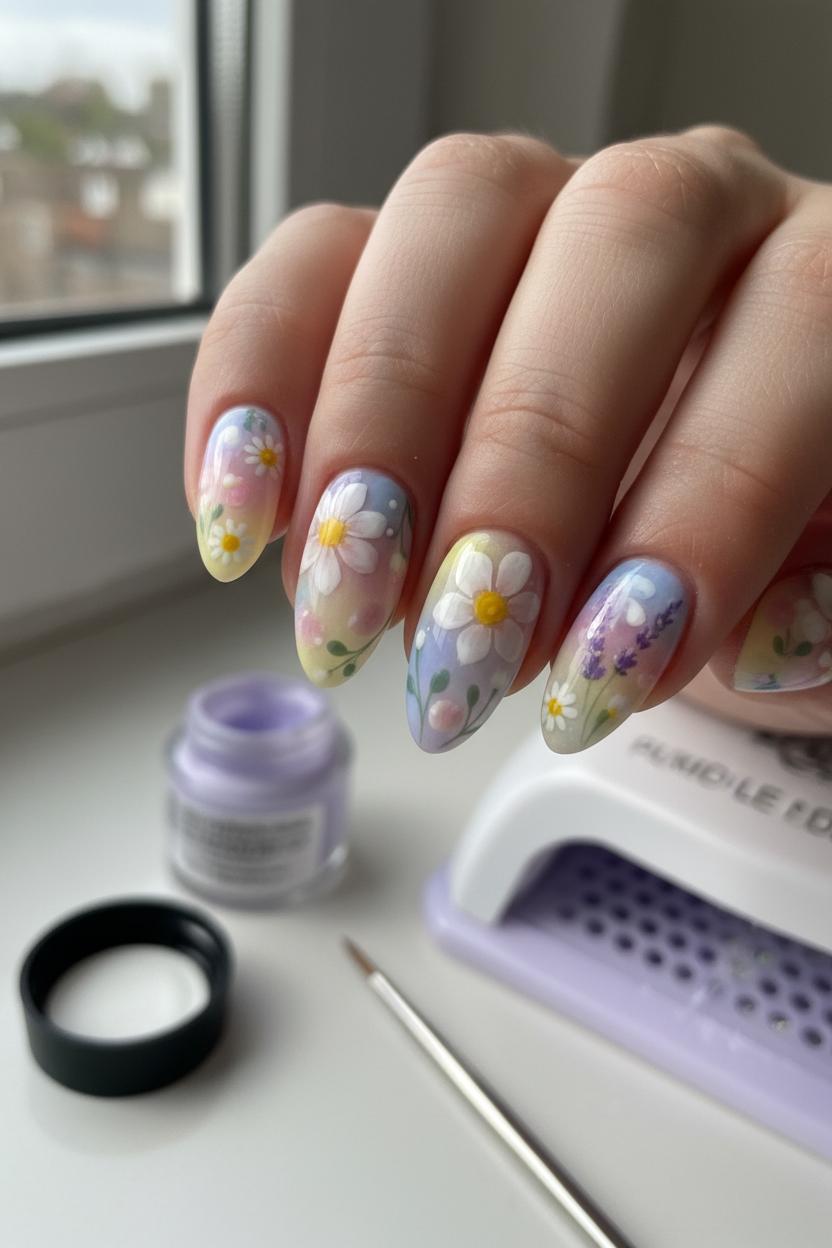
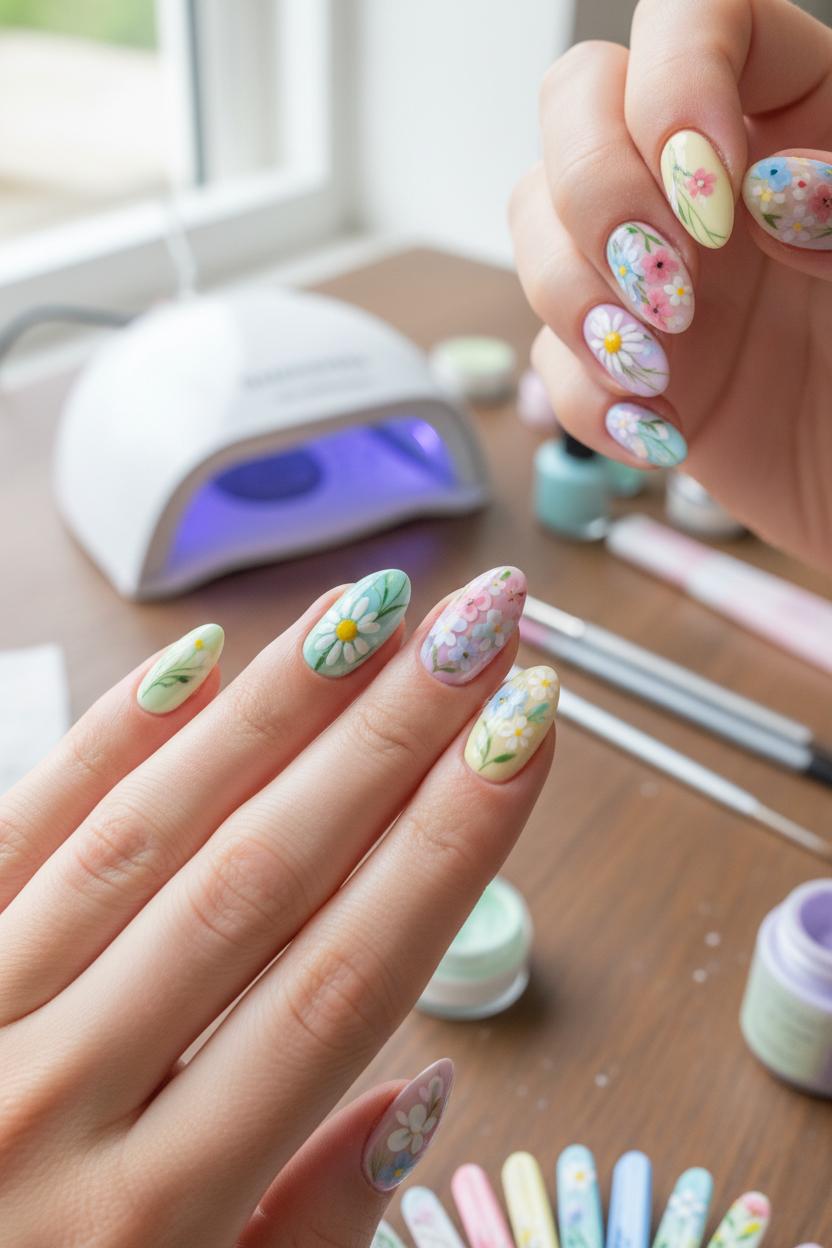
Start with a clean, shaped canvas and a thin layer of base coat, then sweep on your background shades—think soft buttercup, misty lilac, and cloud-blue from a pastel gel polish set if you want that dreamy, watercolor vibe. Two sheer coats will keep your pastel nails airy and light. Cure each layer under a UV LED nail lamp so everything stays smooth and dent-free. Once the base is set, you’re ready to build the soft bloom—this is where your wildflower nails come to life.
For freehand floral nail art, pick up a tiny amount of creamy white or blush pink with fine nail art brushes and tap loose petal shapes where you want your blooms to float. While the gel is still workable, blur the edges by feathering outward with a brush lightly dipped in clear gel, creating that diffused, petal-soft bloom as if it’s caught in morning light. Add a sunny dot in the center for daisy nails, then a whisper of sage for stems and little buds. Cure between details so the petals keep their shape. If you’re more of a quick-and-pretty person, layer on wildflower nail stickers over your cured pastel base; mix and match sizes and tuck tiny blooms near the cuticle for a scattered meadow effect. You can even combine both—freehand a few soft blooms, then sprinkle in stickers for dimension and variety.
To finish, float a thin layer of glossy top coat across every nail, making sure to cap the free edge so your spring manicure gleams and lasts. The top coat melts everything together—the hazy petals, the delicate centers, the little green flicks—into a glassy, dew-kissed finish. Flash-cure to set, then give a final full cure under your UV LED nail lamp. Step back and admire: a bouquet at your fingertips that feels effortless and fresh, perfect for brunch, picnics, or just brightening a Tuesday. Save the palette you loved, keep your nail art brushes handy, and next time swap in lavender or butter-yellow accents to refresh your floral nail art without rethinking the whole design. Soft bloom season, unlocked.
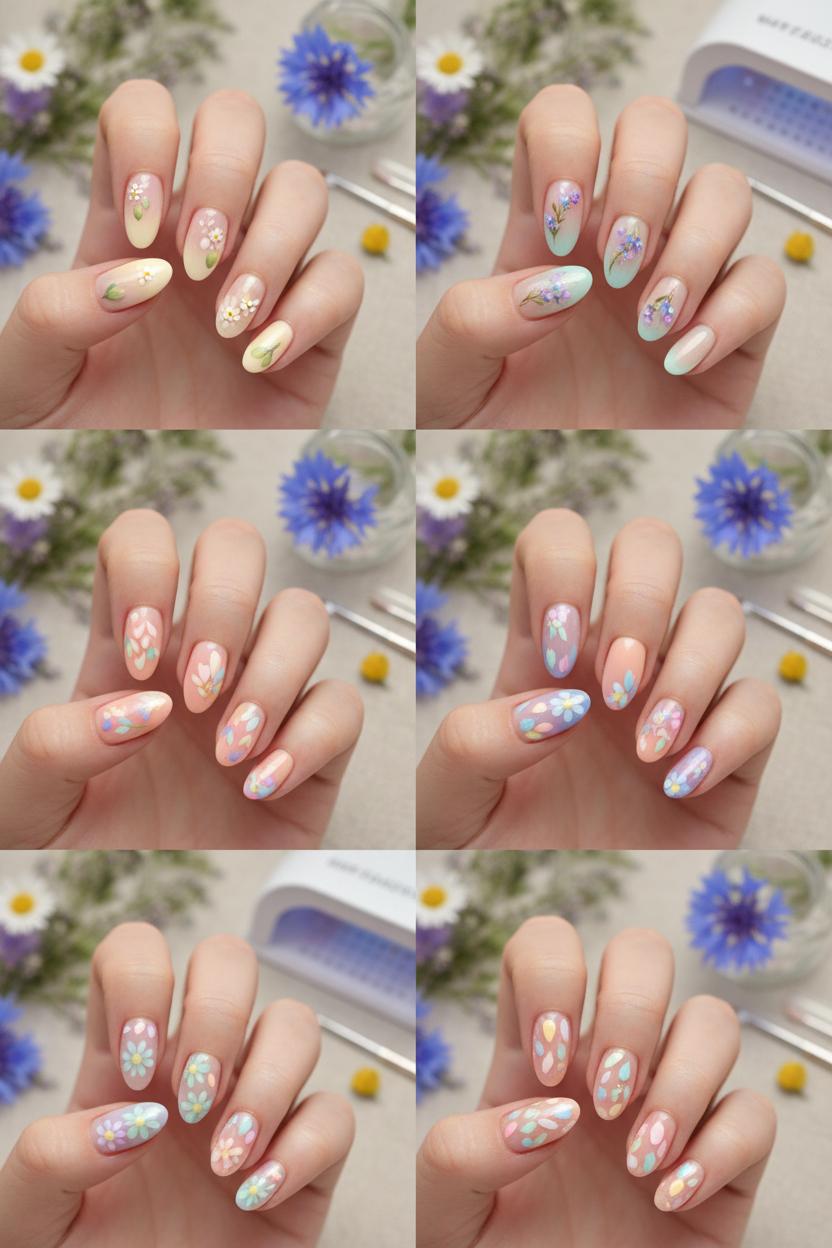
Imagine your fingertips as a tiny meadow waking up after winter—soft, airy, and full of dew-kissed color. For a spring manicure that feels like sunshine on your sleeves, start with pastel nails in whisper-light pairings: lavender with buttercream, mint with blush, sky blue with lilac, or peach sorbet with periwinkle. Paint a solid base or try a barely-there micro-French in contrasting pastels for a playful twist. If you’re feeling dreamy, blend two shades into a soft ombré that looks like the horizon at golden hour. These color combos create the prettiest backdrop for floral nail art, transforming simple polish into a serene garden moment. Think of it as mood-setting for your week—colors that calm but still sparkle with personality.
Now for the wildflower accents that make the look sing. You can hand-paint delicate blooms with nail art brushes—tiny daisy dots, cornflower sprigs, tulip buds—or keep it effortless with wildflower nail stickers placed like scattered petals along the cuticle or clustered at the tips. A pastel gel polish set gives you all the mix-and-match options, while a quick cure under a UV LED nail lamp keeps everything smudge-free as you layer. For daisy nails, dot a buttery yellow center and ring it with five or six white petals; sprinkle a few on accent nails or trail them diagonally for that windswept-in-a-field feel. Add variations—one thumb with a petite bouquet, a ring finger with a single stem, and a few tiny buds drifting across the others—so your wildflower nails feel artfully unplanned. Seal your meadow with a glossy top coat to lock in shine and make the colors pop like fresh blooms after rain.
If you want an easy recipe to follow: try milky lilac with pale mint daisies; cornflower blue with butter-yellow blooms and soft-pink buds; or a sheer nude base dotted with pastel petals in mismatched tones for a curated, vintage-garden vibe. However you style it, the combination of tender pastels and floral accents captures everything we love about spring—gentle color, soft light, and that irresistible whisper of new beginnings.
If you’re craving that fresh, soft-bloom vibe without spending hours at the salon, daisy nails with wildflower nail stickers are the sweetest shortcut. I start with a sheer, milky base from a pastel gel polish set—think butter yellow, blush, or the palest mint for a whisper-soft backdrop that feels like a meadow at sunrise. After shaping and prepping, I apply two thin coats, curing each under a UV LED nail lamp so everything stays smooth and chip-resistant. This creates the perfect canvas for easy floral nail art, and it already looks like a dreamy spring manicure even before the flowers go on.
Now for the fun part: peel-and-place wildflower nail stickers. I like to mix tiny daisies and delicate sprigs, clustering a few at the cuticle or trailing them diagonally across the nail for movement. For instant daisy nails, anchor one larger blossom on your ring finger as an accent, then scatter mini blooms on the others so the look feels curated but effortless. If you want to elevate the detail, use nail art brushes to add a dot of golden pollen in the daisy centers or a whisper of pale green “stems” beneath a sticker—just the tiniest touch gives that hand-painted charm while keeping it quick.
Seal everything with a glossy top coat, floating it over the stickers so there’s no edge peeking up. Cure again, and suddenly those pastel nails look like a pressed-flower keepsake—soft, romantic, and very wearable. I love how this approach captures the essence of wildflower nails without overthinking the design: it’s playful, feminine, and perfect for weddings, weekend picnics, or anytime you want your hands to feel like spring. Swap color stories depending on your mood—lavender and buttercream for airy sweetness, or baby blue with white petals for a cottagecore twist. The best part is how forgiving it is; even a scattered bloom or two makes a big impact. With a few stickers, a UV LED nail lamp, and a trusty glossy top coat, you’ll have garden-party nails in under an hour—no advanced skills required.
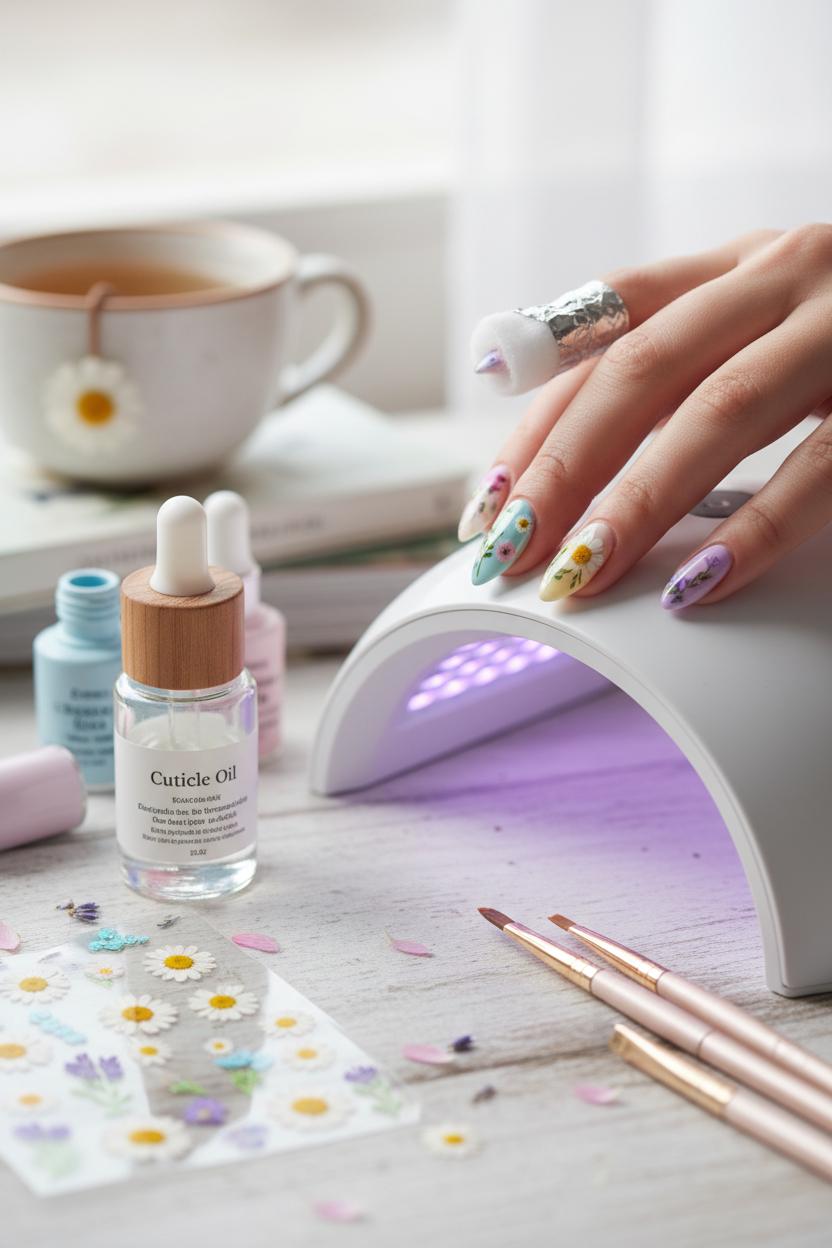
For floral nail art that actually lasts past the weekend brunch, the magic starts with prep. Gently push back cuticles, shape, and lightly buff to remove shine, then cleanse with alcohol so your base clings. If you have it, a dehydrator or primer is your best friend. Apply a thin base coat and slide your hand under a UV LED nail lamp for a full cure; thin layers are key to preventing chips. For that soft bloom vibe, reach for a pastel gel polish set and paint in whisper-light coats—think milky blush, buttercream, lilac mist—curing each layer thoroughly so your spring manicure has a solid foundation. Pastel nails love patience: two to three sheer coats cured properly will look buttery and stay put.
Once your canvas is ready, it’s time to scatter petals. If you’re confident with detail work, use fine nail art brushes to paint stems and tiny petals, flash-curing as you go so nothing smudges. If you want instant cottage-core, wildflower nail stickers are a dreamy shortcut—press them onto the tacky layer or a wiped, cured surface, smoothing edges so there’s no sneaky air pocket that could lift later. Mix in a few daisy nails for that meadow-fresh moment, and cluster blooms at the cuticle or along a sidewall for a delicate, editorial feel. After placement, give everything a gentle press and pop back under the lamp for a quick set before sealing.
The seal is where longevity happens. Float on a glossy top coat, letting it self-level over the flowers, and be sure to cap the free edge so your wildflower nails resist tip wear. For extra dimension, add a second thin layer of top coat and cure again under your UV LED nail lamp until fully set—no tackiness left. Wipe, if needed, with alcohol to banish any sticky layer, then finish with cuticle oil to lock in that salon sheen. With thoughtful prep, careful cures, and a generous glossy top coat, your floral nail art will look fresh-from-the-field for days, making those pastel nails the softest, sweetest accessory to everything from linen dresses to your favorite worn-in denim.
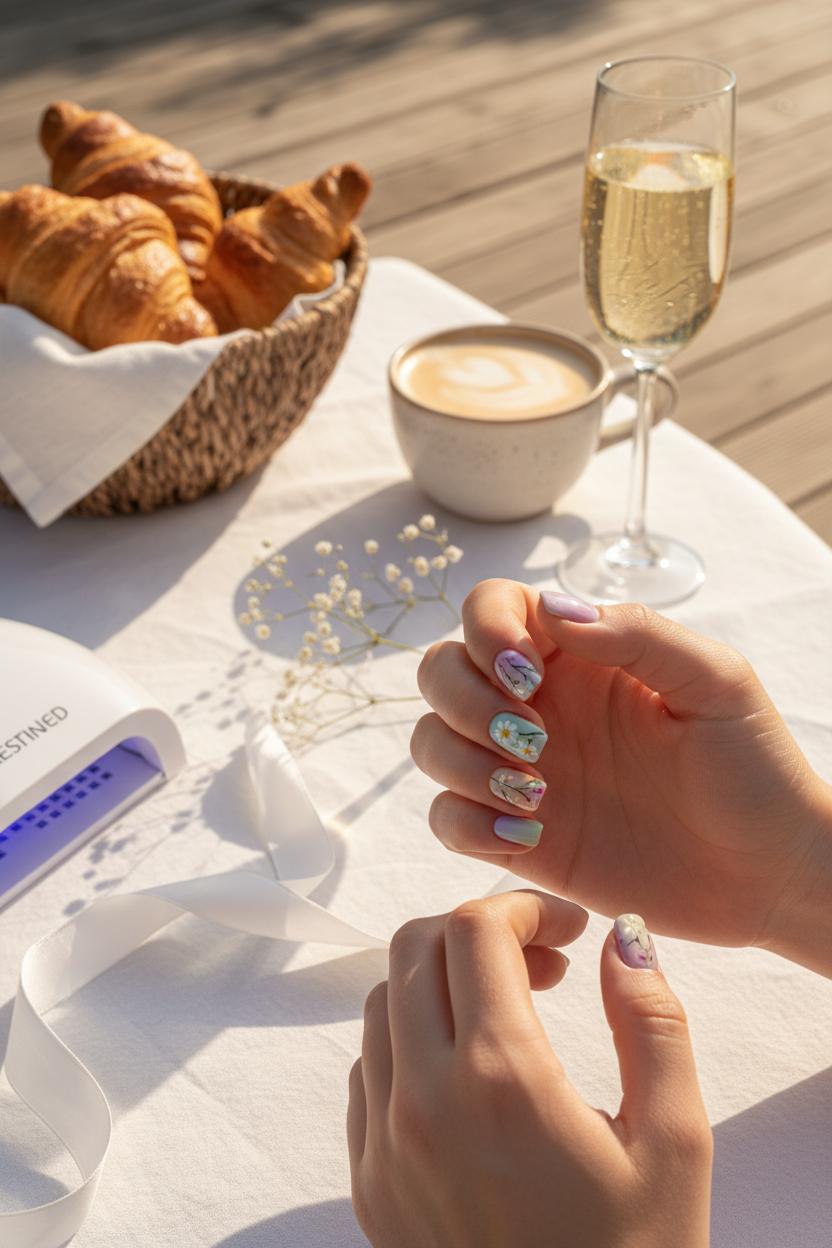
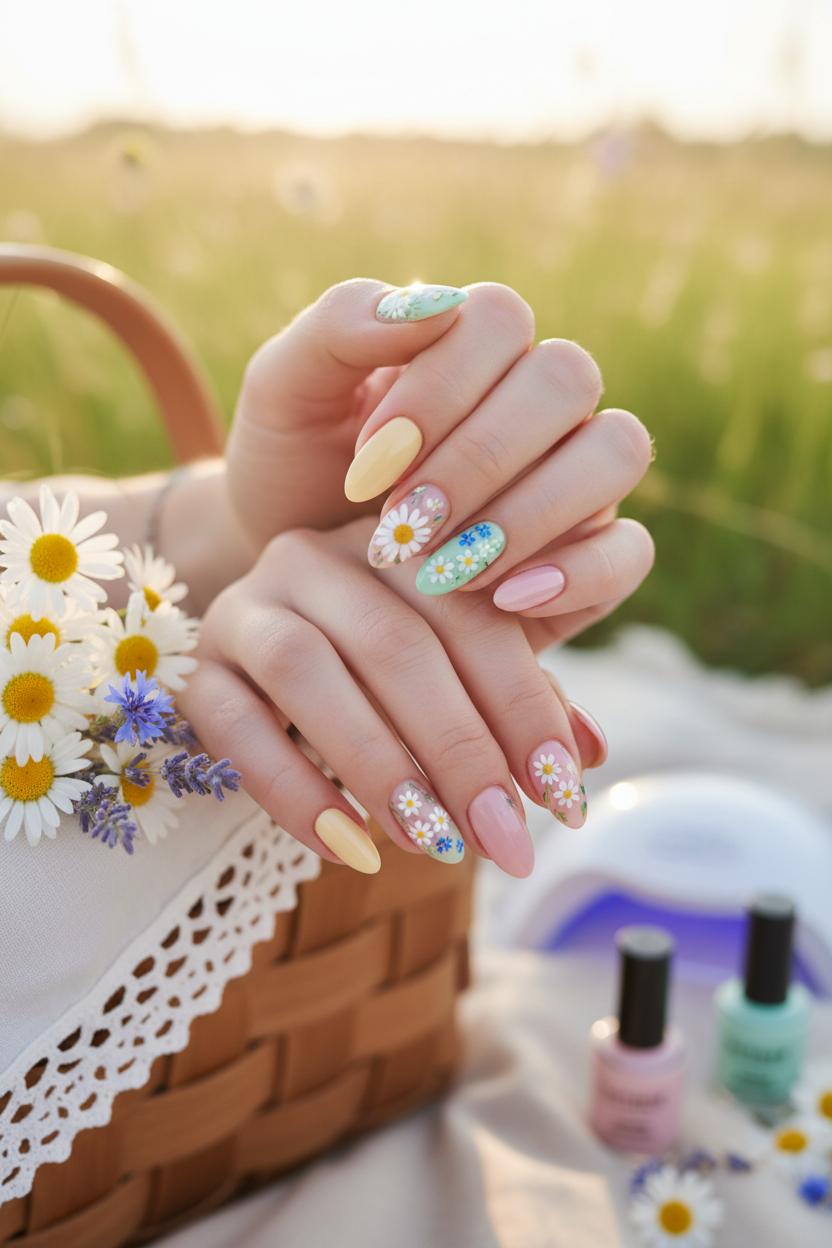
Think of a sunny brunch table, a basket of croissants, and a frothy latte—wildflower nails feel right at home there. A soft mix of pastel nails—lavender, baby blue, buttercream, and mint—sets the tone, while a sprinkle of tiny blossoms adds that effortless “just-picked” vibe. If you’re getting ready in a hurry, wildflower nail stickers are your brunch bestie: swipe on a sheer base, place a few blooms near the cuticle, cure under a UV LED nail lamp, and finish with a glossy top coat so your floral nail art catches the light when you reach for your mimosa. Prefer to DIY your palette? A pastel gel polish set gives you all the shades for playful color-blocked tips, and a couple of dainty daisy nails on each hand instantly pull the look together.
For weddings—whether you’re the bride, a bridesmaid, or a guest—floral nail art can be as romantic as lace and as delicate as baby’s breath. Try a milky, barely-there base with whisper-thin meadow petals trailing along one side of the nail; use fine nail art brushes to paint petite stems and leaves, then dot in soft daisies for a graceful nod to the bouquet. Daisy nails feel charming and timeless, especially paired with satin ribbons and pearly accessories. If you’re going for longevity through the rehearsal dinner to the last dance, cure each layer under a UV LED nail lamp and seal everything with a glassy, glossy top coat so your spring manicure stays flawless in photos and through clinking champagne flutes.
And for everyday spring moments—farmers’ market strolls, desk-side daydreams, a golden-hour dog walk—keep it easy and joyful. A neutral wash with one accent wildflower nail per hand is low-maintenance but still gives that fresh, in-bloom feeling. Rotate shades from a pastel gel polish set as the week unfolds, adding a single sticker blossom here and there when time is tight. Mix a couple of daisy nails with scattered buds on other fingers for a “garden but make it minimal” mood that pairs just as well with white sneakers as with a floaty floral dress. The beauty of wildflower nails is how wearable they are: brunch, weddings, picnics, baby showers, and every soft, breezy moment in between—little petals on your fingertips turning everyday gestures into a tiny celebration of spring.
We’ve all been there: you finish painting the softest pastel nails, dot on the sweetest daisy nails, add a few flicks of floral nail art, and then—ugh—one swipe of top coat drags the design. The trick is to “float” your glossy top coat. After your art is fully dry or flash-cured, load your brush, then hover it so the product glides over the petals instead of pushing them. If you’re using gel, give each art layer a quick 10–15 second flash cure before the final seal, and protect delicate details made with nail art brushes by adding a whisper-thin layer of base gel first. Wildflower nail stickers also love a cushion: press them down firmly, cap the tips, then encase them under a generous, even top coat for that glassy, meadow-morning shine. A pastel gel polish set makes the perfect spring manicure base, but the top coat is what turns good into gleaming.
If your wildflower nails are lifting at the corners, think prep and perimeter. Gently remove surface shine, push back cuticles, and dehydrate the nail plate before base coat. Keep layers thin, and always cap the free edge—especially over stickers and tiny raised centers on daisy nails. Cure each layer fully under a UV LED nail lamp (thumbs separately so product doesn’t pool) and resist the urge to pick; let the manicure cool for a few minutes before moisturizing. A well-sealed glossy top coat acts like a protective dome that keeps edges from catching on hair or sweaters, so your floral nail art stays crisp through dishes, keyboard taps, and bouquet arranging.
Dullness usually means residue, dust, or under-curing. If your top coat isn’t “no-wipe,” cleanse that inhibition layer after curing; if it is, avoid touching the surface with alcohol or linty wipes. Work clean—no floating dust from filing right before your final coat—and if the shine still looks cloudy, lightly buff any micro-scratches and reapply a thin, fresh slick of glossy top coat. Think of it as a glaze that revives depth in milky pastels and locks in that dewy bloom effect. With the right rhythm—pastel gel polish set, precise details with nail art brushes, secure wildflower nail stickers, a thorough cure under your UV LED nail lamp, and a floated, capped glossy top coat—your spring manicure goes from sweet to stunning, and stays that way.
Think of your wildflower nails like a pressed bouquet—sealed, cared for, and admired. The simplest way to keep pastel nails looking freshly picked is to protect them from day one: float on two thin layers of glossy top coat, capping the free edge to seal in your floral nail art and keep tips from wearing. If you’re wearing gel, cure each coat fully under a UV LED nail lamp and cleanse any residue so they keep their glassy shine. For regular polish, refresh the top coat every two to three days; for gel, a once-a-week top-up can revive that just-painted glow. Daily cuticle oil is your best friend—massage it in at bedtime to prevent cracking and keep your daisies crisp. When doing dishes or gardening, slip on gloves; detergents and soil can scuff delicate designs and fade pale hues. Sunscreen can dull finishes too, so after applying SPF, wipe nails with a clean cloth to remove any film and keep those daisy nails bright.
If you spot a chip, don’t panic—treat it like a tiny touch-up instead of starting over. A pastel gel polish set makes color-matching easy, and a fine set of nail art brushes lets you patch petals or re-outline stems with a steady hand. Press on a fresh wildflower nail sticker over a stubborn scuff for a charming accent nail, then seal with top coat. Keep length practical to prevent snags, and file in one direction to avoid micro-tears that invite peeling. For your next spring manicure, start with a stain-blocking base coat; pastel shades are notorious for clinging to the nail plate, and a good base keeps the canvas clean between looks.
When it’s time to say goodbye, be gentle—never peel. File the surface to break the seal, then soak cotton in acetone, wrap with foil or use clips, and let it sit 10–15 minutes before nudging away softened product with an orangewood stick. Buff lightly, rinse, and drench nails in oil and hand cream. Give them a breather or apply a strengthening base for a few days before your next bloom. With a little care and the right tools—think glossy top coat, UV LED nail lamp, and those trusty nail art brushes—your floral story stays vivid from first petal to last.
From watercolor petals to dot-daisy tips, we’ve gathered soft, garden-inspired ideas to help your wildflower nails bloom. Whether you’re trying hand-painted floral nail art, quick decals, or minimalist negative space, choose dreamy pastel nails and a glossy topcoat for a fresh spring manicure. Mix meadow greens with buttercream, blush, and sky blue; tuck in tiny daisy nails for whimsy. Keep cuticles hydrated, let shapes stay soft, and wear what feels like you. Save this inspo, share with your nail bestie, and let your fingertips carry a pocket-sized spring.