Physical Address
304 North Cardinal St.
Dorchester Center, MA 02124
Physical Address
304 North Cardinal St.
Dorchester Center, MA 02124
Ready to refresh your kitchen backsplash on a shoestring? Explore chic, modern kitchen design with budget-friendly backsplash ideas—from renter-friendly peel and stick tile and peel and stick backsplash panels to a timeless subway tile kitchen using affordable subway tile backsplash, smart tile adhesive, and easy tile spacers. Learn simple weekend upgrades, paint hacks, and finishes that look custom. We’ll show you how to seal the deal with grout sealer, stretch every dollar, and create a polished space you’ll love. Small spend, big style—let’s make that backsplash shine.
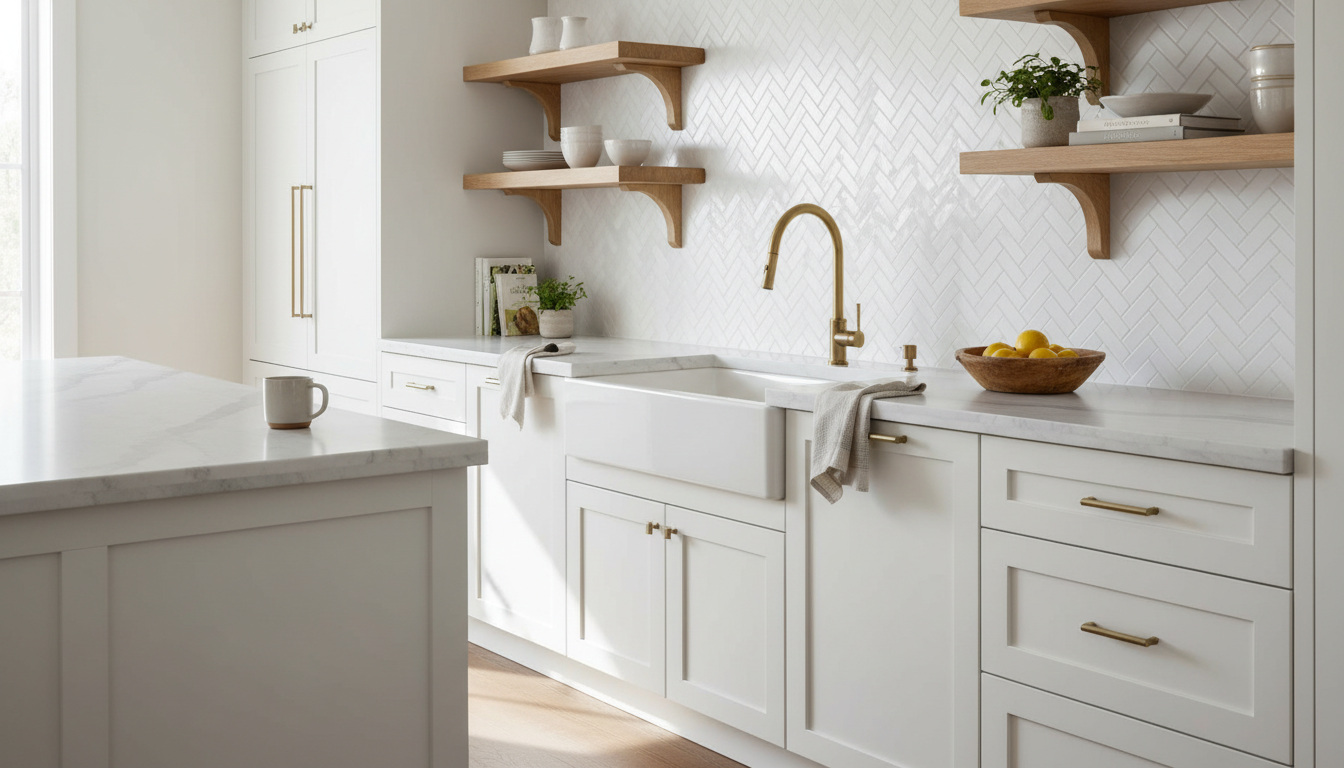
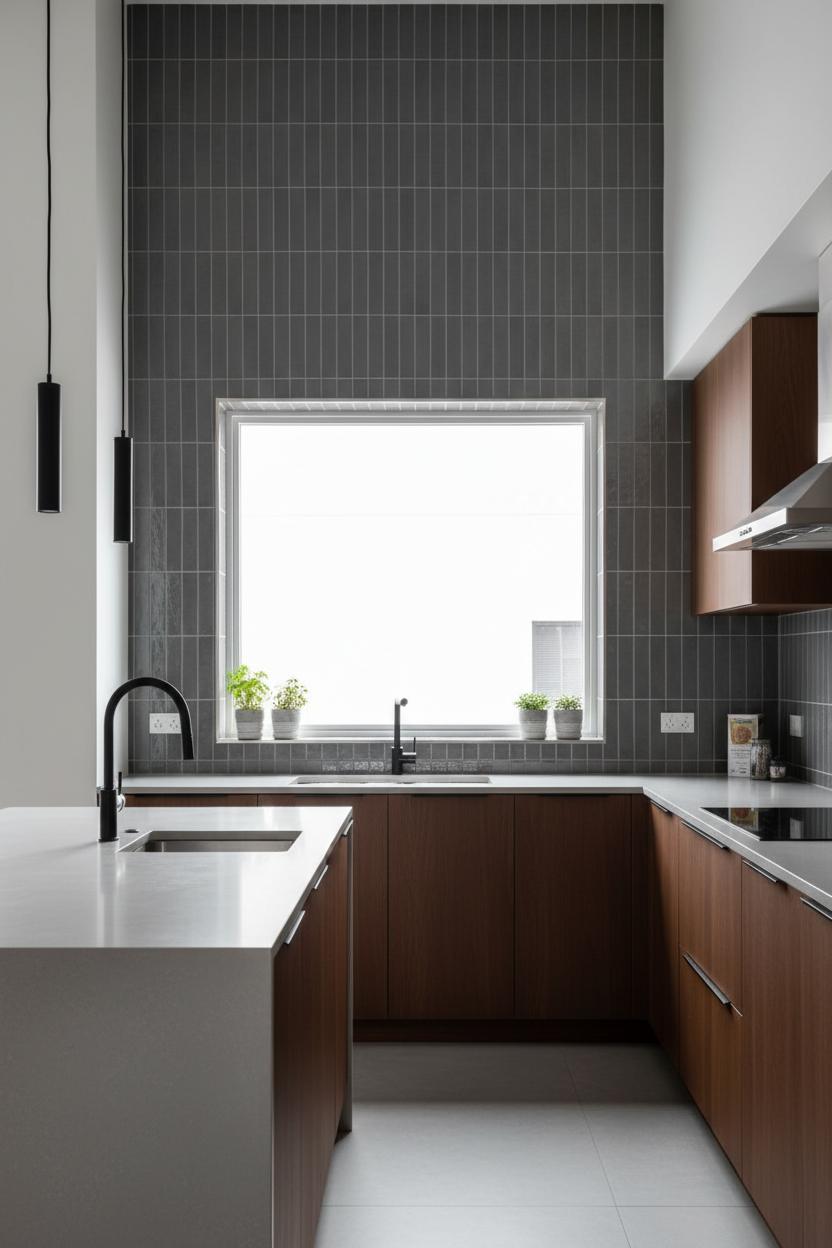
If you want instant gratification without the dust, start with peel and stick tile. Today’s designs look surprisingly high-end—think faux marble herringbone, glossy zellige, or matte hex—yet they’re renter-friendly and easy to swap when your mood changes. A peel and stick backsplash can completely reset a kitchen backsplash in a single afternoon; just degrease, snap a level line, and take your time at the outlets for a polished edge. For a truly modern kitchen design, try a soft, desaturated palette (sage, putty, or cloud gray) and let warm wood accents and brushed brass hardware do the talking. Little tip: gently warming the tiles helps them flex into subtle wall textures, and finishing with a tidy bead of caulk at the counter line makes everything look custom.
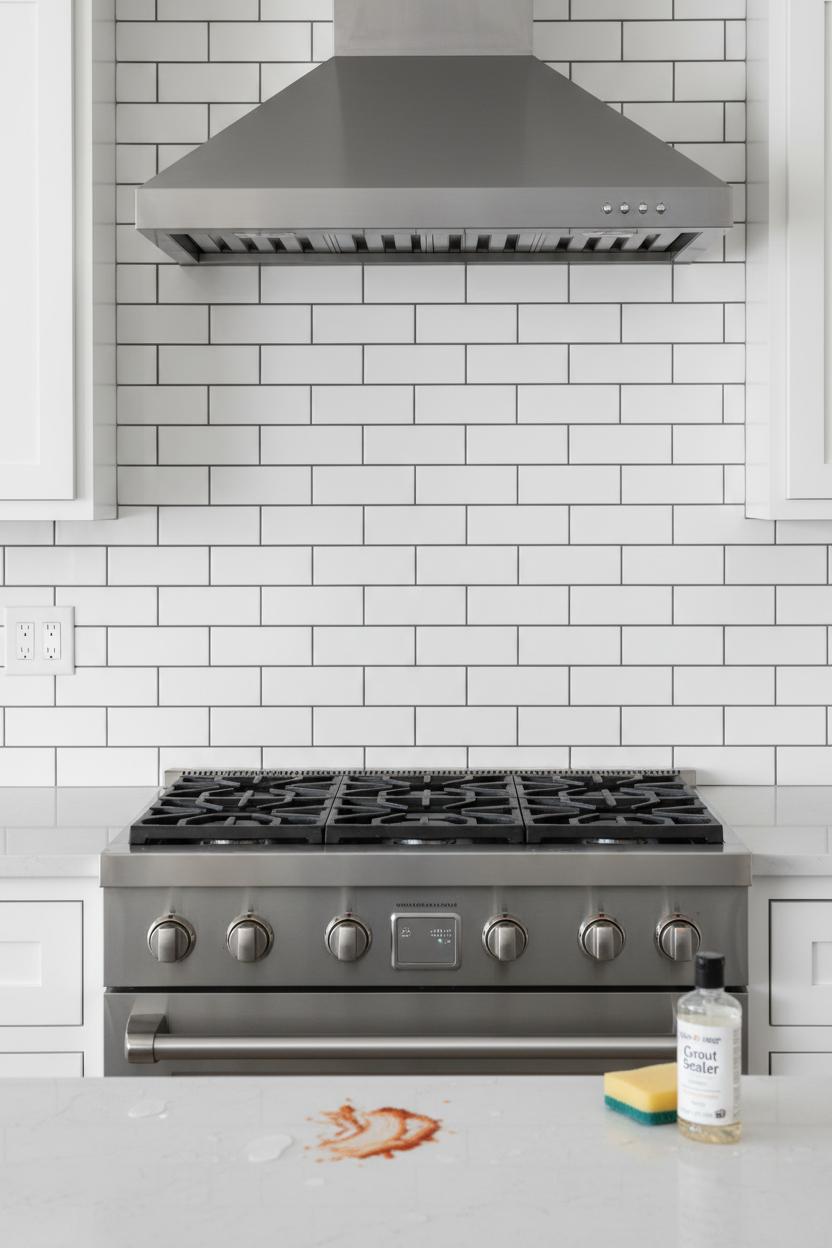
If you’re craving timeless on a budget, a subway tile kitchen is your chic, affordable hero. Classic white ceramic is widely available and endlessly versatile: lay it in a clean stacked pattern for a gallery-feel, go vertical to visually raise the ceiling, or herringbone a small feature zone for movement. Use tile spacers for razor-straight lines, spread pre-mixed tile adhesive in small sections so it doesn’t skin over, and choose a grout shade that suits your vibe—soft gray for subtle shadow or charcoal for graphic punch. Seal it all with a good grout sealer to keep scrubbing easy. Even a simple subway tile backsplash can read boutique when you finish edges with sleek trim and under-cabinet lighting to bounce light across that fresh surface.
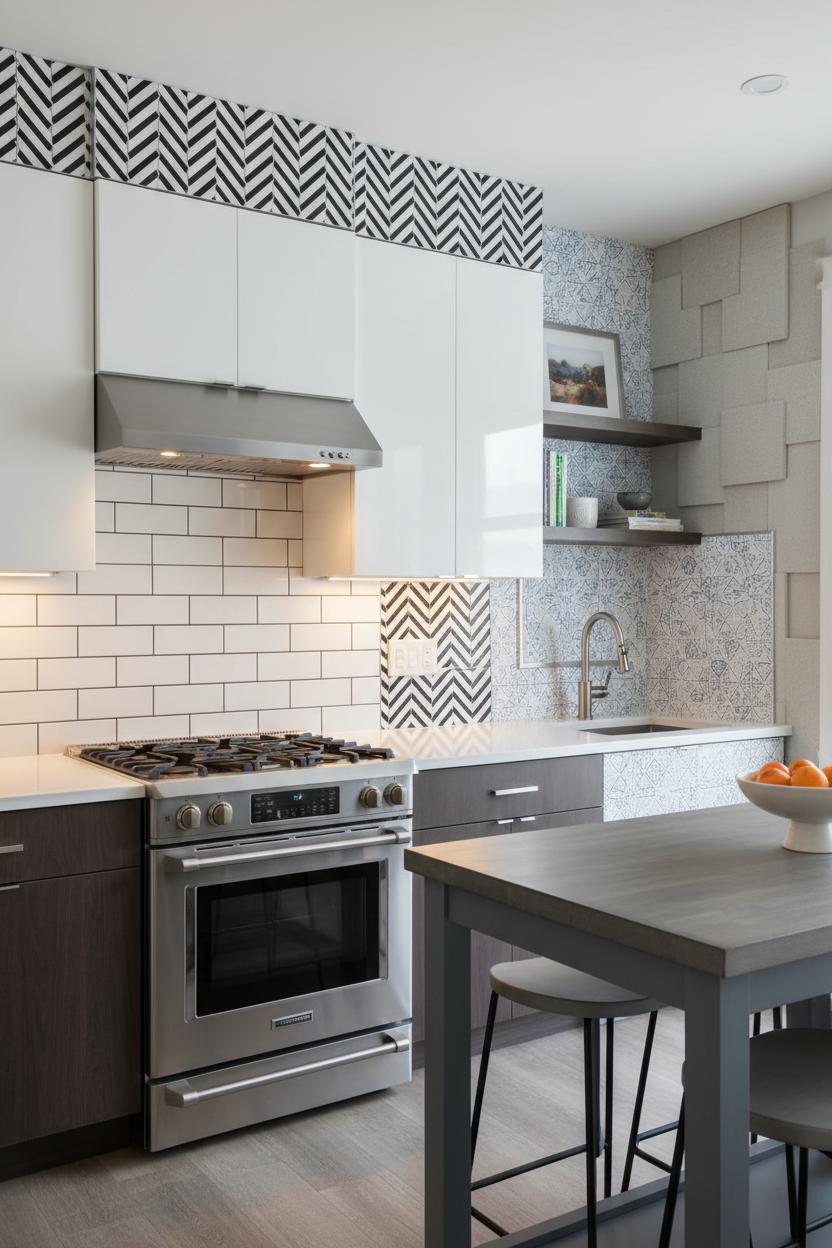
Feeling creative? Mix textures and save: run a short row of mosaic as a shimmer band, then paint the rest of the wall in a wipeable satin enamel; or frame the stove zone with patterned porcelain while keeping the perimeter simple to stretch the budget. Scour clearance bins for small-format tiles to create an ombré moment above the sink, or use leftover stone as a petite ledge for oils and salts. These budget-friendly backsplash ideas prove you don’t need a full reno to refresh your kitchen backsplash—just thoughtful materials, a weekend’s worth of patience, and a few strategic upgrades that make everyday cooking feel a little more special.
If you want instant gratification, peel and stick tile is the budget-friendly glow-up your kitchen backsplash has been waiting for. Think of it as a turnkey makeover: measure, peel, place, and suddenly your counters have a crisp frame and your cabinets feel intentionally styled. The latest designs look so elevated—matte stone looks for organic warmth, glossy marble veining for quiet luxury, brushed metallics for a little sparkle, and even the classic subway tile backsplash in bright white for that clean, timeless vibe. It’s a renter’s dream and a weekend warrior’s best friend, because there’s no mess, no grout haze, and no long cure times. You can run it as a simple strip between counter and uppers or take it to the ceiling for drama behind open shelves. For a modern kitchen design, try a narrow herringbone peel and stick backsplash, or keep it fresh and airy with a sleek subway tile kitchen look in a soft gray.
Installation is delightfully low-stress: start with a squeaky-clean, dry wall (a good degrease is everything), snap a level line, and dry-fit your pieces. Most peel and stick tile sheets overlap to hide seams—use a sharp utility knife to trim around outlets, then pop covers back on for a pro finish. A quick pass with a hair dryer helps the adhesive bond on stubborn corners, and a firm press with a smoothing tool or clean cloth keeps bubbles at bay. You’ll love that there’s no need for tile adhesive, grout sealer, or tile spacers—just peel and stick. For cooktops with high heat or areas getting direct water spray, check the manufacturer’s notes and add a tiny bead of clear caulk along edges for extra protection. Maintenance is easy: wipe with mild soap, and if a panel gets scuffed, swap it out in minutes. Among all the backsplash ideas out there, this one punches way above its price tag—delivering that custom, pulled-together feel without demo or dust. In a single afternoon, you can go from “fine for now” to “pin this, please,” all with a peel and stick tile that looks tailored to your space.
There’s a reason a subway tile kitchen never goes out of style: those clean, rhythmic lines feel crisp and classic, while the right choices make them totally fresh for modern kitchen design. If you’re craving a budget-friendly kitchen backsplash that looks designer, start with simple white ceramic subway tile and let the details do the talking. Try a soft matte finish for a chalky, upscale vibe or glossy for that light-bouncing, freshly-cleaned sheen. Want color without commitment? Think warm greige, sage, or inky charcoal for a subtle twist. One of my favorite backsplash ideas for keeping costs down is pairing an affordable subway tile with a standout grout color—charcoal, warm taupe, even a pale gray-blue—so the pattern pops without splurging on specialty tile.
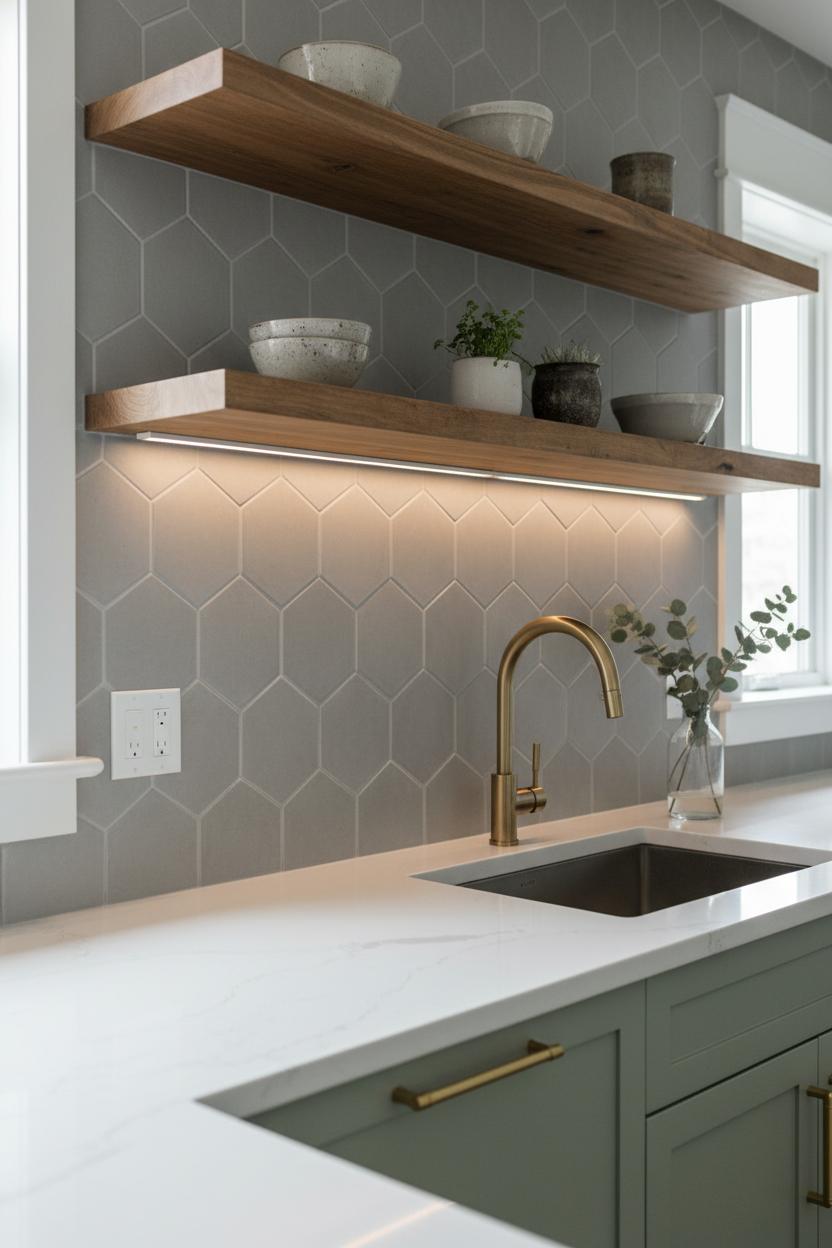
Play with layout to nudge classic toward current. A straight vertical stack instantly feels sleek and height-enhancing, while a tight 1/3 offset or a single herringbone accent band behind the range reads editorial without blowing the budget. Keep grout lines slim and uniform with tile spacers for that custom look, and finish the edges with a simple trim or metal profile for a crisp frame. If you cook a lot, seal the grout with a reliable grout sealer so spaghetti night doesn’t become a permanent art installation. Under-cabinet lighting will make your subway tile backsplash gleam and show off all those tidy joints you worked so hard on.
DIYing it? Renters and weekend warriors can get the look fast with peel and stick tile—specifically a peel and stick backsplash in a subway pattern—just be sure to check heat and steam ratings near stoves. For a long-term install, gather the basics: tile adhesive (mastic or thinset), a notched trowel, tile spacers, grout, a tile cutter, and, again, grout sealer for longevity. To stretch the budget, tile only the high-splash zones and paint the rest in a scrubbable semi-gloss, end the tile at natural sight lines, and shop overstock for savings—order about 10% extra to cover cuts. With a few smart choices, your subway tile kitchen can deliver classic lines and modern vibes, all without maxing out the remodel fund.
If you’re craving that crisp, timeless look on a budget, subway tile is the ultimate chameleon for a kitchen backsplash. Size sets the mood: the classic 3×6 reads charming and effortless, while a skinny 2×4 feels cottage-sweet and detailed. For a sleeker vibe in a modern kitchen design, try elongated 3×12 or 4×12 tiles—fewer grout lines and a clean, gallery feel. Even a micro 1×3 mosaic can add texture without stealing the show. The beauty of a subway tile backsplash is that it works in any palette and price point, so you can experiment with backsplash ideas without blowing your budget.
Finish is where personality shines. Glossy white bounces light and instantly brightens a small space, while matte or satin finishes lend a soft, designer hush. Try beveled edges for a subtle shadow play or a handmade-look tile for just-wonky-enough charm. Color shifts the story: classic white keeps a subway tile kitchen airy, greige feels warm and organic, inky charcoal is moody and sophisticated, and soft sage whispers calm. Grout matters just as much—go tone-on-tone for a seamless wash or choose a high-contrast grout to outline each brick. Whichever you pick, a quick coat of grout sealer makes cleanup simple. Renters or weekend DIYers can skip the mess with peel and stick tile; a peel and stick backsplash gives the look for less, and when you’re ready for the real deal, switch to traditional setting with quality tile adhesive.
Layout is your secret style weapon. The classic 50% offset is forever, but a stacked pattern (horizontal or vertical) reads minimal and modern. Herringbone adds movement—use it as a focal point behind the range or in a framed section to stretch your budget. Running tiles to the ceiling around a window instantly elevates the room; stopping with a neat trim keeps it polished. Plan your centerline so cuts fall in the corners, use tile spacers for razor-straight grout joints, and finish edges with a slim metal trim for that custom touch. Start small if you like—do a short splash now and add height later. However you style it, subway keeps your kitchen backsplash classic, current, and totally you.
Before you fall in love with the pretty patterns, a little prep will make your kitchen backsplash look pro-level and perfectly straight. Start by marking a level reference line across the wall and, if you can, screw a temporary ledger board where the first full row will sit—instant insurance against tile “creep.” Dry-lay a few pieces to choose your grout width, testing different tile spacers to see what feels right with your modern kitchen design. If you’re dreaming of a classic subway tile kitchen, stagger your joints in a simple brick pattern and center your layout on the focal point (range or sink) so you don’t end up with skinny slivers at the edges. For traditional ceramic or porcelain, spread tile adhesive with a notched trowel, holding it at a 45-degree angle for even ridges, then press and wiggle each tile in place. If you’re going the budget-friendly route with peel and stick tile or a peel and stick backsplash, scrub away grease, lightly scuff glossy paint, and snap chalk or laser lines to guide you; yes, still use tile spacers so the rows stay uniform and straight from start to finish.
Straight lines also come from stepping back every few rows and checking with a level—it’s like taking a breath in the middle of a project. Cutouts around outlets are easier when you measure twice and mark from the backside; a utility knife scores vinyl peel and stick tile, while a snap cutter or wet saw handles ceramic for a subway tile backsplash. Let your tile adhesive set fully before grouting, then float in the grout and wipe the haze in gentle passes. Seal the deal with a grout sealer after it cures to keep spaghetti-night splashes from staining. Shopping tip: you’ll find wallet-friendly bundles online for tile adhesive, tile spacers, grout sealer, peel and stick backsplash, and even ready-to-install subway tile backsplash kits—perfect for turning your favorite backsplash ideas into a polished, custom kitchen backsplash on a weekend budget. Little basics, big payoff: crisp lines, clean edges, and a finish that looks straight out of a magazine spread.
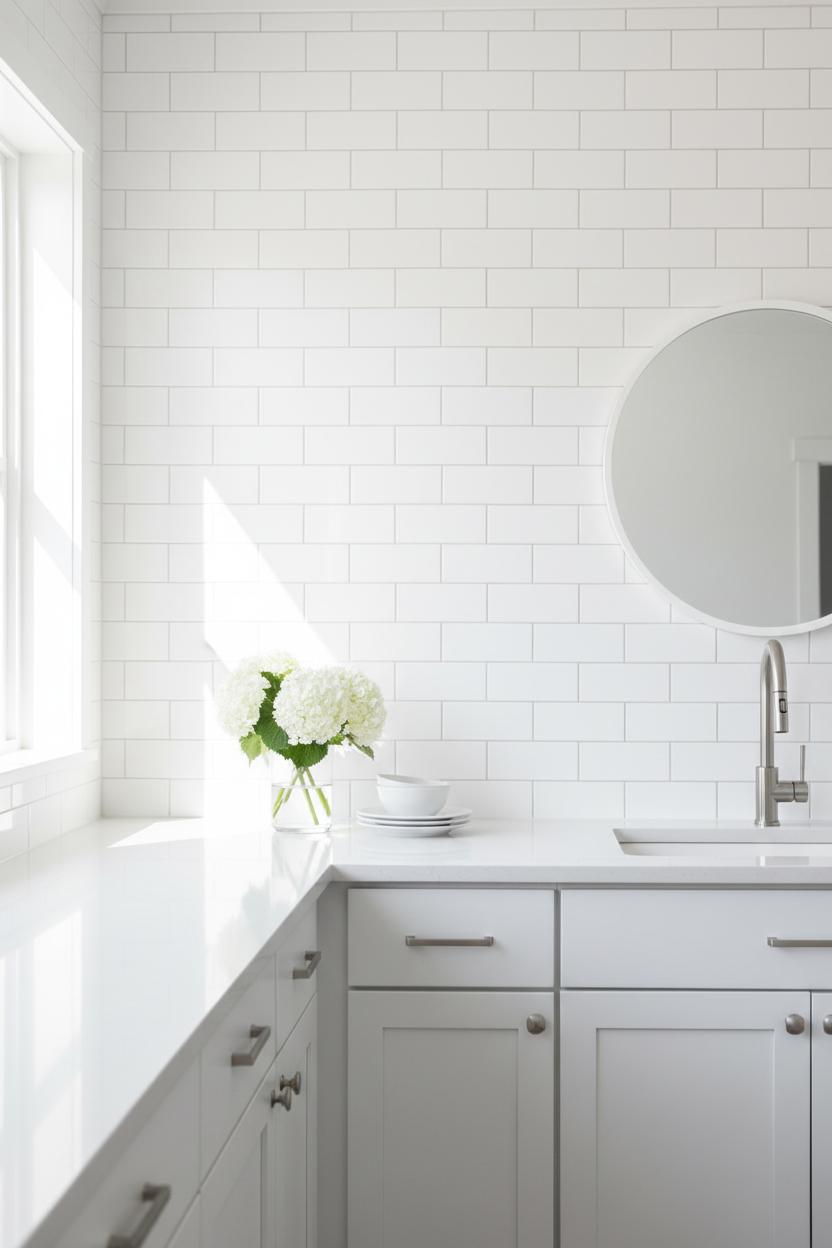
Grout is the quiet stylist in a kitchen backsplash, and choosing the right color can shift your whole vibe from farmhouse-cozy to gallery-chic. If you’re loving a classic subway tile backsplash, crisp white grout delivers that clean, airy feel and bounces light beautifully, while a soft gray hides day-to-day splashes without looking dull. Charcoal grout adds a graphic grid that feels bold and modern, especially in a subway tile kitchen with matte black hardware. For warmer woods or brass accents, try a greige or sand tone that mellows stark contrasts. Working with peel and stick tile? Many have faux grout lines baked in, so pick a pattern where the “grout” shade complements your counters. When you’re gathering backsplash ideas, lay a few tiles and grout color sticks on your counter and snap phone photos at different times of day—lighting can change everything in a modern kitchen design.
Application is where the magic—and the mess—happens. For ceramic or porcelain, use tile spacers to keep lines straight and intentional; 1/16 to 1/8 inch is a sweet spot for that refined look. If your tiles aren’t self-adhesive, spread tile adhesive evenly with a notched trowel, then set tiles with gentle pressure and a wiggle to bed them in. When it’s time to grout, mix to a creamy, peanut-butter consistency and float it diagonally across the joints so you fill them completely. Wipe in stages: first pass with a barely damp sponge to shape the lines, a second to lift residue, then a final buff with a dry microfiber to nix haze. For a peel and stick backsplash, cleanup is simpler—press seams firmly, and if you’re adding real grout to thicker peel-and-stick panels, work lightly and clean quickly.
Seal the deal, literally. After the grout cures, apply a grout sealer to block stains and spaghetti-night splatters; a penetrating formula is great around sinks and stoves. Do a quick water-bead test every few months—if droplets soak in, it’s time to reseal. Keep edges near countertops caulked (not grouted) for movement, and you’ll stretch your budget and your backsplash’s beauty for years. Small steps, big payoff.
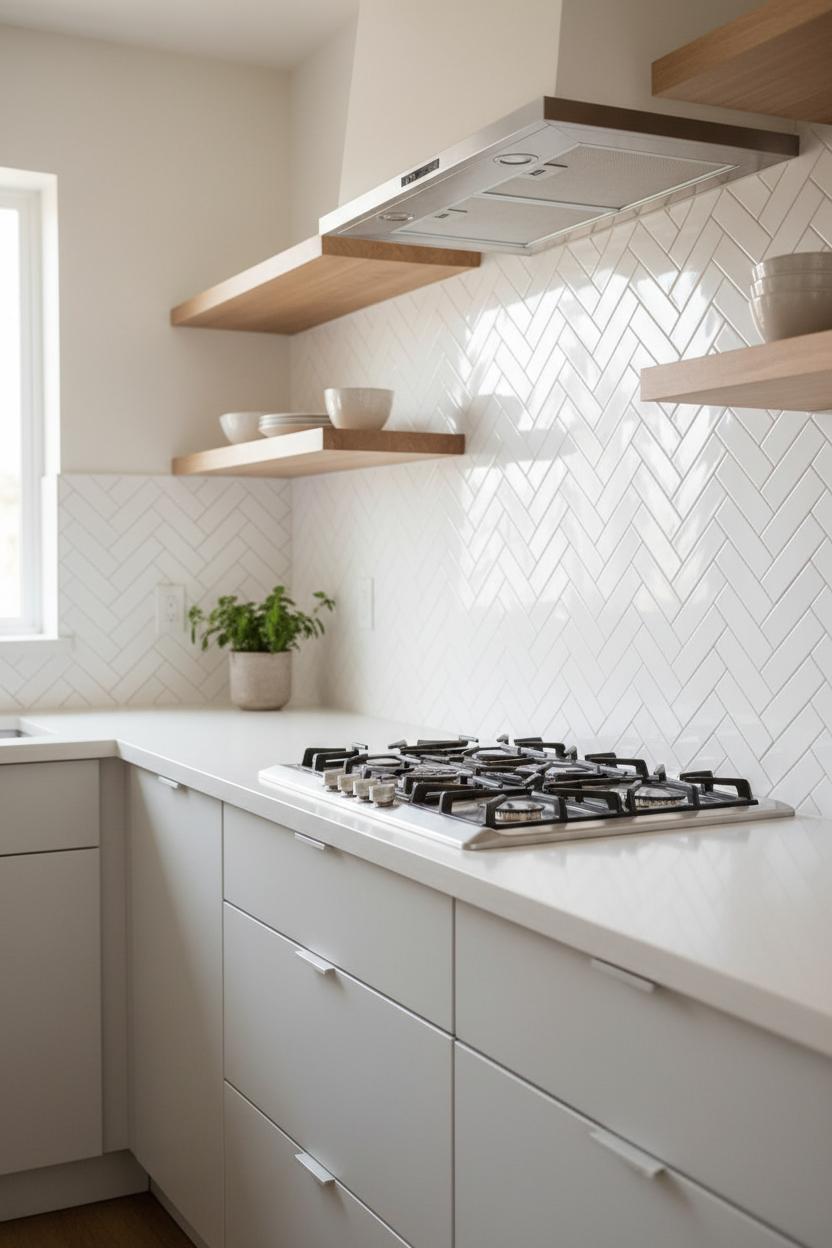
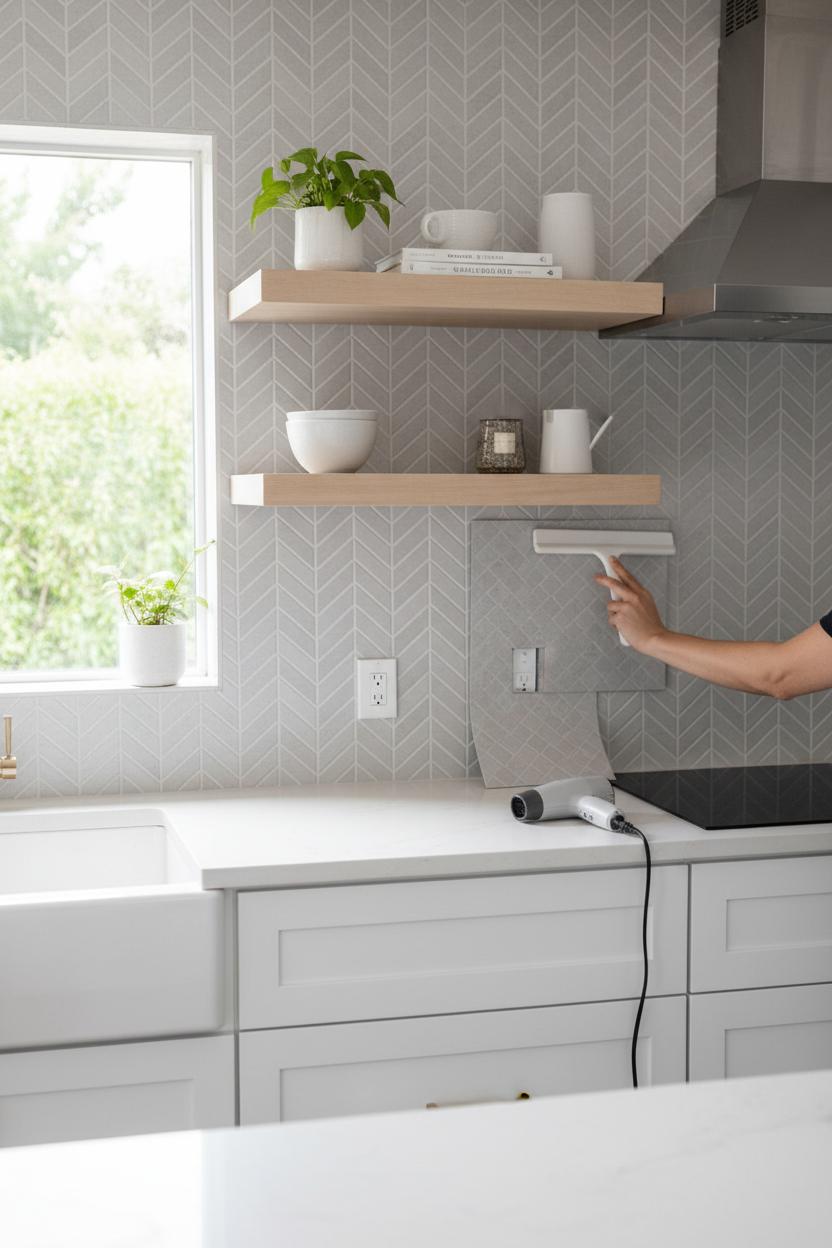
Small kitchens love a smart pattern, and nothing stretches a tight footprint like a layout with movement. Try a herringbone kitchen backsplash using classic white rectangles for that lively zigzag that makes walls feel wider and taller at once. It’s the beloved subway tile kitchen, but reimagined: turn those 2x8s or 3x12s on a diagonal and suddenly a familiar material looks designer. If you’re renting or working under a strict budget, peel and stick tile in a herringbone print or pre-laid chevron sheet gives you the same energy without the mess, and many peel and stick backsplash options come in soft grays, blushes, and moody greens to suit a modern kitchen design. Keep the palette light and let the pattern be the star; a barely-there grout line keeps things airy, while a charcoal grout adds graphic drama for photos that pop.
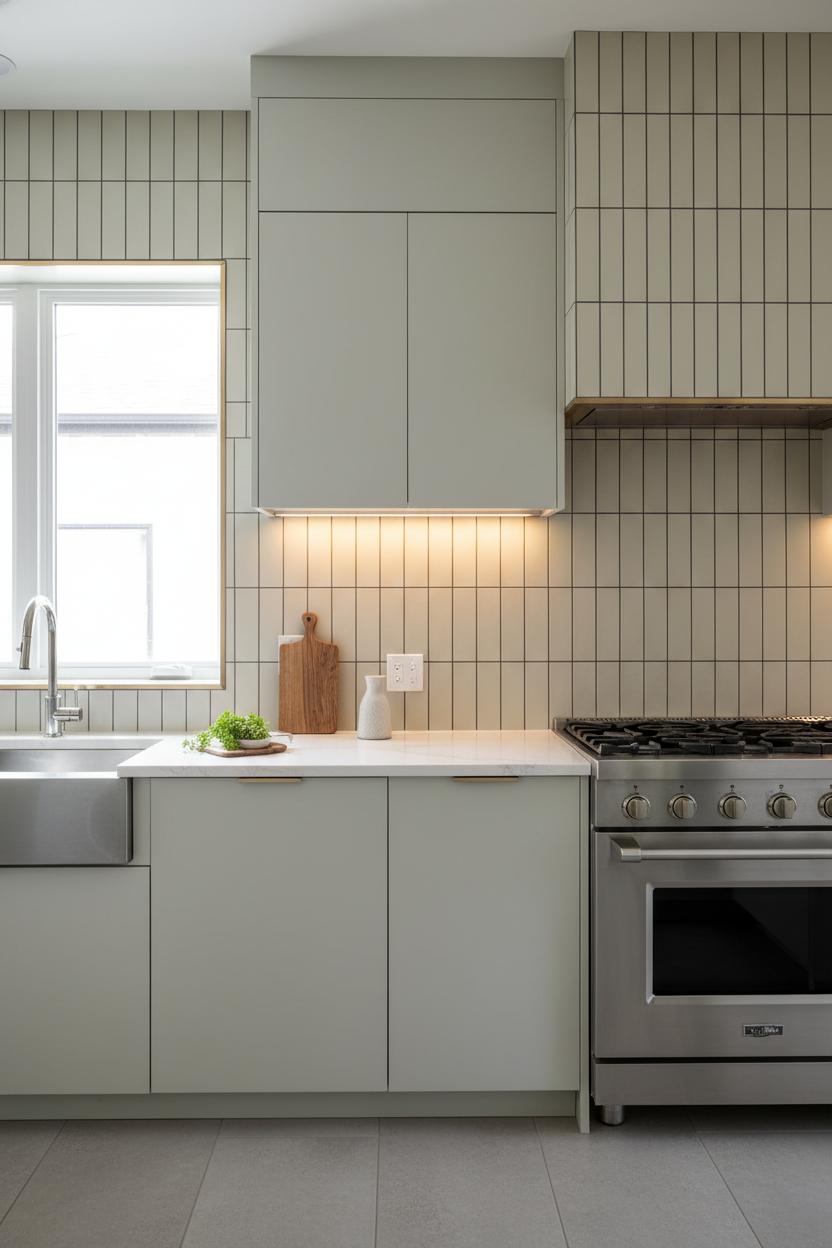
For sky-high vibes in a small space, stack tiles vertically in clean columns. A vertical stack is crisp, calming, and super current—think spa-meets-loft. It’s one of the easiest backsplash ideas to DIY because you’re just lining everything up like Tetris. Use tile spacers to keep the grid laser-straight, reach for a premixed tile adhesive if you’re doing a permanent install, and finish with a good grout sealer for easy wipe-downs. Matching grout to tile gives you a seamless, elongated look; contrasting grout turns the wall into a chic grid. If you’re starting from scratch, a budget-friendly subway tile backsplash stacked straight up feels curated without splurging, and short runs behind a range or coffee nook make a huge impact.
Love a little extra flair? Try a vertical half-stack on the perimeter and a centered herringbone “picture frame” over the stove for a custom moment. Skinny rectangles in a tight stack feel minimal; a basketweave or angled offset brings soft texture without cluttering the eye. Glass or glossy finishes bounce light in dim corners, while matte tiles add cozy, modern kitchen design depth. Whether you’re clicking add-to-cart on peel and stick tile or mixing classic subway with thrifted shelves, pattern is the secret ingredient that turns a simple kitchen backsplash into a camera-ready feature wall—stylish, space-smart, and totally doable this weekend.
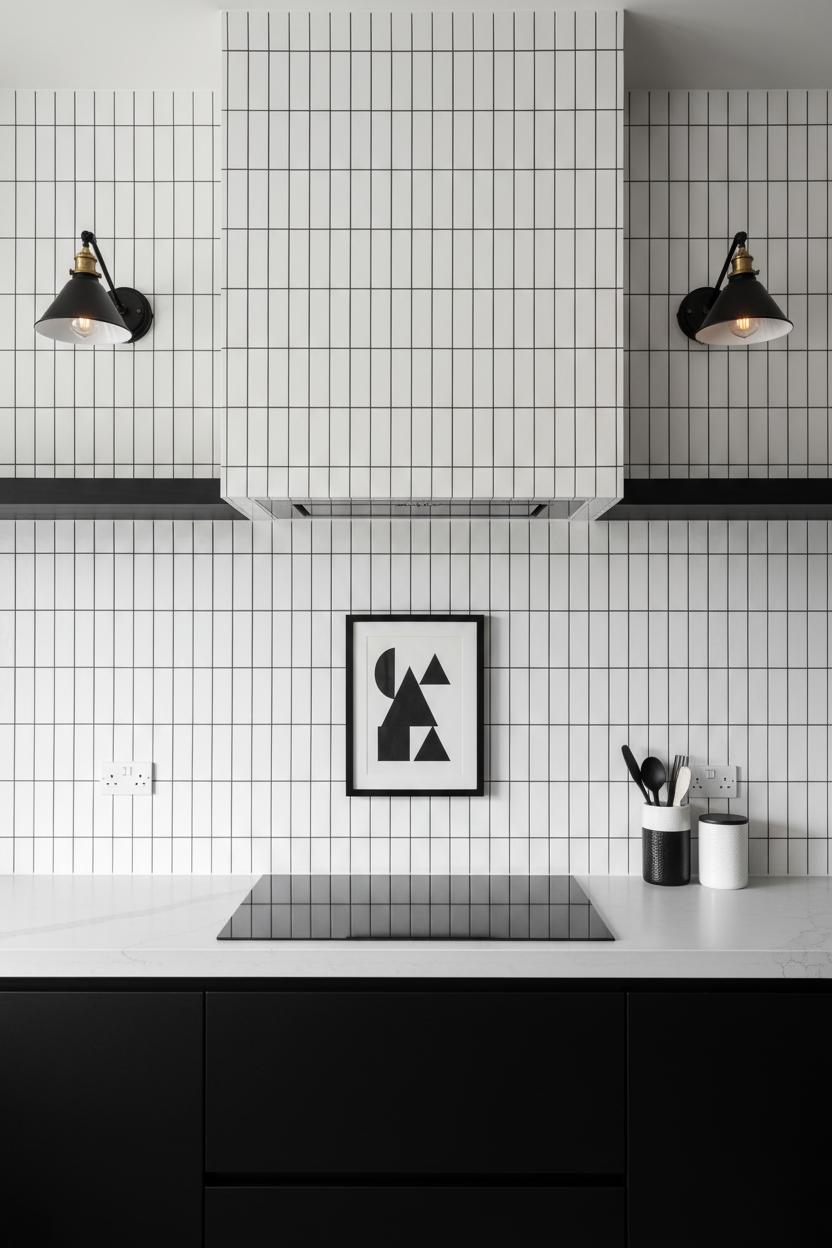
When you’re playing with color in a modern kitchen design, think of your kitchen backsplash as the mood-setter. High-contrast schemes—crisp white tiles against inky cabinets, or black hexagons with pale oak—instantly look intentional and high-end without blowing the budget. Try a white peel and stick tile with charcoal grout lines, or flip it with on-trend matte black squares for drama that still feels clean. If you’re renting or testing the waters, a peel and stick backsplash lets you audition bold contrasts without commitment; just keep the counters simple so the eye lands on that graphic pop. This is one of those easy, affordable backsplash ideas that photographs beautifully and makes even a small space read sharp and curated.
Monochrome is the quiet hero: one color, tons of texture. In a subway tile kitchen, choose a single hue—soft gray, sage, or classic white—and vary the shape or layout for subtle movement. Stacked vertical tiles feel fresh and elongate the room, while a slim subway tile backsplash set in a herringbone instantly adds interest. If you’re going the DIY route, basic ceramic paired with careful details looks luxe: use tile spacers for razor-straight lines, a quality tile adhesive to avoid lippage, and seal everything with a grout sealer so it stays bright. Even peel and stick tile comes in glossy, matte, and beveled finishes now, so you can layer sheen within the same palette for that designer, tone-on-tone depth.
Warm neutrals are the coziest twist on modern—think creamy latte, sand, and caramel that glow under soft lighting. These hues flatter wood cabinets and black hardware, and they’re incredibly forgiving of daily life. Choose textured squares that mimic handmade zellige, or a warm beige subway with slightly varied edges to add that artisanal vibe on a budget. Pair them with a butcher block counter or brushed brass sconces and you’ll get that sun-washed, Mediterranean feel without pricey stone. For renters, a warm-toned peel and stick backsplash instantly softens a stark room; for permanent installs, finish with a light grout and seal well to keep everything low-maintenance. Whether you’re going high-contrast, monochrome, or warmly neutral, these approachable backsplash ideas prove you don’t need a big renovation—just thoughtful color, smart materials, and a few well-chosen tools to make your modern kitchen design sing.
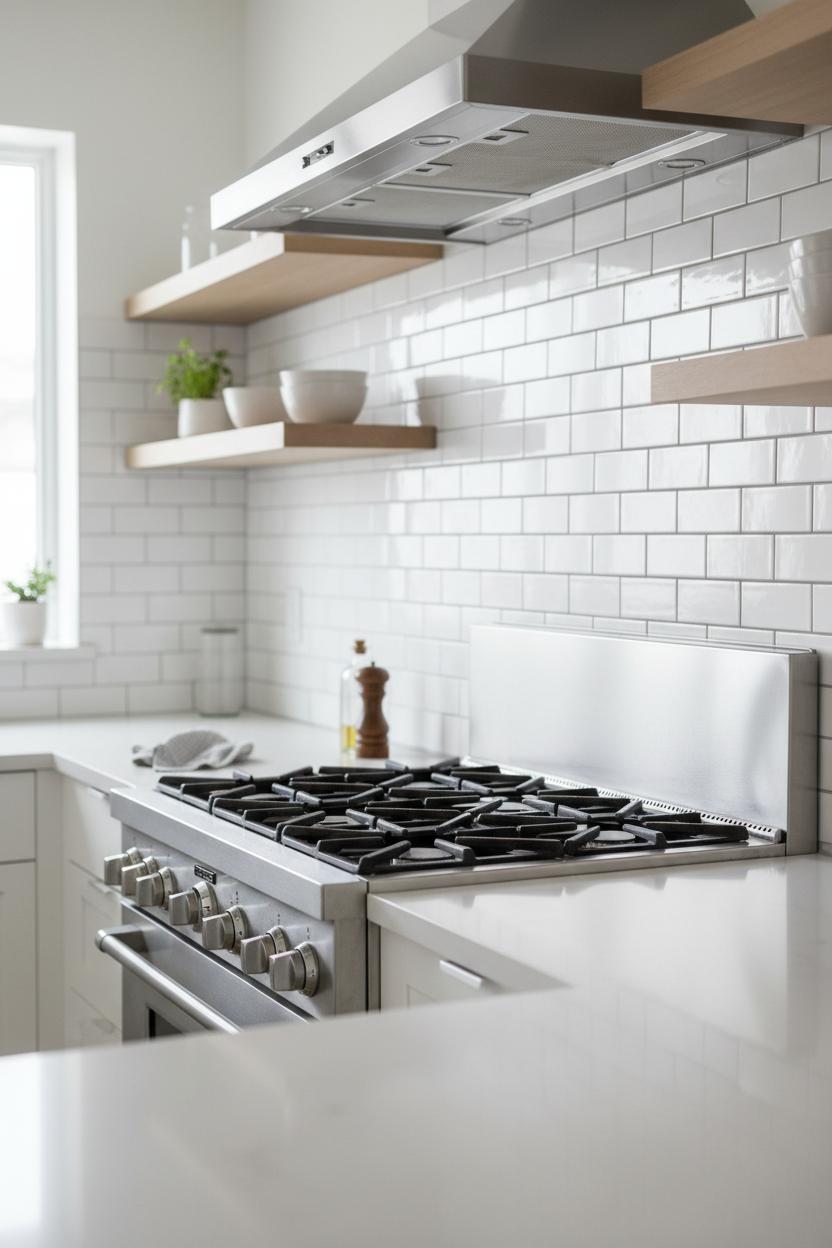
When you’re dreaming up backsplash ideas, think beyond pretty patterns and go for finishes that make daily wipe-downs a breeze. Smooth, glossy surfaces are your best friend: ceramic or porcelain in a classic subway tile backsplash, sleek glass, or even a stainless panel behind the range can all handle splatters without drama. If you’re DIYing on a budget, peel and stick tile is a secret weapon—today’s peel and stick backsplash options look surprisingly luxe, and most have a non-porous, wipe-clean face that shrugs off oil. For a timeless look that still feels fresh in a modern kitchen design, try a slightly oversized 4×12 tile in a simple stacked layout for fewer grout lines than a traditional subway tile kitchen. Keep edges crisp with tile spacers for uniform joints, and if you’re installing the real deal, a quality tile adhesive will help everything sit smooth and flat so grime has nowhere to hide.
Long-term sparkle is all about smart maintenance. Grout is usually the first place stains show up, so seal it right after installation with a good grout sealer and reapply on schedule; you’ll be amazed how much easier cleanup becomes. Choose a mid-tone or charcoal grout to disguise splashes, or go color-matched for a seamless look that visually expands a small space. After cooking, a quick spritz of warm, soapy water and a microfiber swipe keeps your kitchen backsplash looking new; skip abrasives and harsh acids, especially around natural stone or specialty finishes. If you’re a heavy sauté-er, add a fast weekly degrease near the cooktop and dry with a soft cloth for streak-free shine. Minimize visual clutter (less to dust!) and lean into reflective surfaces that bounce light—your kitchen will feel airier and your cleanup routine will be faster. With the right materials and a few thoughtful habits, your backsplash can wear everyday life beautifully and still look like you just installed it.
Renters, this is your permission slip to get the look you love without losing your deposit. Start with the easiest switch: a peel and stick backsplash. Today’s peel and stick tile comes in everything from glossy marble looks to matte cement patterns, and there are ultra-convincing options that mimic a classic subway tile kitchen without the mess. Measure, dry-fit, and use a plastic smoothing tool to press out bubbles as you go; a sharp utility knife makes clean outlet cuts. For a polished finish, run a slim bead of clear, removable caulk along the edges to keep splashes out. If you’re scrolling backsplash ideas for a modern kitchen design, try brushed-metal stick-on sheets behind the range (check heat ratings) or a high-contrast herringbone peel and stick tile under the cabinets for a graphic moment that still peels off painlessly later.
If you love pattern, washable vinyl wallpaper can double as a kitchen backsplash behind low-splash zones—think coffee corners and prep nooks. Choose a wipeable, moisture-resistant roll, then frame it with slim trim tape for a custom look. Foam faux-stone panels are featherlight and install with removable strips, and glossy acrylic sheets look chic layered over fabric or wallpaper: mount the panel with clear Command-style strips and you’ve got a protected, wipe-clean surface you can pop off on moving day. For a minimalist twist, mix narrow peel and stick backsplash planks in two tones—soft greige and crisp white—and stagger them for subtle texture that still reads modern. Pro tip: under-cabinet LED strips will make any temporary kitchen backsplash shine like the real thing.
Craving the dimension of real tile without committing to your walls? Build a removable panel. Cut a thin PVC board to size, lay out your tiles on a table, and set them with a light layer of tile adhesive. Use tile spacers for razor-straight lines, then either choose a no-grout tile or a lightweight grout; seal it with a grout sealer to keep cleanup easy. When it’s cured, mount the whole panel with heavy-duty removable strips so it pops off cleanly when you move. Whether you go for a sleek subway tile backsplash panel or a patterned mosaic, this trick delivers that designer finish while staying totally reversible—and totally budget-friendly.
If you need proof that a fresh kitchen backsplash can carry a whole room, these real-world before-and-afters deliver. Think dim beige boxes turning into bright, weekend-project stunners with just a few smart backsplash ideas and a little sweat equity. One renter-friendly galley started with yellowed laminate and shadowy cabinets. Instead of a full reno, the update hinged on peel and stick tile in a soft gray herringbone. The peel and stick backsplash went up in an afternoon with a utility knife and a level, instantly bouncing light and adding texture without touching the lease. A slim metal edge trim finished the ends like jewelry, and some battery under-cabinet lights made the surface gleam. Paired with matte black pulls and a bowl of green limes, the whole space reads intentional and airy—modern kitchen design on a shoestring.
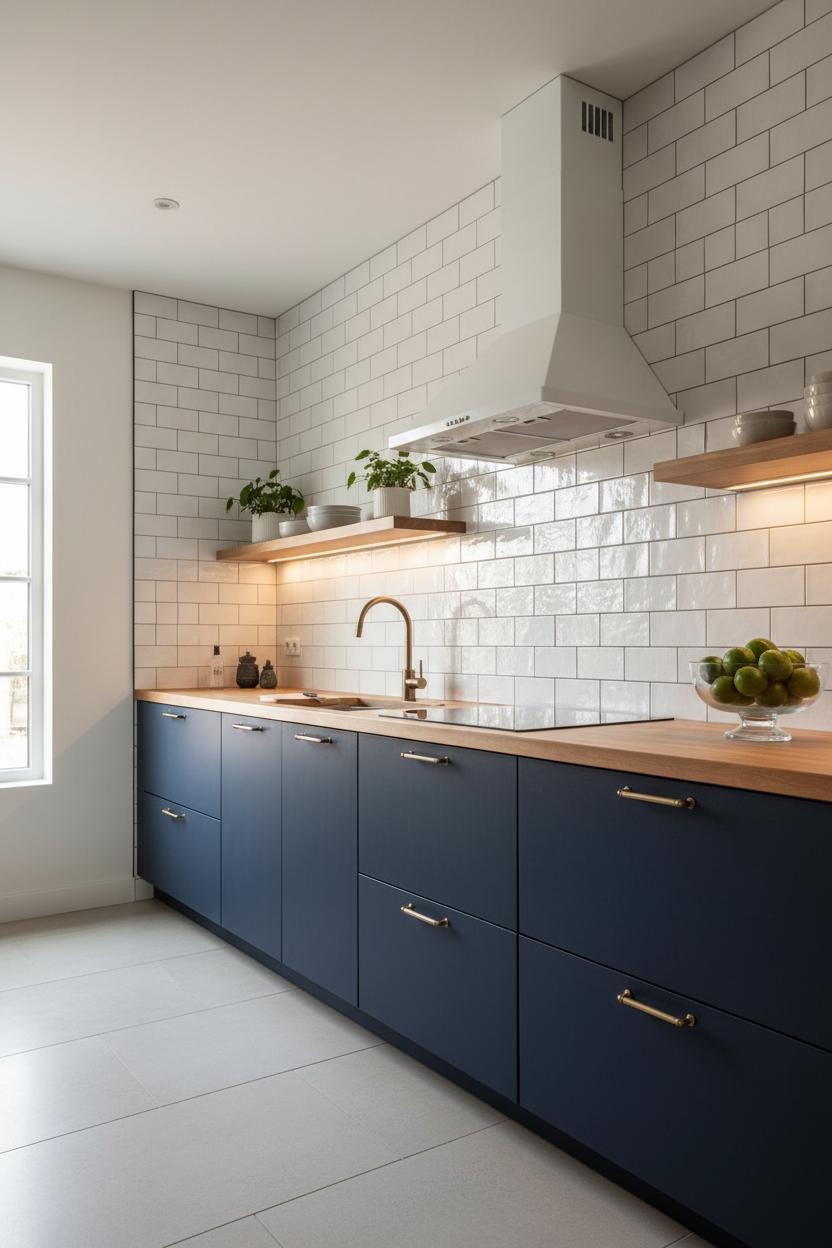
Another makeover tackled a builder-grade space with oak cabinets and a speckled countertop begging for a lift. The homeowners painted lowers a deep navy and kept uppers crisp white, then committed to a classic subway tile kitchen for timeless polish. They chose an affordable white subway tile backsplash and ran it to the ceiling behind the range hood for that magazine-cover verticality. Pre-mixed tile adhesive simplified the messy part, tile spacers kept the lines laser-straight, and a light gray grout added subtle contrast. After curing, a swipe of grout sealer locked in stain resistance so spaghetti night isn’t a stress test. The result feels custom and calm, with just enough edge to read current without dating fast.
If you’re flirting with patterns, try sampling a few peel and stick tile sheets first to audition color and scale under your own lighting. Love a minimalist vibe? Stack rectangular tiles in a neat vertical pattern or choose longer 3x12s for a sleeker line. Crave warmth? Mix in wood accents and brass hardware to balance all that clean tile. Whether you’re renting or ready to tile for real, focusing on the backsplash keeps costs contained while delivering maximum impact—proof that thoughtful materials and a few right tools can rewrite your kitchen story.
Ready to give your kitchen backsplash a glow-up without the splurge? From classic subway tile kitchen looks to clever peel and stick tile, these budget-friendly backsplash ideas prove modern kitchen design is all about smart choices—fresh grout lines, playful patterns, and cozy textures that reflect you. Mix metals, layer warm woods, or go monochrome for instant polish. Start small behind the range, then build out as budget allows. Snap a before-and-after, pin your favorites, and enjoy a space that feels current, inviting, and completely yours—one beautiful tile at a time.