Physical Address
304 North Cardinal St.
Dorchester Center, MA 02124
Physical Address
304 North Cardinal St.
Dorchester Center, MA 02124
Dreaming of a warm, woodsy retreat? Explore cozy cordwood house design ideas and smart tips for cordwood building that transform logs and lime into a charming natural home. From layout inspiration to budget-friendly finishes, we’ll show you how to plan a snug DIY cabin that’s also a truly sustainable home—durable, energy-wise, and full of character. Tools and resources included: our favorite cordwood masonry book, time-saving mortar mixer, protective log end sealer, and essential natural building tools—plus an off grid solar kit to keep your haven bright. Pin now, start stacking soon!
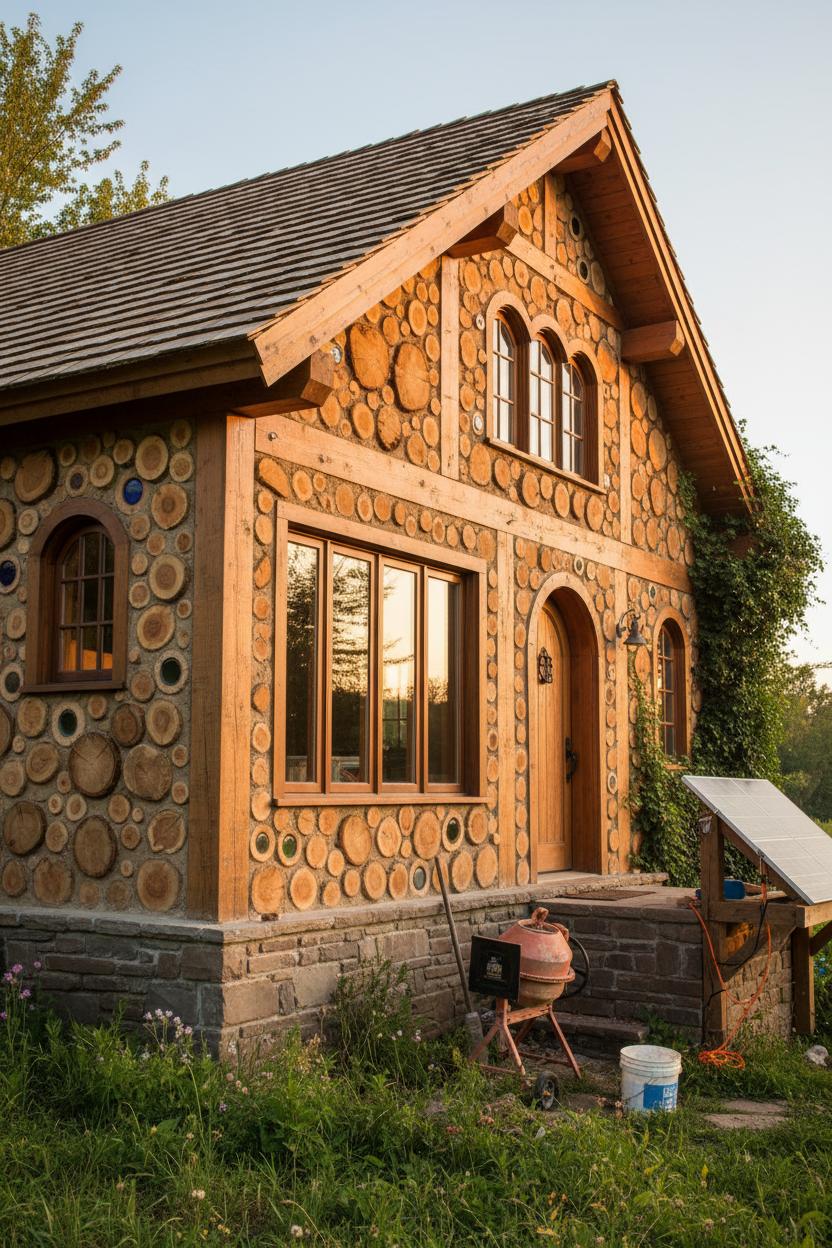
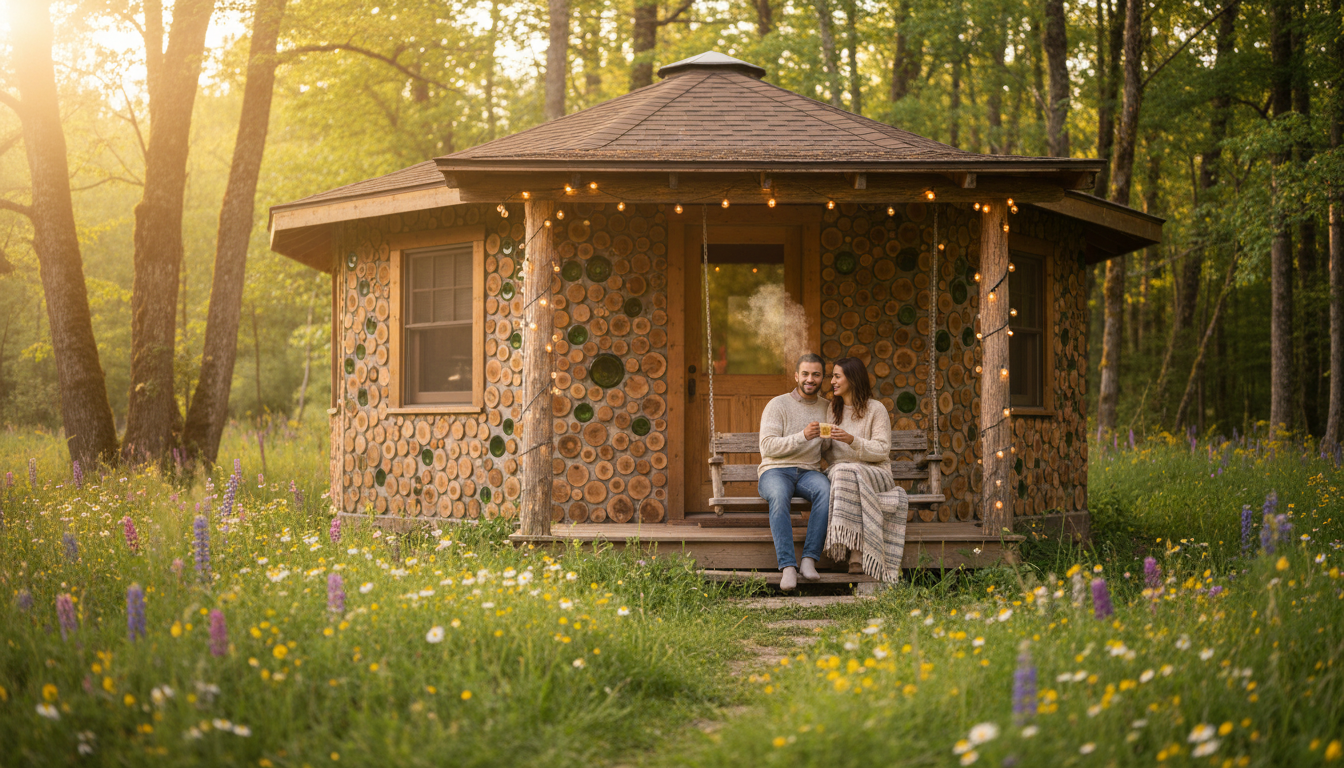
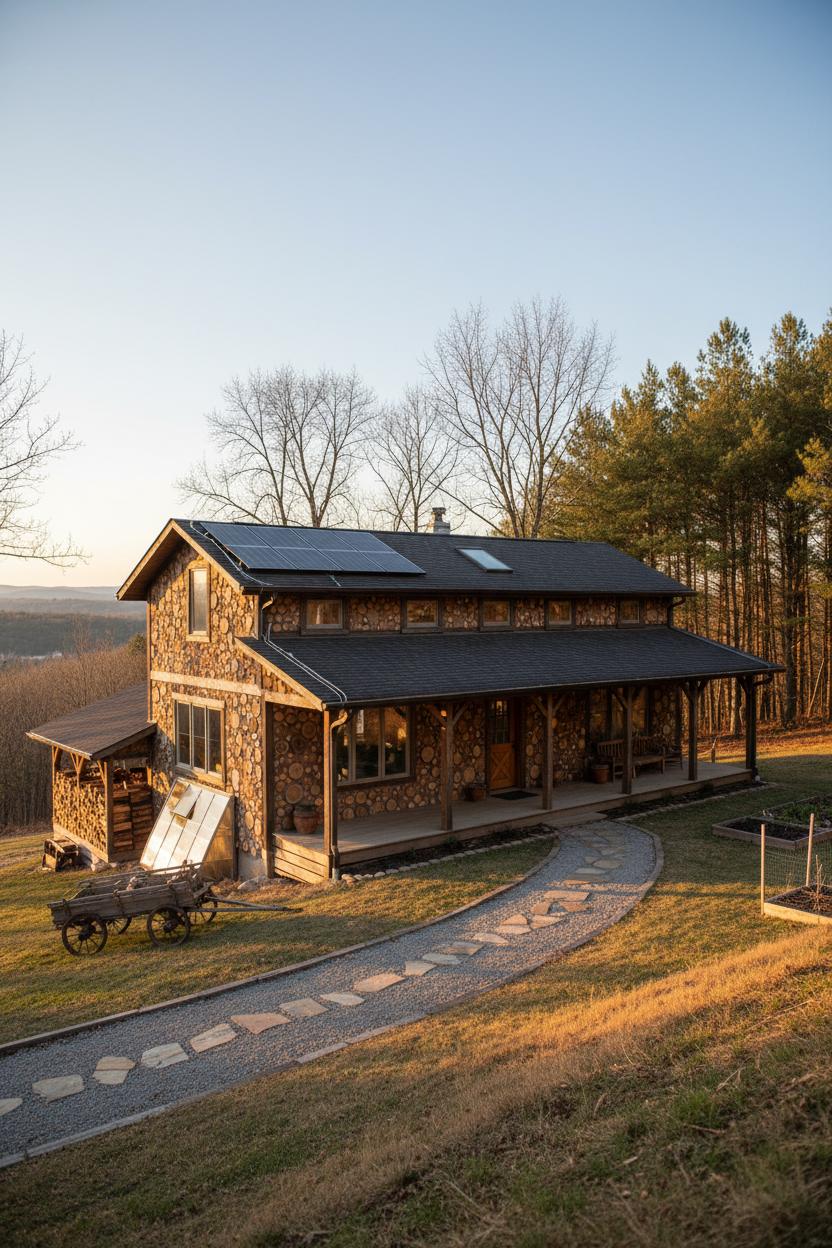
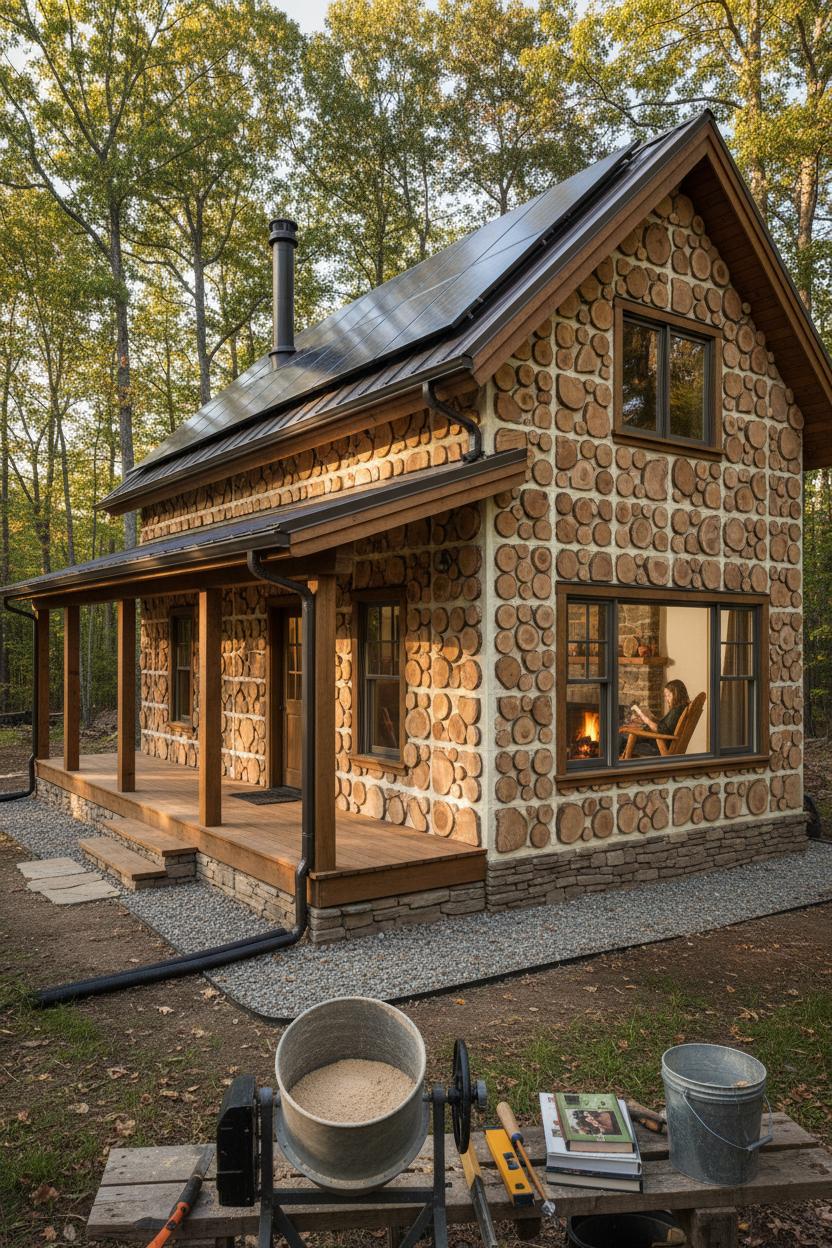
Imagine stacking round, honey-colored log ends like cookies in a thick quilt of mortar, and you’ve got the heart of a cordwood house. In cordwood building, short pieces of firewood (often 12–16 inches long) are set with their log faces exposed, while the spaces between are filled with an insulating mortar mix—traditionally sand, lime, a bit of cement, and organic insulation like sawdust or wood chips. The result is a textured wall that looks like a woodpile turned sculpture, with gorgeous patterns, occasional bottle-glass accents, and a cozy cabin feel that’s hard to resist. Most modern cordwood homes are built as infill within a simple post-and-beam frame, which carries the roof while the cordwood walls provide insulation and beauty. Design-wise, think practical romance: a raised foundation to keep moisture at bay, wide roof overhangs, breathable finishes, and smart passive-solar moves like generous south-facing windows and smaller openings on the north side. Whether you’re dreaming of a snug DIY cabin or a full-time natural home, the look is warm, handmade, and welcoming.
Beyond charm, the benefits stack up. A cordwood house can be a deeply sustainable home because it often uses local, low-embodied-energy materials—windfall logs, thinnings, or slabwood that might otherwise be wasted. The thick walls offer a mix of insulation and thermal mass that helps even out temperature swings, creating that steady, tucked-in comfort you feel in old stone cottages. It’s also a budget-friendly, sweat-equity approach for hands-on builders; with a solid plan and patience, you can pace the work seasonally and involve friends. If you’re new, a good cordwood masonry book will walk you through mixes, curing, and details like using log end sealer to reduce checking. A small mortar mixer and basic natural building tools make weekend workdays smoother, and an off grid solar kit pairs beautifully with the self-reliant spirit of cordwood living. Add artistic flourishes—arched doorways, embedded shelves, colored glass rounds—and your walls become storybook canvases. In the end, cordwood building isn’t just about structure; it’s about crafting a home that feels rooted to its place, rich with texture, and timelessly cozy.
Before you sketch a single wall, take a slow, coffee-in-hand walk of your land and watch where the light lingers. A cordwood house loves a sunny, well-drained perch—ideally a gentle south-facing slope with a bit of windbreak to the north and views you’ll never tire of. Notice winter shadows, summer breezes, and how water moves after a storm; nudge the footprint slightly to capture warmth and avoid soggy spots. Think logistics, too: space for staging logs, a path for deliveries, and a covered nook for a future woodpile. Before you stack your first round, curl up with a trusted cordwood masonry book to fine-tune details, then gather simple natural building tools you’ll reach for all season. Seal freshly cut rounds with a log end sealer while they season, and when the mixing marathon begins, a small mortar mixer saves shoulders and keeps batches consistent.
For layout, run the long axis east–west so your living spaces can gaze south and bask in winter sun. Keep the kitchen, dining, and lounging together under the brightest exposure; tuck bedrooms to the east for gentle morning light and quieter afternoons. Concentrate your wet rooms—bath, laundry, and mechanicals—into a compact core to simplify plumbing and keep pipes cozy. A small mudroom-airlock by the main door is pure gold for boots, pets, and energy efficiency, and a covered porch threads indoor-outdoor life together. The thick walls of cordwood building set a cozy tone; pair them with interior thermal mass—an earthen or slab floor, an adobe half-wall—so daytime warmth isn’t just admired, it’s stored. Keep the vibe DIY cabin friendly, but plan like a sustainable home: right-sized rooms, generous eaves, and a sheltered spot for a future woodshed or greenhouse.
Lean into passive solar: aim for modest south glazing (roughly 7–12% of floor area in cold climates), shade it with tuned overhangs that block high summer sun yet welcome low winter rays, and use deciduous trees for seasonal filtering. Invite cross-breezes with aligned windows, add a stack-effect clerestory if you can, and wire chases now for a later off grid solar kit without tearing into walls. Tighten the envelope with gasketed doors and thoughtful air sealing, then let the materials do the magic—a natural home that’s sun-warmed, breeze-cooled, and wonderfully low-tech, with just enough planning to feel effortless.
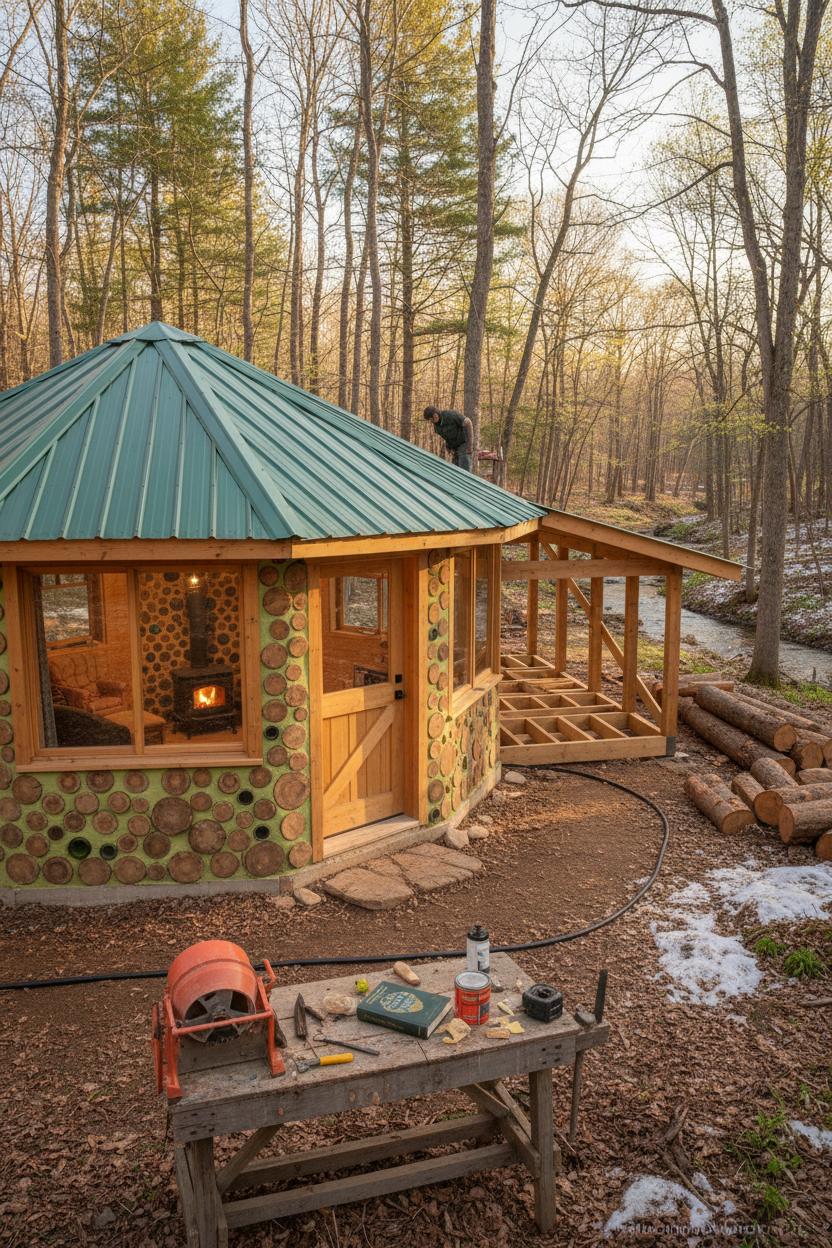
Choosing the shape of your cordwood house is like choosing the melody for your whole life inside it—round, rectangular, and hybrid floor plans each hum a different, cozy tune. Round plans feel wonderfully snug and social, with walls that naturally hug you and soften sound. They’re beautiful for small footprints, a single great room, or a dreamy DIY cabin tucked into the trees. Many builders center the hearth or a cookstove beneath a reciprocal roof or skylight, creating a lantern-like glow at dusk. Do plan ahead for furniture against curves and custom shelves or built-ins. A good cordwood masonry book and a few trusty natural building tools make this path so much smoother, and a mortar mixer saves your arms when you’re batching mortar for those mesmerizing log-end mosaics.
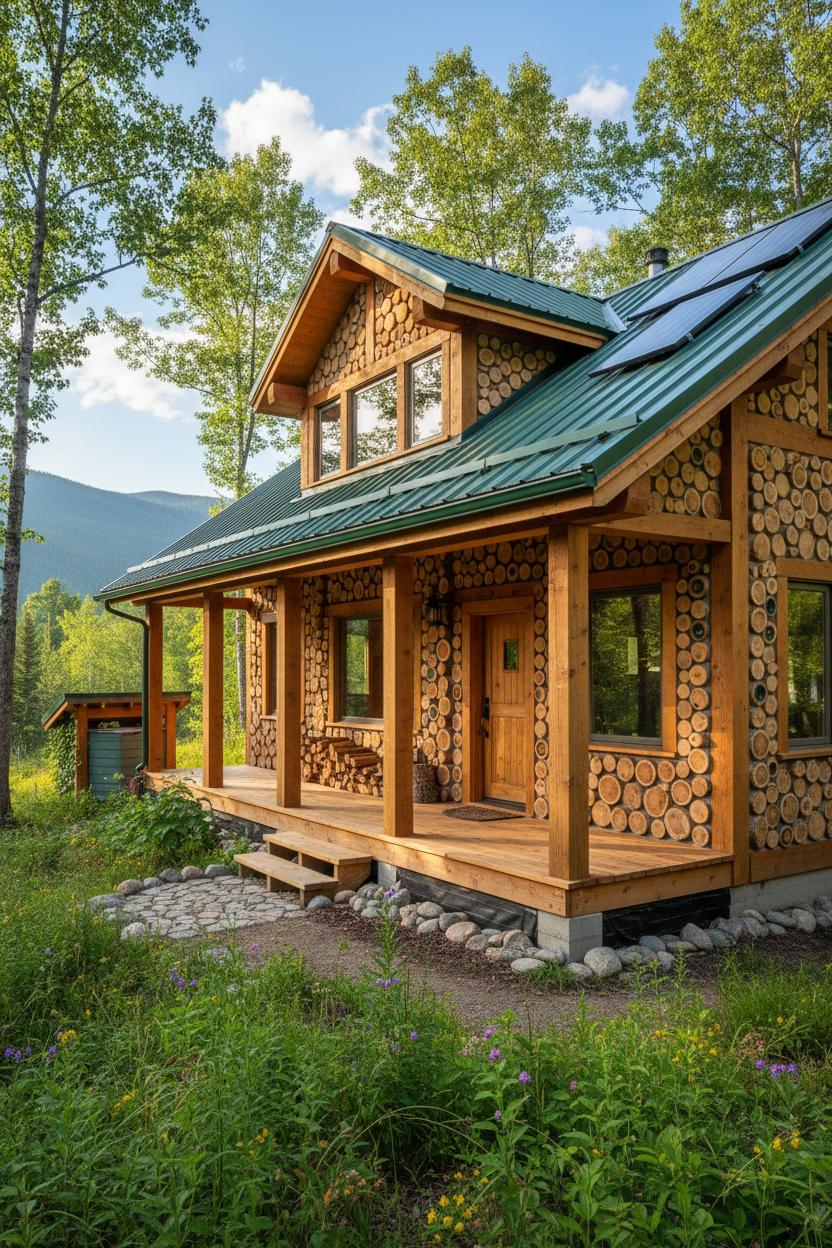
Rectangular layouts bring simple lines and everyday ease—great for a sustainable home where you want straight runs for plumbing, wider kitchen counters, and tidy storage. Gable or shed roofs are fast to frame and friendly for solar, so if you’re dreaming of independence, a compact off grid solar kit and a long, south-facing wall can be a perfect pairing. Rectangular rooms also make permits and additions simpler, so you can start small and grow as time and budget allow. If you’re seasoning your log rounds on site, a log end sealer helps tame checking and keeps your finished walls crisp and clean. With cordwood building, it’s all about small smart moves that add up to a durable, natural home.
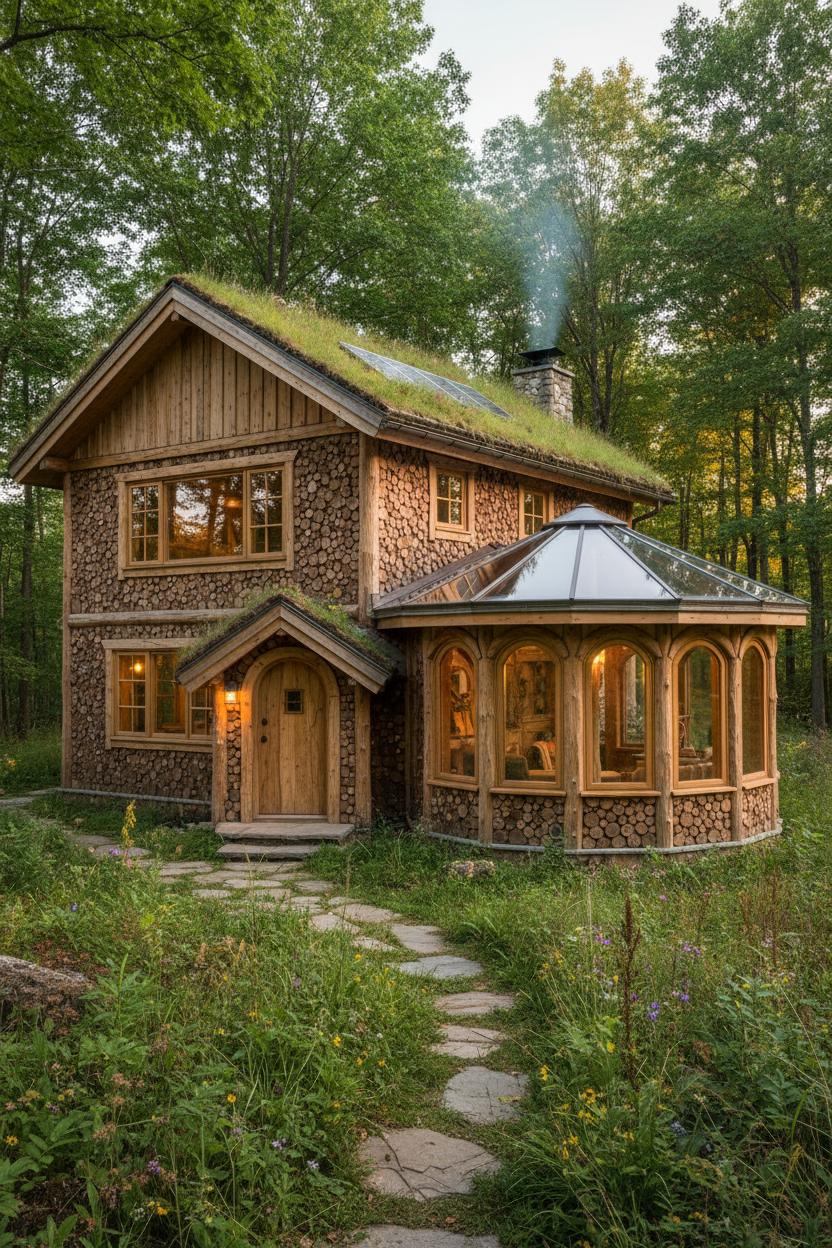
Hybrid floor plans blend the best of both worlds: a rectangular great room and kitchen for function, with a rounded nook for a reading den, nursery, or meditation space. Think curvy entry vestibules, turret-style studies, or a round sunroom stitched to a simple bedroom wing. This style lets you play with light, views, and circulation, while keeping rooflines mostly manageable. Just sketch the junctions thoughtfully—transitions between straight and curved walls need clean detailing and consistent insulation. A little extra planning, a well-thumbed cordwood masonry book, and the right natural building tools will carry you through. Whichever shape you choose, let the floor plan hold your rituals—morning coffee, muddy boots by the door, winter soups simmering—so your cordwood building becomes a truly lived-in, love-worn sanctuary.
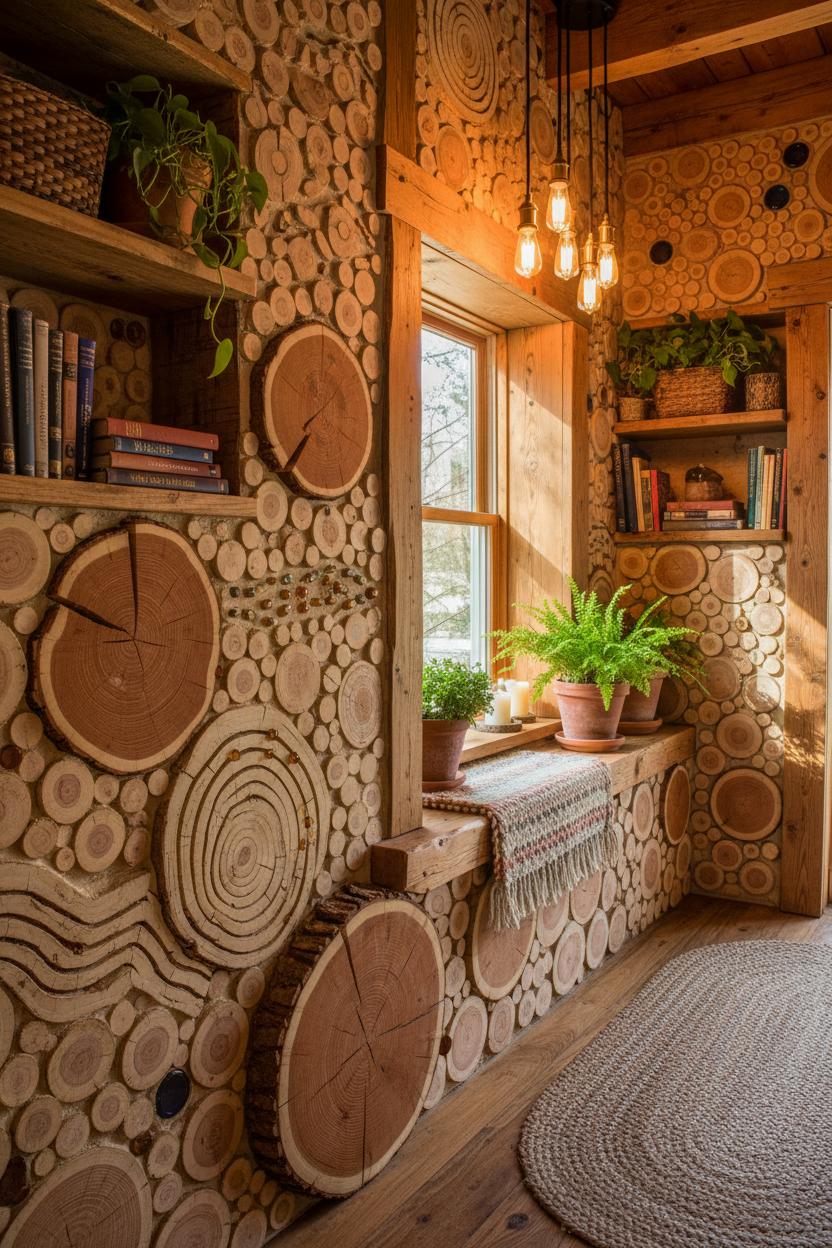
Start with the log ends themselves—their pattern is your signature. In a cordwood building, rounds of varying diameters create movement: larger logs anchor the wall while smaller “buttons” fill in like confetti. Try swirling rosettes around a focal piece, weave waves that mimic topographic lines, or cluster pale aspen beside cinnamon-toned cedar for a sunset fade. Slivers and cookies can frame a window like a mosaic, and a few colored bottle ends turn sunlight into quiet stained glass. If you’re sketching ideas, flip through a cordwood masonry book for layouts and spacing tricks, then play with cardboard circles on the floor before you set a single round. A quick coat of log end sealer keeps the wood’s tones rich and reduces checking, and a small kit of natural building tools—mallet, margin trowel, level—makes the artsy part much easier in a DIY cabin.
Color sets the mood almost as much as pattern. Mortar isn’t just gray; tint it buttery cream for a cottage feel, sandy beige for beachy warmth, or warm taupe to echo aged barnwood. A mortar mixer helps you keep color consistent batch after batch, especially on big walls where slight shifts can show. Layer tone-on-tone: honey pine rounds against oat-colored mortar, or mocha-hued hardwoods with clay-tinted joints. Tuck in river stones or amber glass for sparkle. Inside, echo those hues with wool throws, clay pots, and linen curtains so your sustainable home feels cohesive from wall to sofa.
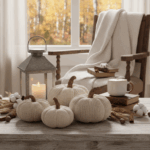
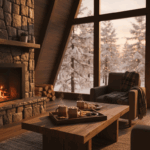
For truly inviting interiors, lean into texture and light. The rounded log faces love soft, raking illumination—pendants with warm bulbs, candle clusters on deep sills, and a small off grid solar kit for gentle, reliable evening glow if you’re tucked away. Build in chunky window seats to showcase the wall thickness, add plank shelves between posts, and scatter braided rugs to soften acoustics. Keep furnishings simple so the cordwood house remains the star, then add plants to bring in fresh greens against all that honeyed wood. A natural home thrives on tactile comfort: baskets, wool, pottery, and a few well-loved books. When pattern, color, and cozy layers harmonize, your cordwood building doesn’t just look warm—it feels like it was always meant to be lived in.

When you’re dreaming up a cozy cordwood house, start with materials that feel like they belong to your landscape. Local wood is more than a budget win—it’s a storytelling choice. Cedar, larch, tamarack, pine, and spruce all make lovely log ends; just peel, sticker-stack, and season them under cover until they’re dry and light in the hand. Cut to your wall thickness (often 12–16 inches), and brush on a log end sealer to minimize checking while they cure. Sourcing from nearby mills or storm-felled trees keeps your cordwood building grounded in place and cuts transport emissions—so your natural home literally becomes a map of your surroundings. If you’re new, a trusted cordwood masonry book is gold for species tips and ratios, especially for a first-time DIY cabin.
Lime is the quiet hero in cordwood work. Unlike hard, brittle cement, a lime-rich mortar stays flexible, salt-white, and breathable, letting your walls manage moisture naturally. Mix clean sand with hydrated or natural hydraulic lime and a little fine sawdust for body—aim for something like thick frosting. A small mortar mixer saves time if you’re building solo, and a few favorite natural building tools (tuck pointer, margin trowel, jointing tool) make the work smoother and prettier. As you butter each log round and press it into place, lime’s gentle chemistry protects the wood, wicks damp, and develops a graceful patina over time. It’s the secret to that soft, organic look that makes a sustainable home feel alive.
For the insulation core between log ends, think fluffy and plant-based. Lightly tamped sawdust, hemp hurd, or cellulose pairs beautifully with lime—just dust it with a little borax or lime to discourage critters. Perlite works too if you want something mineral and mold-resistant. You’re aiming for a balance: the thermal mass of the log ends stores sun-warmth, while the insulation cradles it, keeping your rooms even through shoulder seasons. If you’re leaning off-grid, that thermal calm pairs well with an off grid solar kit, shrinking energy peaks and valleys. With locally harvested wood, breathable lime, and simple, well-chosen insulation, your cordwood building becomes a timeless, tactile sanctuary—handmade, handsome, and deeply in tune with the way you want your natural home to feel.
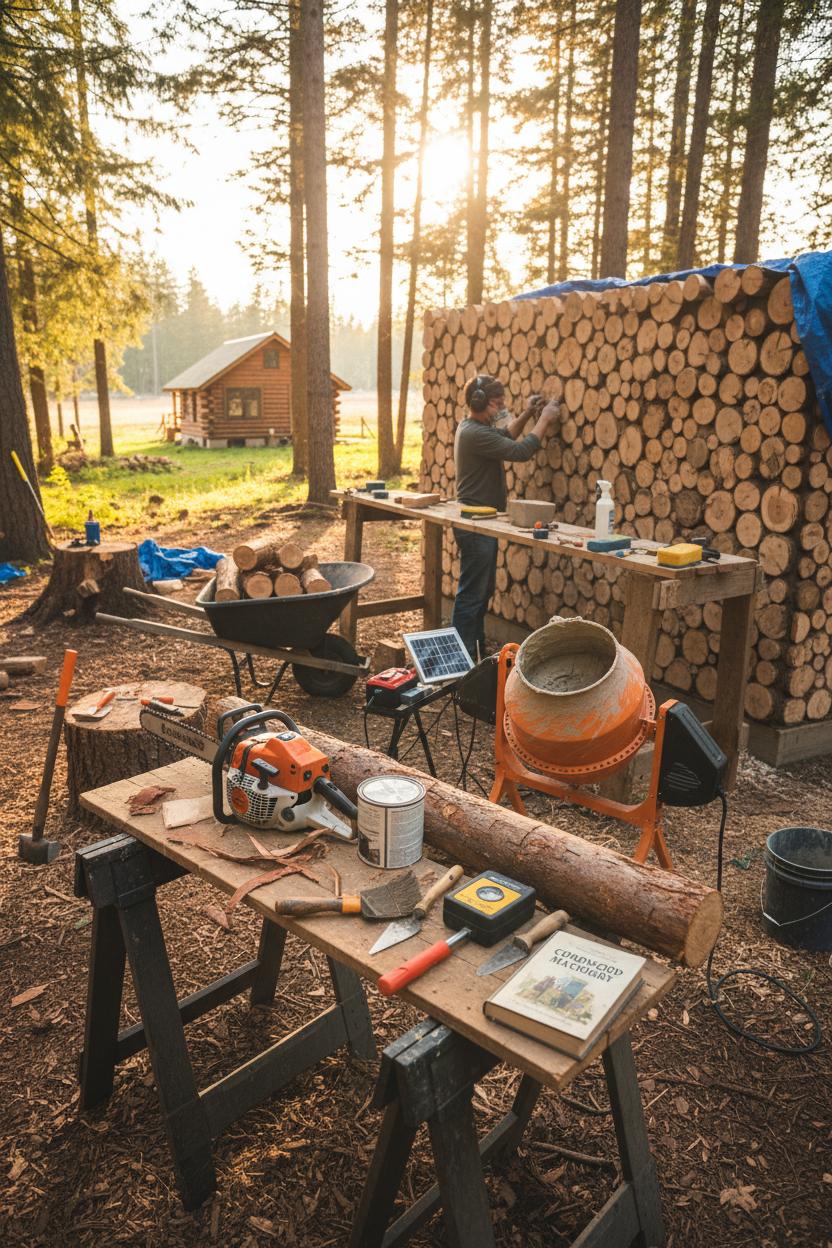
Before you lay the first log round, set up a simple, well-loved toolkit that makes cordwood building feel like a relaxed weekend craft instead of a wrestling match. A sharp chainsaw or miter saw trims log ends to even lengths, while a drawknife or debarking spud peels bark cleanly for tidy, breathable walls in your future cordwood house. Keep a moisture meter handy to make sure those pieces are dry and ready, then brush on a log end sealer so checks stay minimal and your patterns look crisp. A couple of sturdy sawhorses, a splitting maul, buckets, a wheelbarrow, and a few faithful trowels round out the basics. I like to keep a dog-eared cordwood masonry book nearby for mix ratios and pattern inspiration; it’s like a friendly mentor perched on the sawhorse, nudging you toward small, smart choices that add up to a truly cozy, natural home.
The unsung hero of a smooth build is a reliable mortar mixer. A compact electric mortar mixer (those 3.5–4 cu ft models are perfect) turns out consistent batches so your joints cure evenly and your wall gains strength course by course. Aim for a creamy, peanut-butter texture whether your recipe leans on sharp sand, hydrated lime, and a touch of Portland, or a more natural blend with sawdust or cellulose. Set a rhythm: load the mixer, spread mortar with a margin trowel, tap pieces into place with a rubber mallet, check level and plumb, then tidy joints with a pointing tool and a soft brush. A spray bottle and sponge keep faces clean; a tarp over fresh work shields it from hot sun or surprise showers. Clean the mixer at day’s end and it will love you back for many walls to come.
If your DIY cabin dreams are off-grid, an off grid solar kit can quietly power the mixer and site lights while you work to the sound of breezes instead of a generator. Safety glasses, hearing protection, and a lime-rated respirator are must-have natural building tools you’ll reach for daily. With simple scaffolding, a few lengths of rebar for reinforcement, and a small kit that fits in a couple of totes, you can stack beauty and insulation into a sustainable home, one satisfying, mortared log end at a time.

Those beautiful polka-dot log ends are the heart of a cordwood house, but they’re also the most vulnerable part of the wall. End grain acts like thousands of tiny straws, sipping up moisture, swelling with rain, shrinking with sun, and eventually checking and cracking. A quality log end sealer is the simple, quiet hero that keeps all that at bay—like lip balm for your walls. It slows rapid moisture exchange, blocks UV, helps prevent fungus stains, and keeps little checks from turning into big splits that can telegraph through the mortar. In cordwood building, that means tighter joints, fewer drafts, and a longer-lasting, cozier natural home. It also preserves the warm honey tones and patterns you picked those rounds for in the first place, so your DIY cabin stays photo-ready through every season.
Look for a thick, purpose-made log end sealer—clear or softly amber, low-VOC, with UV resistance—so you protect the wood without plasticizing it or hiding the grain. The ideal time to apply is right after you cut your rounds (within hours if you can), and then again once the wall is stacked and cured so the exposed ends are fully dressed for the weather. Work on clean, dry wood in the shade; brush or roll a generous coat over the entire end grain, edge to bark, paying special attention to visible checks. Two light coats are better than one gloopy one. Wipe drips off the mortar while it’s fresh. Then make it a habit to inspect each spring and after the first hard freeze—south- and west-facing walls may want a refresh every couple of years. Skip this step, and freeze–thaw cycles can pump water into the wall, invite decay, and create insect highways. Do it right, and your sustainable home keeps its integrity and charm.
Practical DIY tip: set up a little “finish station” next to your mortar mixer so you can seal as you go—bucket, chip brush, rags, and a pair of trusty natural building tools. If you’re building a weekend retreat or a full-time off-grid life, pair good sealing with smart details like deep roof overhangs, high stem walls, and even an off grid solar kit to power the site. For deeper how-tos, a well-thumbed cordwood masonry book is gold, but day to day, a dependable log end sealer is the quiet MVP that lets you spend more time styling your cordwood building and less time repairing it.
Think of moisture control as giving your cordwood house great boots and a wide-brimmed hat. Start with a foundation that stays high, dry, and happy: raise the first course 12–18 inches above finished grade, use a rubble trench or well-drained stem wall with a solid capillary break (membrane plus sill gasket), and slope soil away from the walls. Gutters with long downspout extensions and a simple French drain keep splash-back from soaking the logs, while porch decks and gravel skirts tame raindrop bounce. Then comes the “hat”: generous eaves—24 to 36 inches, with gable-end returns—cast deep shade and shed water away from the walls. A crisp drip edge, proper flashing over window/door heads, and careful roof-to-wall transitions do more for a natural home than any fancy finish. If you’re planning panels, pre-map your roof penetrations so your off grid solar kit doesn’t compromise those watertight lines.
Thermal comfort in cordwood building is all about a smart balance of insulation and breathability. The wood rounds bring gentle thermal mass; the core insulation—think sawdust-lime, perlite, or cellulose—brings the R-value. Pack the core firmly but keep it vapor-open, and avoid plastic films that trap moisture; instead, lean on lime or clay plasters that create a continuous, breathable air seal from the inside. At the mortar-to-wood interface, pre-wet, “butter” the ends, and strike tight joints to limit air leaks. Around window and door bucks, add compressible gaskets and taped flashing for a clean air barrier. Seal every penetration—plumbing, wires, stove pipes—with high-temp boots and flexible sealants, then finish with a limewash outside and a smooth interior plaster that quietly boosts airtightness. A dab of log end sealer on exposed faces helps tame checking and stains. For pace and consistency, a humble mortar mixer and a few favorite natural building tools turn weekend muddling into crisp, confidence-building work. If you’re new to the craft, a well-thumbed cordwood masonry book is pure gold for mix ratios and weather-smart details. Done this way, your DIY cabin isn’t just adorable—it’s a sustainable home that stays snug through cold snaps, sheds summer heat with grace, and shrugs off storms with the calm of something built to last.
If you’re dreaming up a cordwood house on a real-world budget, think of the project like nesting dolls: start with a snug, livable core and layer on the extras as time, money, and energy allow. Many folks begin with a one-room DIY cabin or studio, then add a mudroom, a sleeping nook, or a breezeway later. Phasing your build lets you get weather-tight sooner—foundation, floor, cordwood walls, and a simple roof first—then circle back for interior finishes, built-ins, and porches when cash flow and seasons cooperate. A little planning goes a long way: sketch a long-term site plan, run utilities in oversize conduit for future add-ons, and choose window and door placements that can gracefully expand. Keep a 10–15% cushion for surprises, and time the messy parts with the climate—harvest and peel logs in the cold months, dry and stack in spring, and do wall infill during your driest stretch.
DIY vs. pro help is less a line in the sand and more a gentle gradient. Cordwood building is wonderfully hands-on, but it’s smart to hire pros for the parts where precision and permits matter: foundations, roofing, electrical, and chimney installs. You can still keep the soul of a natural home while leaning on a structural engineer to sanity-check spans or a licensed electrician to rough-in safely. Save the tactile, joyful pieces for yourself—setting log rounds, sculpting mortar, crafting sills—while a roofing crew blitzes the dried-in shell in a weekend. Renting a mortar mixer will save your shoulders, and a small set of natural building tools—a drawknife, moisture meter, and a good log end sealer—will protect your stockpile and speed your rhythm. A well-thumbed cordwood masonry book on the workbench will pay for itself in avoided do-overs.
Budget-wise, think in layers that spark delight. Invest early in a sturdy roof and high-quality windows; choose local timber and lime-sand mixes to keep your sustainable home grounded and affordable. If off-grid is on your vision board, rough-in for an off grid solar kit even if panels come later. The beauty of a cordwood building is how gracefully it grows with you—each phase another cozy chapter in a handmade life.
Paperwork isn’t the cozy part of a cordwood house, but navigating permits can actually be a creative step in telling the story of your natural home. Start by visiting your local building department early, cup of coffee energy and a friendly sketch in hand. Explain that cordwood building is typically reviewed under the “alternative materials and methods” path and bring backup: a simple binder with site plan, floor plan, sections, and a wall detail showing moisture control, insulation, and how the roof ties into the walls. Include references—a well-regarded cordwood masonry book, photos of proven projects in your climate, and any workshop certificates. Officials appreciate clarity; the more you show you’ve thought about structure, weather, and durability, the smoother things go.
Expect questions about zoning (setbacks, height, occupancy), foundation depth in your frost zone, and roof design for snow, wind, or seismic loads. Energy code is a biggie: be ready to demonstrate how your wall assembly meets performance requirements—many builders combine cordwood with a well-insulated center cavity and air-sealed plaster to satisfy R-value or U-factor paths. Moisture management matters too: big eaves, capillary breaks at the foundation, and breathable finishes help you make a durable, sustainable home. Some jurisdictions may ask for an engineer’s letter on roof spans, lateral bracing, or wall capacity; that’s not a roadblock—just plan for it. If you’re dreaming of an off-grid lifestyle, electrical and solar often need their own permits; bring basic specs for your off grid solar kit, along with plumbing/septic or composting toilet details. Even a tiny DIY cabin can trigger permits depending on utilities and use, so verify local thresholds early.
A few practical touches make inspectors smile: consistent mortar (a small mortar mixer helps on bigger pours), labeled materials, and neat jobsite organization with your natural building tools. Seal log ends that will be exposed to the weather with a compatible log end sealer, and note your fire-resistive interior finish if applicable. Use familiar code language—many people permit cordwood as “post-and-beam with cordwood infill”—and keep a running log of inspections and photos. Finally, chat with your insurer and lender before you break ground. With a little prep and an open, collaborative attitude, permits become less red tape and more roadmap—guiding your cordwood building from charming idea to approved, lived-in reality.
From rounded log-ends to sunlit mortar mosaics, these cozy ideas prove a cordwood house can be both artful and practical. Whether you’re sketching a DIY cabin, refining cordwood building techniques, or layering textures for a natural home, lean into warm woods, reclaimed finds, and soft, light-loving palettes. Think thick walls, deep window seats, and handmade details that last. Start small, source local, seal well, and celebrate imperfections. Pin your favorite nooks, sip something warm, and imagine your future sustainable home—rooted in place, rich with story, and crafted for slow, joyful living.