Physical Address
304 North Cardinal St.
Dorchester Center, MA 02124
Physical Address
304 North Cardinal St.
Dorchester Center, MA 02124
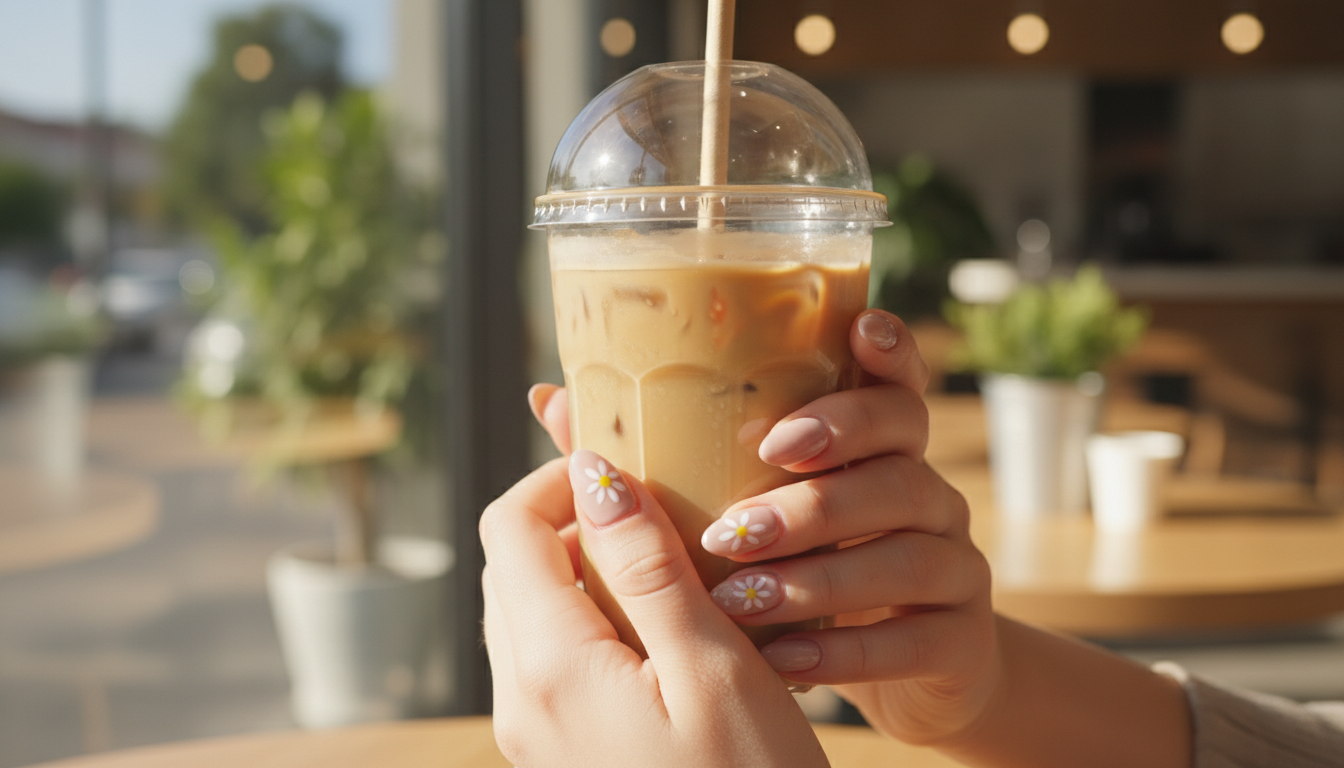
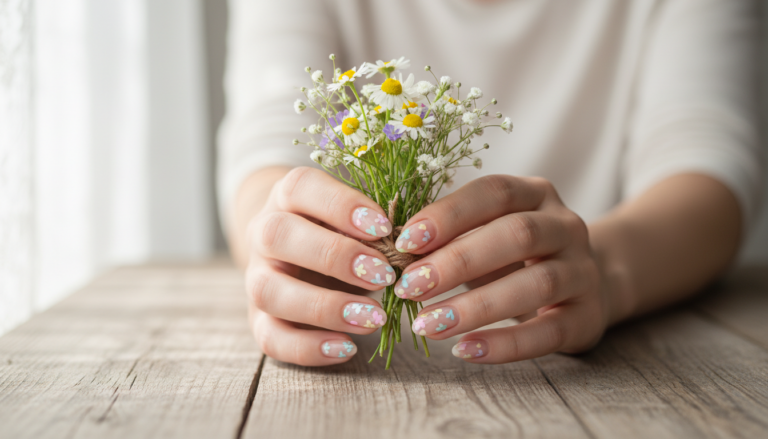
Ready to refresh your spring manicure? These delicate floral nail art ideas bloom with daisy nails, rose nail art, and whimsical flower nail designs you can DIY at home. Whether you love soft pastels or glossy neutrals, we’ll show you how to get petal-perfect results using nail art brushes, dotting tools, a gel polish set, and a UV LED nail lamp—plus easy floral nail stickers for instant charm. Pin now and let your fingertips blossom!
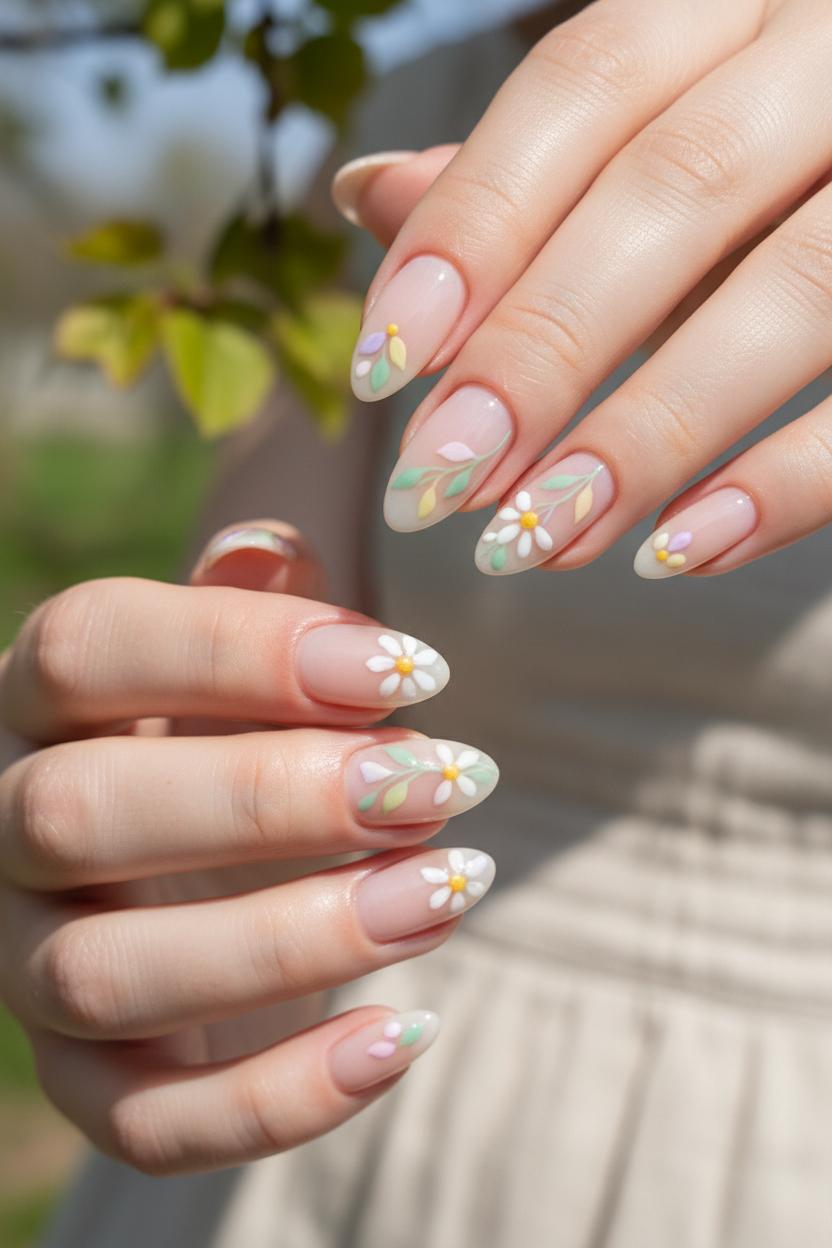
When the weather finally softens and the light feels a little sweeter, a fresh spring manicure becomes the perfect mood lift—especially with delicate floral nail art that looks like you gathered petals at golden hour. Start with a soft base that flatters your skin tone: a sheer milky pink, a whisper of lavender, or a pale pistachio from a gel polish set sets the stage for airy details. For effortless daisy nails, dot five tiny white petals around a buttery-yellow center—dotting tools make those little blooms crisp and even—and cure between layers under a UV LED nail lamp to keep everything ultra-thin and glassy. Sprinkle a few daisies across negative space or hug them along the cuticle line for that “meadow peeking through” vibe.
If you’re craving something a touch romantic, try rose nail art that feels hand sketched. Load a fine nail art brush with two shades of pink and swirl soft, comma-shaped strokes into loose rosettes; a hint of sheer white on the edges gives the petals that translucent, fresh-cut look. French tips get a spring twist when you trade the classic line for a chain of tiny buds along the smile—delicate, a little flirty, and totally wearable. For extra dimension without bulk, float a ultra-thin veil of shimmer over your flowers before sealing; it reads like morning dew on petals.
Short on time? Floral nail stickers are your secret weapon for dreamy flower nail designs with zero stress. Layer a micro-sprig near the cuticle and a single bloom off-center, then add a hand-painted stem to make sticker petals feel bespoke. A translucent jelly base makes sticker florals look like pressed flowers beneath glass—so pretty and so spring. Mix one accent nail with a petite wreath on the ring finger, keep the rest minimalist with a single stem per nail, or scatter tiny wildflowers across just two fingers for balance. Whether you go glossy or matte-satin, lock it in with a durable top coat and a final cure under your lamp. With the right tools—dotting tools, nail art brushes, and a patient, light touch—you’ll have a bouquet at your fingertips that lasts right through the season.
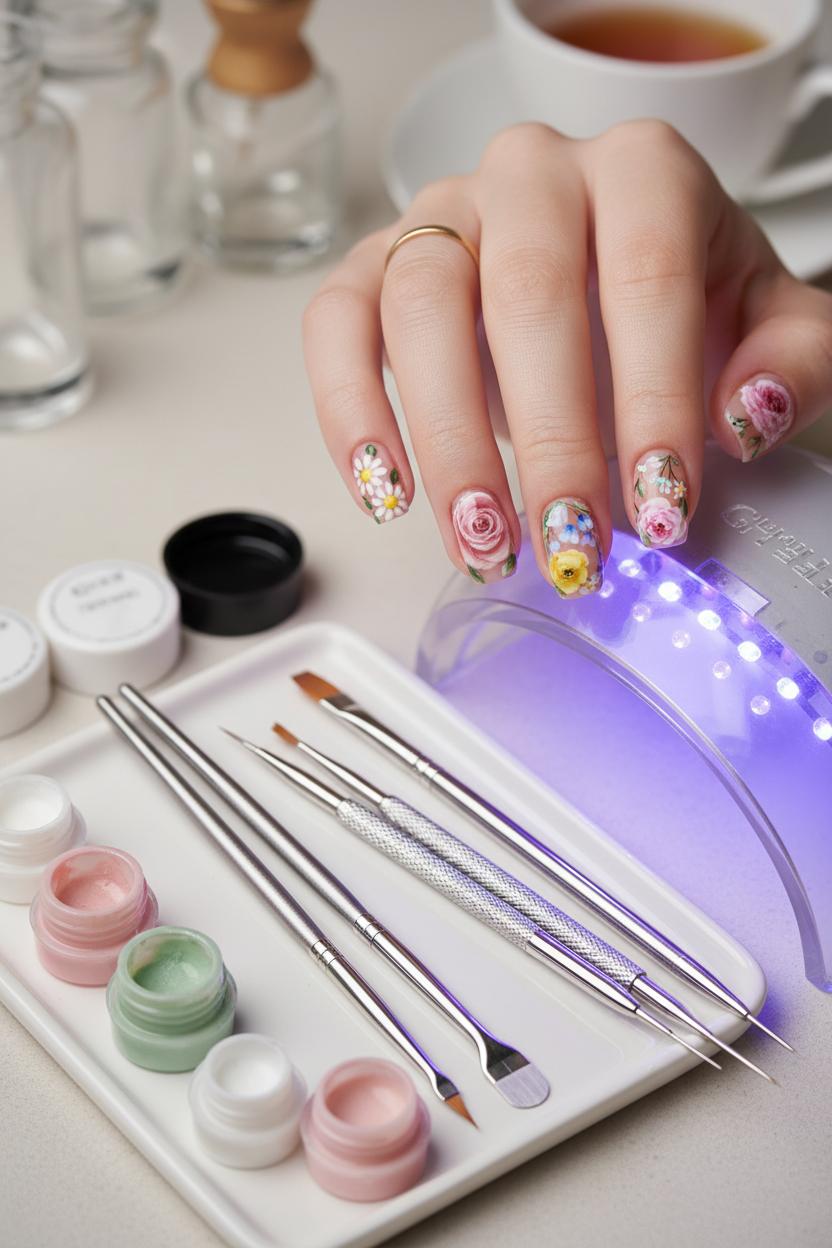
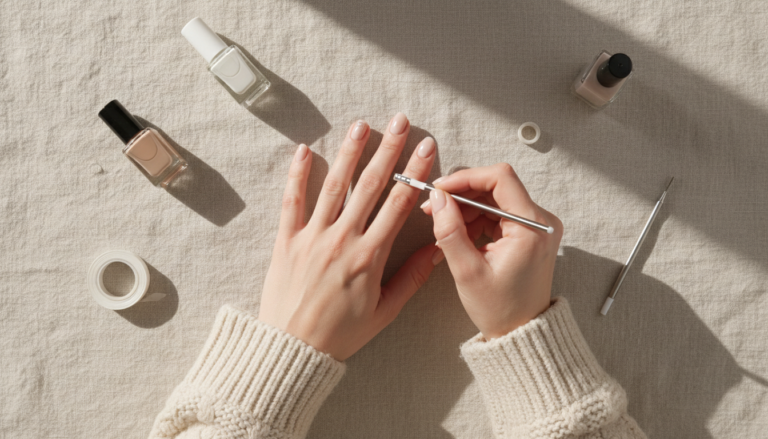
Before you paint a single petal, gather a few essentials that turn cute ideas into crisp, dreamy details. A good set of nail art brushes is your secret sauce for floral nail art: a slim liner for vine-like stems, an ultra-fine detailer for tiny petals and leaves, and a small flat brush for soft, painterly shading. Pair them with dotting tools to stamp perfect pollen centers, miniature buds, or delicate clusters that bring flower nail designs to life. If you’re working with gels, choose a gel polish set in a garden of shades—milky whites, blush pinks, leafy greens, sunny yellows—so you can mix tones for depth without the streaks. Keep a little palette or tile on hand for color mixing, plus alcohol or cleanser to wipe your brush between shades so your petals stay crisp instead of muddy. This simple toolkit makes sketching daisies, ranunculus, and tiny wildflowers feel approachable, even if you’re new to detail work.
For staying power and that glossy, fresh-picked finish, cure as you go under a UV LED nail lamp. Flash-curing thin layers helps lock in each stroke so your petals don’t smudge while you add leaves or line work, and it’s especially helpful for daisy nails where those white dots need to stay super round. If you’re craving rose nail art with softly curled edges, cure your base petals first, then layer a touch of translucent color for depth, sealing each step. Not in the mood to freehand? Tuck floral nail stickers into your kit—press them onto a smooth, cured surface and frame them with a few painted leaves for a custom-meets-effortless vibe. Finish your spring manicure with a glossy or soft-touch top coat to protect your bouquet and bring out the dimension. A little care—thin layers, clean tools, and patient curing—goes a long way, and with the right brushes, dotters, gels, and lamp, your fingertips will look like a tiny garden in bloom.
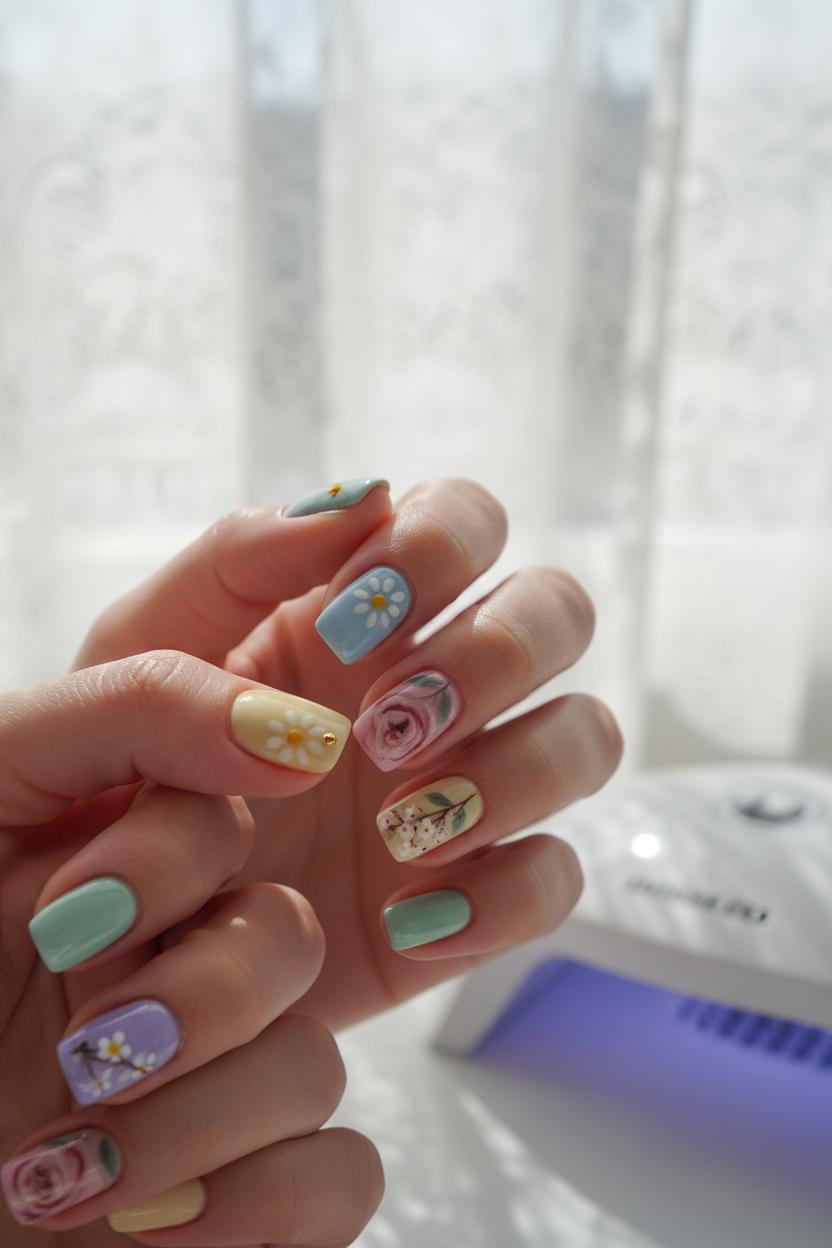
Think of pastels as the soft-focus filter for your fingertips—the dreamy backdrop that lets every petal and leaf sing. Start by shopping your gel polish set for a palette of whispery shades: buttercream yellow, powdery blue, marshmallow pink, mint milkshake, and a lavender haze. Prep with a careful base coat, then float on two thin, even layers of your chosen color, curing between coats under a UV LED nail lamp for that glassy, cushiony finish that makes a spring manicure feel extra fresh. Mix and match across both hands, or keep it tonal—five versions of pink is a mood—then decide where you want your florals to bloom. Pastels instantly soften the look of your fingertips and make even the tiniest blossoms pop without ever feeling busy.
Once your bases are set, it’s time for floral nail art that’s sweet but not saccharine. For effortless daisy nails, dip dotting tools into white and tap out five tiny petals around a butter-yellow center on a sky-blue or mint base; the contrast is delicate yet graphic. If you’re craving something a touch romantic, try rose nail art with ultra-fine nail art brushes: sketch a few wispy crescents in dusty rose and blush to suggest petals, then add muted sage stems and the faintest hint of shading. Layering sheer jelly pastels over opaque bases gives depth, like watercolor on porcelain. Not into freehand? Floral nail stickers make it unbelievably easy—press a miniature sprig on a ring finger, scatter petite blossoms over a French tip, or cluster tiny buds near the cuticle for a “growing from the base” effect. These flower nail designs look intentional when you repeat colors from your base to your blooms.
Seal it all with a glossy top coat for candy-shell shine, or choose a milky, semi-sheer topper to blur edges for that soft, photographed-through-lace vibe. A micro–gold accent at the center of a daisy or a whisper of negative space at the sidewall adds just enough modernity. Finish with cuticle oil so everything looks dewy and garden-fresh. With a reliable gel polish set, a couple of nail art brushes, dotting tools, and a patient cure under your UV LED nail lamp, you’ve built the prettiest pastel canvas for spring—ready for blossoms, vines, and every delicate detail that makes floral nail art feel alive.
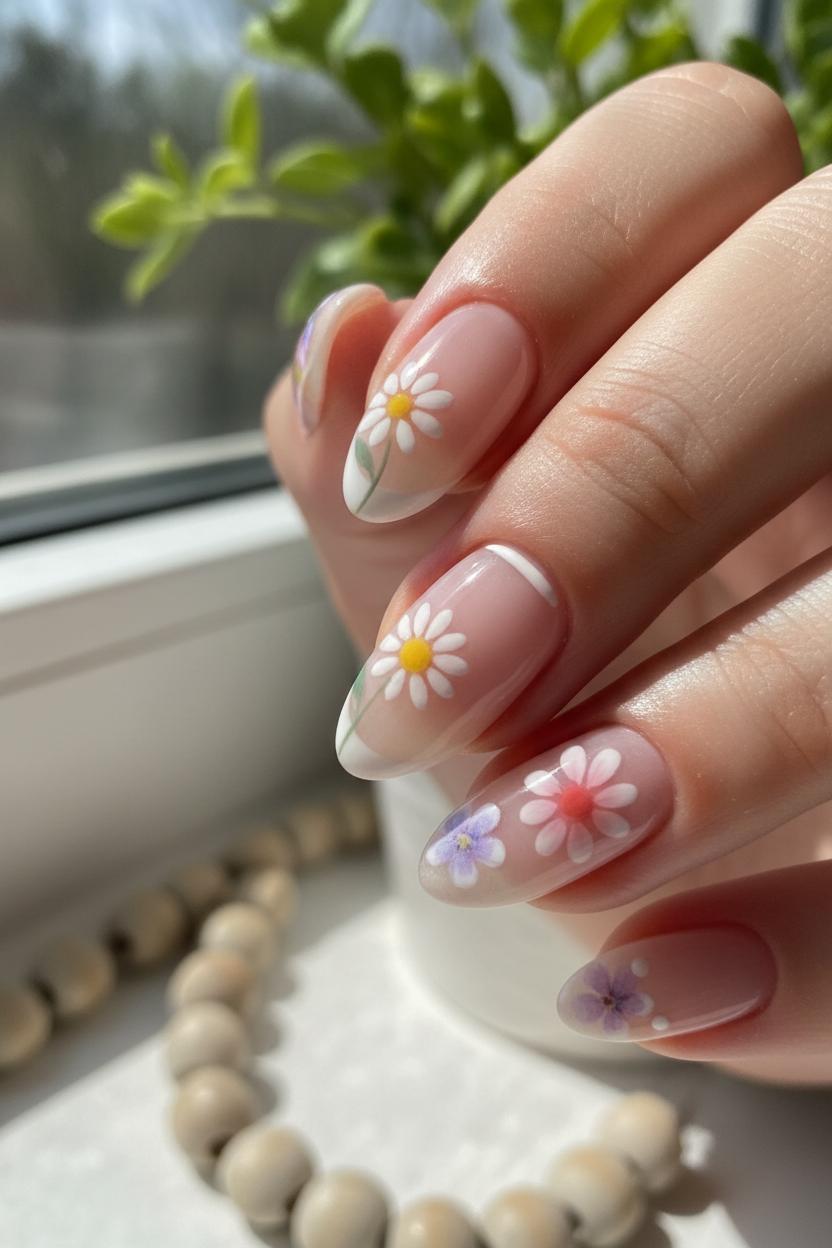
If your heart leans minimalist but you still want that sweet, fresh pop of spring, daisy nails are the prettiest compromise. Think sheer, milky bases with crisp white petals and a tiny honey-yellow center—like a field of wildflowers pared down to its chicest essence. Start with a soft nude or transparent pink from your favorite gel polish set and cure under a UV LED nail lamp for a smooth, glassy canvas. Then grab your dotting tools: use a small tip to place one dot of yellow where you want each bloom to sit, then five petite white dots around it for petals. Press lightly and let the polish settle; the dots soften into perfect petals all on their own. For a balanced, minimalist look, cluster one or two daisies near the cuticle or offset them along the sidewall, leaving plenty of negative space so the design feels airy and grown-up.
I like to mix petal sizes for movement—one tiny daisy near the cuticle, a slightly larger one drifting toward the tip—and sometimes add a micro French line to tie everything together. If you want a little more detail, a fine nail art brush can sketch the faintest sage-green stem or a single leaf under one bloom, still keeping the look clean. Seal your flower nail designs with a thin, glossy topcoat (or matte for a modern twist) so the dots stay plump and defined. If freehand isn’t your thing, layer a few floral nail stickers with your dotted daisies; the contrast of printed florals and hand-placed petals feels intentional and chic.
This floral nail art idea is effortless to customize for any spring manicure palette: swap the classic white for buttery cream, blush, or even pastel lilac petals, and try a soft coral or gold center for warmth. Keep the daisies as a full set, or pair them with one accent nail of rose nail art for a sweet bouquet vibe without overwhelming the eye. However you style them, dotted petals are the easiest way to get crisp, symmetrical blooms—no art degree required, just a couple of dotting tools, a steady hand, and the promise of sunnier days ahead.
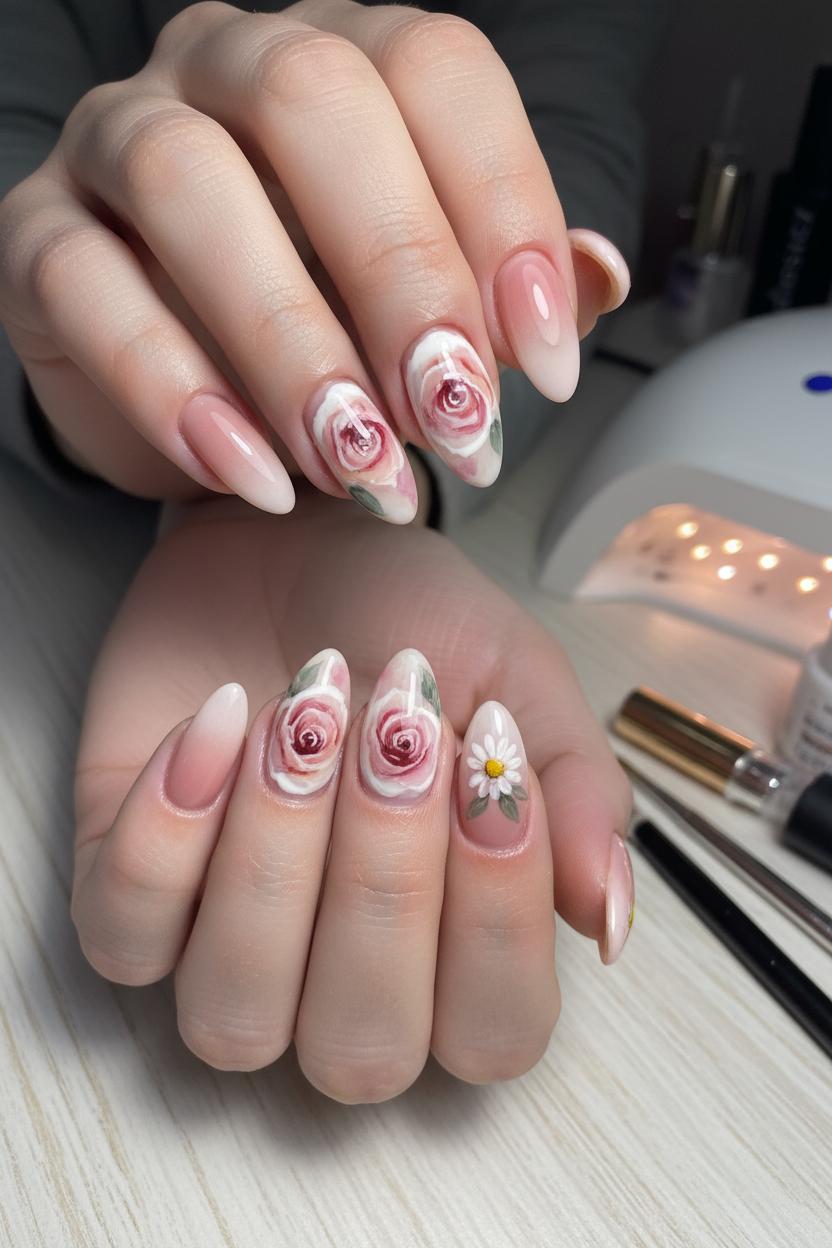
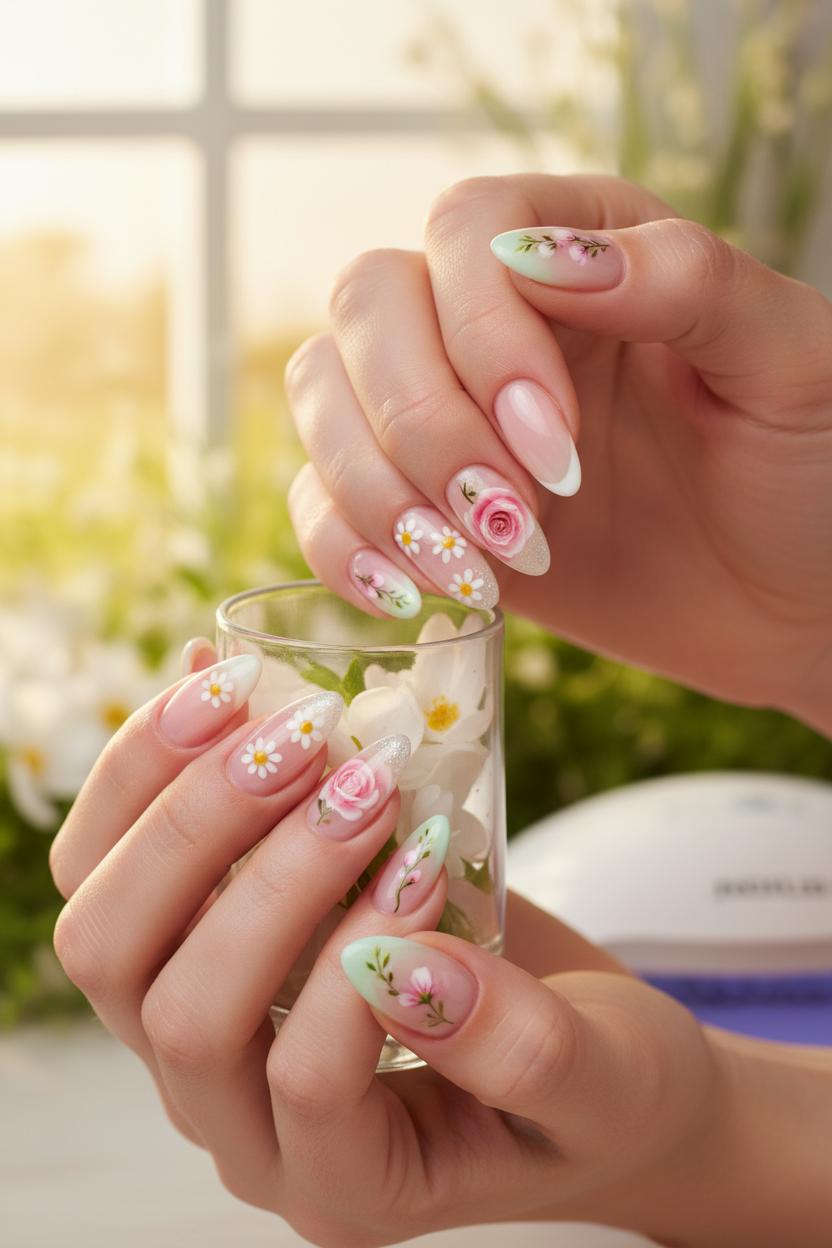
Think petal-soft pinks and barely-there nudes that melt together like watercolor—soft rose nail art is the calm, romantic heart of a spring manicure. Start with a sheer nude or milky blush base to blur the nail line and give everything that hazy, tea-rose glow. Then, using your thinnest nail art brushes, paint loose, whispery petals in layers of ballet-slipper pink, dusty rose, and a touch of warm nude, letting each shade peek through the next. A tiny swirl of the deepest rose at the center and a halo of milky white around the edges makes the blooms look dimensional without feeling heavy. If freehand feels intimidating, sketch petals with the tiniest amount of polish on the brush tip—light pressure, short strokes, and lots of breathing room are the secret to airy, flattering flowers.
For extra softness, try a blush-to-nude ombré on a couple of nails and place a single, slightly off-center bloom so it looks like it landed there naturally. A micro-French in petal pink is a chic partner to fuller flowers, and a single leaf in muted sage keeps the palette grounded. Want a little sparkle? Kiss the center of one rose with the faintest tap of rose-gold foil, then seal everything with a high-shine top coat so the petals look dewy. If you’re working with a gel polish set, cure each delicate layer under a UV LED nail lamp as you go to preserve that gossamer softness. Dotting tools are great for creating tiny rosebuds, and you can even sneak in a single daisy accent—daisy nails next to roses feel like a wildflower moment and still read as refined.
This look is beginner-friendly, too. If you’re new to floral nail art, mix a couple of hand-painted roses with floral nail stickers on accent nails for balance and speed. Many flower nail designs become heavy fast, so keep negative space, stick to a tight blush-and-nude palette, and let the roses breathe. A soft-matte top coat turns the petals into velvet; gloss makes them look glassy and fresh—both are dreamy for rose nail art. Gather your nail art brushes, a versatile gel polish set, dotting tools for the tiniest buds, and your UV LED nail lamp, and you’ve got everything you need to wear spring on your fingertips.
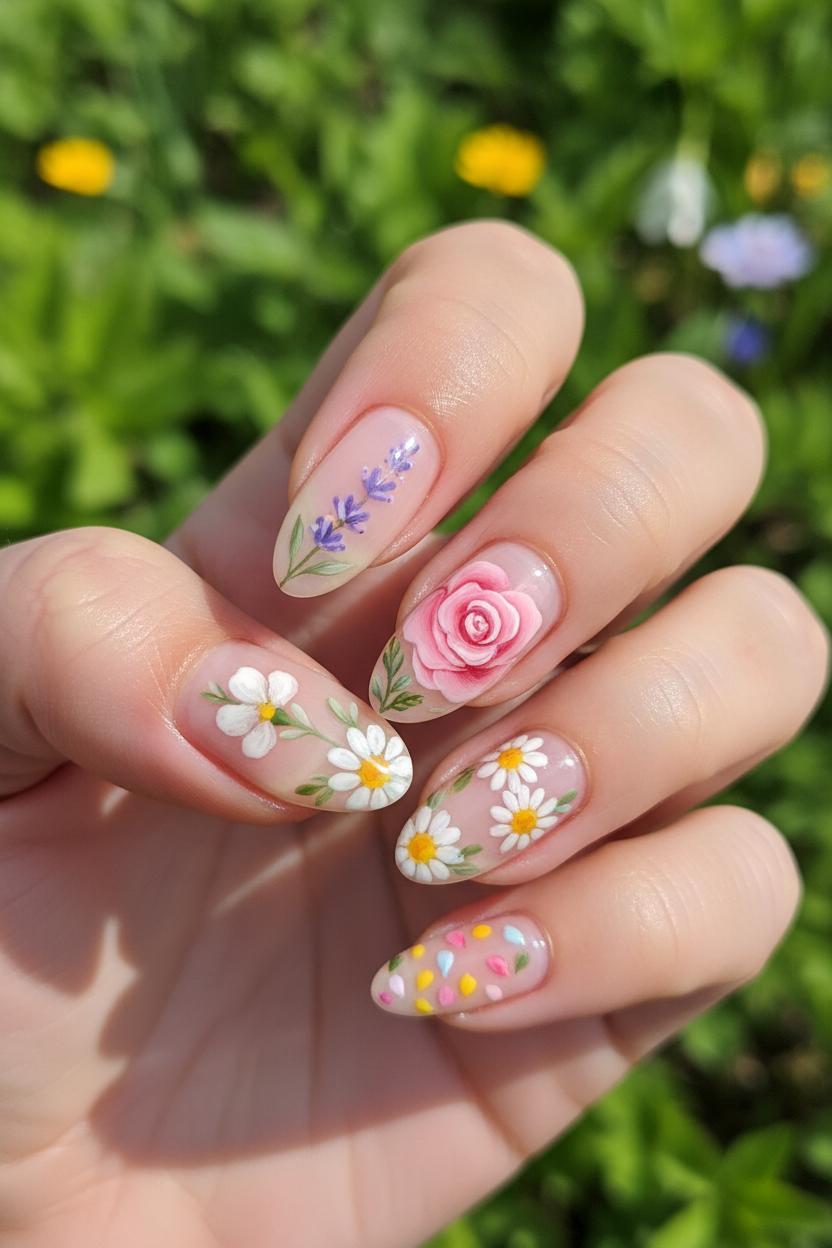
Think of this look as a tiny meadow on your fingertips—soft, airy, and effortlessly mixed. Start with a whisper-light base, like a sheer milky pink or a pastel wash from your favorite gel polish set, then cure under a UV LED nail lamp for a smooth canvas. From there, scatter a variety of blooms across different nails so nothing feels too matchy: a single sprig here, a petite bud there, and the occasional full bloom for drama. The magic of this spring manicure is in the mix of scale and color—buttery yellows, petal pinks, and lavender haze—so your nails read like a breezy wildflower bouquet rather than a uniform print.
If you’re a beginner, keep it playful and stress-free. Floral nail stickers are a quick win and look surprisingly hand-painted when you layer a few on a sheer base and top with a glossy seal. For the sweetest daisy nails, try dotting tools: place five tiny white dots in a circle and tap a sunny yellow center—done. You can cluster a couple of daisies on one feature nail and leave the rest soft and minimal for balance. Another easy trick is to float tiny petals along a diagonal tip or around the cuticle for a delicate, windswept effect without drawing full flowers.
Ready to level up? Grab your nail art brushes and sketch fine stems, micro leaves, and petite blossoms in a mix of shades for dimension. Add wispy lavender sprigs or paint one statement nail with rose nail art, softly shading the petals with two tones for a lifelike curl. A negative-space bloom peeking from a corner is chic and modern, while a micro French tipped with scattered petals feels fresh but wearable. Seal everything with a thin, glossy topcoat so the layers of your floral nail art look dewy and cohesive. However you mix it—stickers, hand-painted details, or a blend of both—these flower nail designs come together like a curated garden, perfectly imperfect and ready to twirl through the season.
When you want that just-picked-from-the-garden vibe without spending an afternoon painting petals, floral nail stickers are the sweetest shortcut. Start with a fresh base from your favorite gel polish set—think milky sheer, soft blush, sage, or a whisper of lilac—and cure under a UV LED nail lamp if you’re working with gel. A smooth canvas makes all the difference, so prep with a gentle buff and a glossy base coat. Peel your stickers with care and float them onto the nail, letting them land where a real bloom would naturally fall: a tiny sprig at the cuticle, a single blossom kissing the tip, or a meandering cluster across one accent nail. Press the edges down firmly so there are no sneaky air bubbles, and if you’re mixing sizes, layer the larger florals first and tuck the tiny buds around them to create that effortless meadow effect.
Now the fun styling: for daisy nails, scatter a few petite white blooms across a pale sky-blue base, then use dotting tools to add buttery-yellow centers so they feel extra lively. Want rose nail art with zero stress? Place one delicate rose at the sidewall of each nail and leave negative space for a modern, airy look, or pair a single rosebud with a whisper-thin micro-French drawn using fine nail art brushes. You can even elevate simple flower nail designs by adding hand‑painted stems, teeny leaves, or a constellation of dew‑drop dots around your stickers. Seal everything with a generous top coat—two thin layers if you want glassy smoothness—and cure between coats for long wear. Whether you’re dressing up one accent nail or building a full bouquet, this quick floral nail art trick turns a basic spring manicure into something dreamy and polished in minutes. Keep a sheet of floral nail stickers in your kit and you’ll always have a garden at your fingertips—no steady hand required.
If you love the look of petals but crave a clean, barely-there finish, negative-space floral nail art is the sweet spot: it lets your natural nail peek through so everything feels light, breathable, and effortlessly polished. Imagine whisper-thin blossoms drifting across a milky wash or clear base—just enough detail to say spring without shouting it. For a fresh twist on classic flower nail designs, cluster a few tiny blooms at the cuticle like they’re sprouting from the nail bed, then let the rest of the plate stay airy and open. Think soft pistachio leaves, buttercream centers, and petal tips in lavender or ballet pink; mix a few daisy nails that look hand-picked from a meadow with a single stem of rose nail art trailing along a sidewall. The result is a delicate, gallery-worthy spring manicure that feels as weightless as a linen dress.
To recreate this look at home, start with clean, shaped nails and a whisper of sheer nude from your favorite gel polish set. Cure under a UV LED nail lamp for a glassy, long-wear base. Using fine nail art brushes, paint slim, petal-like strokes, keeping plenty of negative space between them so the design can breathe. Dotting tools are perfect for tiny daisy centers; keep the dots petite and slightly irregular so they feel organic. For a quicker route, layer a few floral nail stickers near the cuticle or along the edges, trimming to fit so the flowers seem to “fade out” into bare nail. Seal everything with a glossy top coat for dew-drop shine or go matte for a soft, pressed-flower effect. This minimal placement grows out gracefully, too—ideal if you want your floral nail art to last through a few weeks of spring plans.
Play with proportion and placement: a negative-space French with micro daisies tracing the smile line is super chic, while a single vine of rosebuds curling along one accent nail adds romance without bulk. Mix a couple of tiny blooms on each hand, leave the thumbs mostly bare, and sprinkle a micro gold dot in one or two centers for a subtle twinkle. The key is restraint—just a handful of petals and plenty of airy space—so your spring manicure feels fresh, modern, and softly botanical.
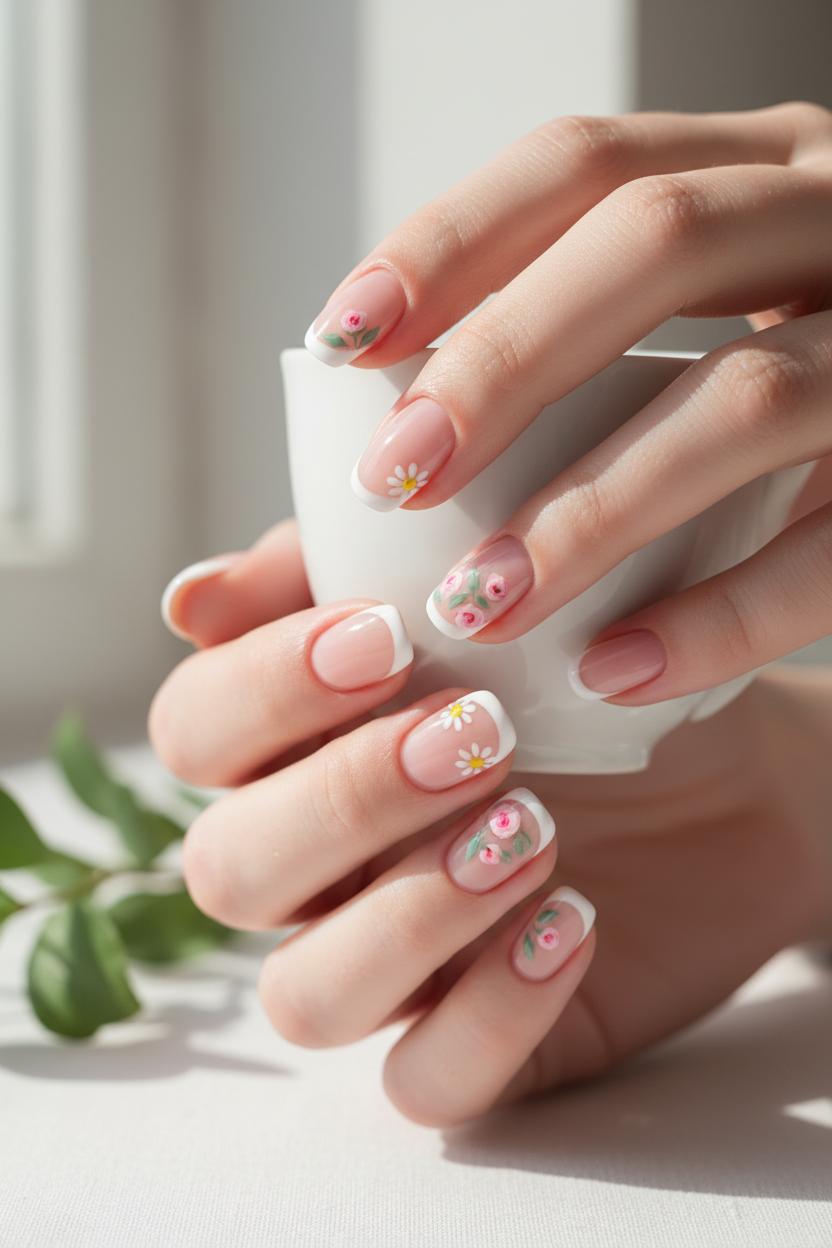
Think of floral French tips as the minimalist’s answer to blooms: airy, sheer bases that let your natural nail peek through, with a whisper-thin smile line dotted by tiny petals. It’s the kind of floral nail art that feels effortless—elegant enough for a wedding guest look, yet soft for everyday. Start with a milky or blush wash so the nail looks like chiffon; then trace a slim white tip and nestle petite blossoms right along the curve. You can go full-on daisy nails with teeny white petals and buttery centers for a fresh meadow vibe, or keep it romantic with rose nail art—little pink “comma” strokes that read as rosebuds—with a hint of sage leaves. The result is polished, modern, and incredibly wearable, turning classic French into one of those flower nail designs you’ll screenshot for every spring manicure mood board.
DIY-ing? A gel polish set with a sheer nude, soft white, petal pink, and leafy green keeps the palette cohesive. Lay down two thin coats of your sheer shade, curing each under a UV LED nail lamp. Sketch your French tip, then reach for fine nail art brushes to paint petals; use dotting tools for perfect daisy centers and micro-buds. For extra precision (or if freehand isn’t your thing), press on floral nail stickers just along the smile line and seal them in—no one will know. Try variations: cluster blossoms on one side for an asymmetrical tip, layer a double French with a delicate vine between, or give just the ring fingers a rosebud accent while the rest wear clean tips. A single gold micro-stud or a glint of foil at each flower center adds that Pinterest-pretty sparkle without taking over. Finish with a glossy top coat for glassy depth, or go soft-touch matte for a petal-like finish. Either way, these floral French tips are the kind of quiet, detailed beauty that makes your hands look instantly groomed, proof that a few thoughtfully placed flowers can transform a staple French into something sweet, chic, and completely spring.
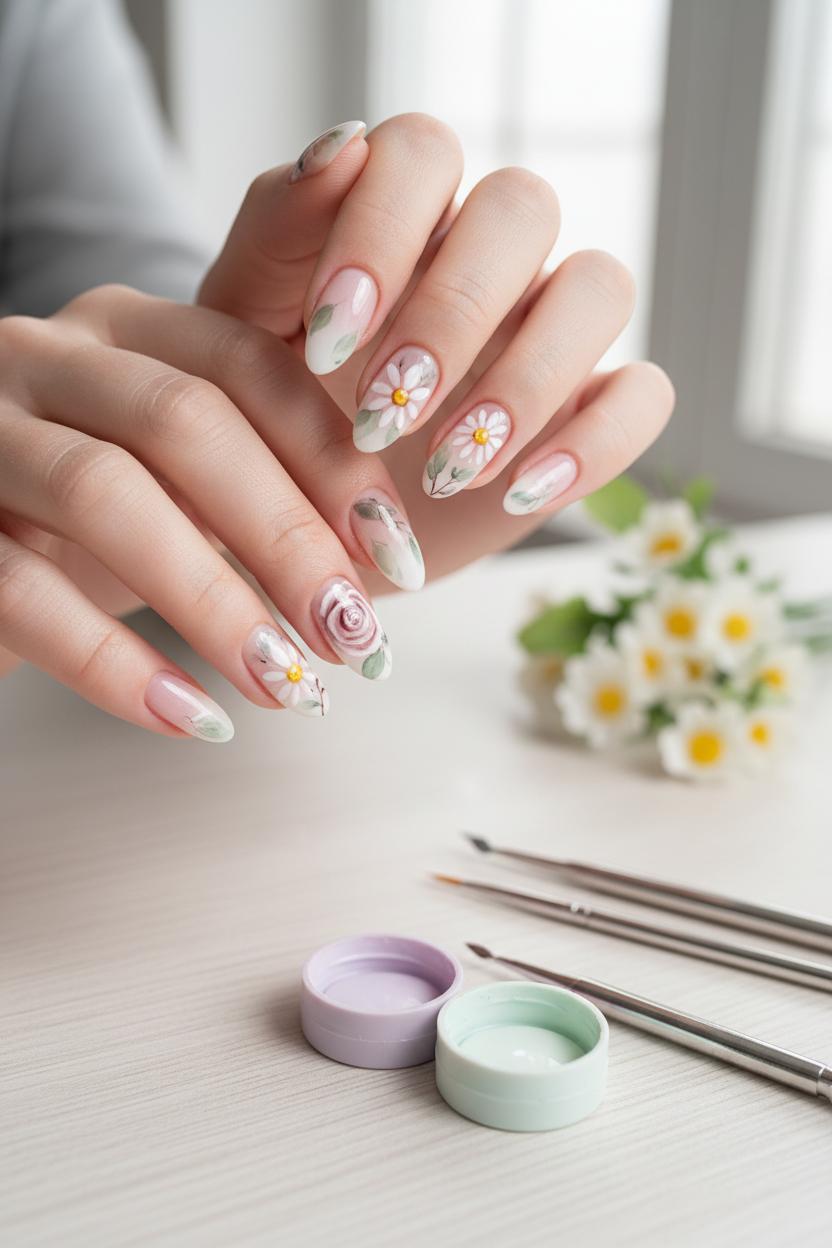
Think of watercolor blooms as the soft-focus filter of floral nail art: hazy petals, dreamy color transitions, and just enough detail to feel hand-painted and special. Start with a sheer, milky base for that airy canvas and cure it under a UV LED nail lamp. On a palette, mix a drop of color from your gel polish set with a little clear top coat or cleanser alcohol to sheer it out. Using fine nail art brushes—a skinny liner and a tiny round—float translucent petal shapes onto the nail, letting the edges feather like real watercolor. Flash cure as you go so each petal keeps its soft outline. The effect is gorgeously forgiving, perfect for a beginner-friendly spring manicure that still looks boutique-level.
For daisy nails, sketch five or six wispy teardrop petals radiating from the center, then tap in a sunny dot with dotting tools and brighten it with a tiny highlight. For rose nail art, start with a whispery spiral in blush or mauve, then layer loose C-shaped strokes around it, each slightly darker and closer together toward the middle; blur the outer edges with a damp brush for that romantic fade. Keep layering thin washes, curing between steps, until your flower nail designs feel full and petal-kissed. A touch of sage or eucalyptus leaves painted in the same sheer style pulls everything together. Seal with a glossy top coat and give it a final cure for that glassy, salon shine.
Color-wise, think petal-soft pinks, buttercup yellow, lilac, and a hint of cocoa or mushroom for subtle outlines. If hand-painting makes you nervous, place a few petite floral nail stickers as anchors, then watercolor around them to blend and elevate the look—no one will guess your secret. A compact gel polish set with pastels, a couple of detail-ready nail art brushes, and a dual-ended set of dotting tools are all you need for endless variations. Leave a bit of negative space at the cuticle for a modern twist, or cluster tiny blooms on just two accent nails to keep the look airy and wearable all week. It’s the kind of floral nail art that feels like soft sunlight on a Sunday—effortless, fresh, and undeniably spring.

When your petals are placed and your vines look just so, the real magic is sealing everything in so that shine lasts well beyond the first latte snap. Float a thin, even layer of top coat over your floral nail art, letting the brush skim so you don’t drag through your tiny details. Think of it as glazing a pastry—gentle and glossy. Cap the free edge and sidewalls to keep chips at bay, especially on busy hands. If you’ve used a gel polish set with layered petals from nail art brushes and dotting tools, try a quick 10–15 second flash cure between detail steps so nothing shifts when you add the top coat. For extra crisp lines in rose nail art or daisy nails, wipe away any dust, then make sure each nail is perfectly dry and level before sealing.
Your UV LED nail lamp is the difference between “pretty” and “polished.” Place your hand flat in the lamp’s center so every part of the nail catches the light evenly, and cure according to your brand’s directions—most glossy, no‑wipe top coats love 30–60 seconds, while thicker coats or textured flower nail designs may appreciate 60–90. Cure thumbs separately to prevent pooling, and if you’re heat‑sensitive, pulse cure in short bursts to build up the set comfortably. Choose your finish intentionally: a glass‑like top coat makes watercolor petals glow, while a velvet‑matte layer turns rose nail art into soft‑focus botanicals. Mixing finishes is gorgeous for a spring manicure—try matte stems with glossy dew‑drop centers.
Working with dimension? If floral nail stickers, dot clusters, or raised gel petals leave slight ridges, add a thin builder layer or a second, slightly thicker top coat to encapsulate; let it self‑level for a few seconds before curing so you don’t lose your delicate contours. After the final cure, let nails cool for a minute, then wipe any inhibition layer if your top coat isn’t no‑wipe. Finish with a whisper of cuticle oil to frame that mirror shine. Keep your lamp’s surface clean and your brushes tidy, and your flower nail designs will look salon‑fresh for days—proof that with the right seal and cure, every petal and daisy dot stays perfectly in bloom.
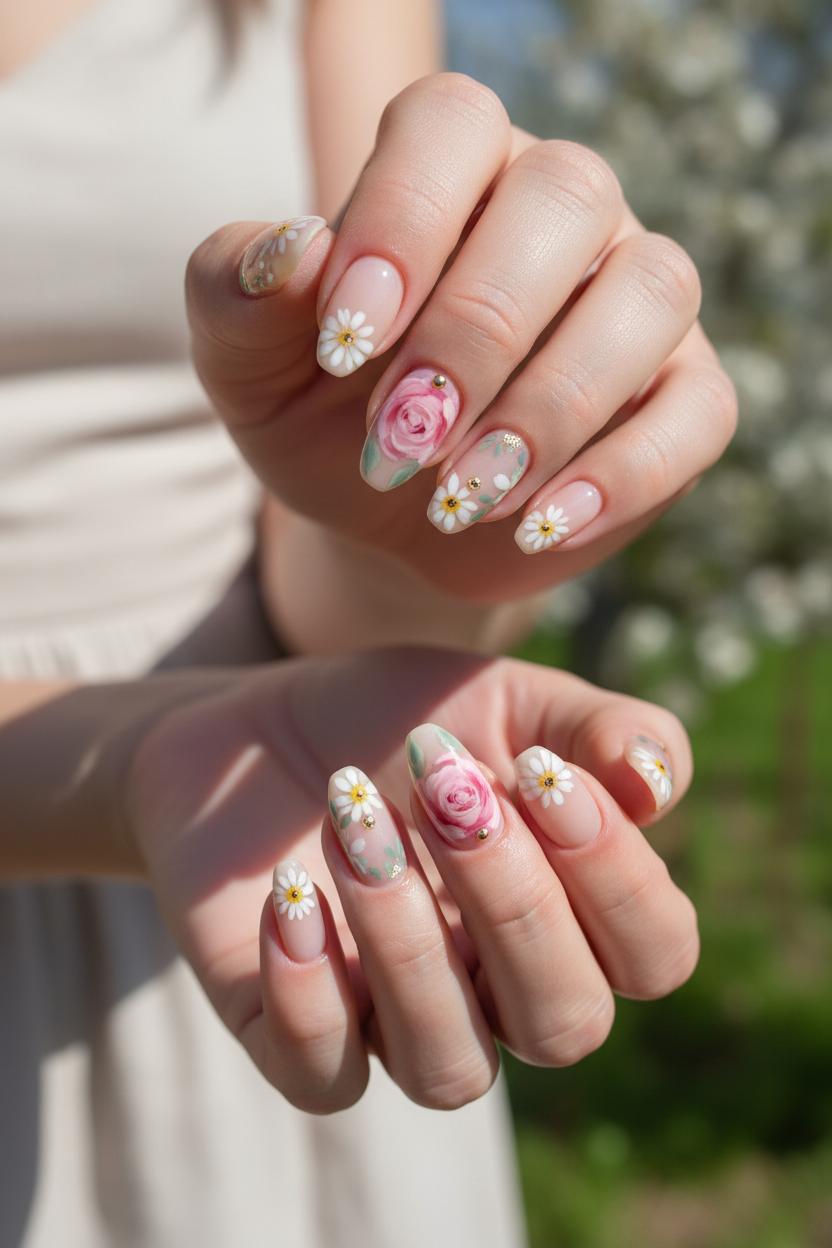
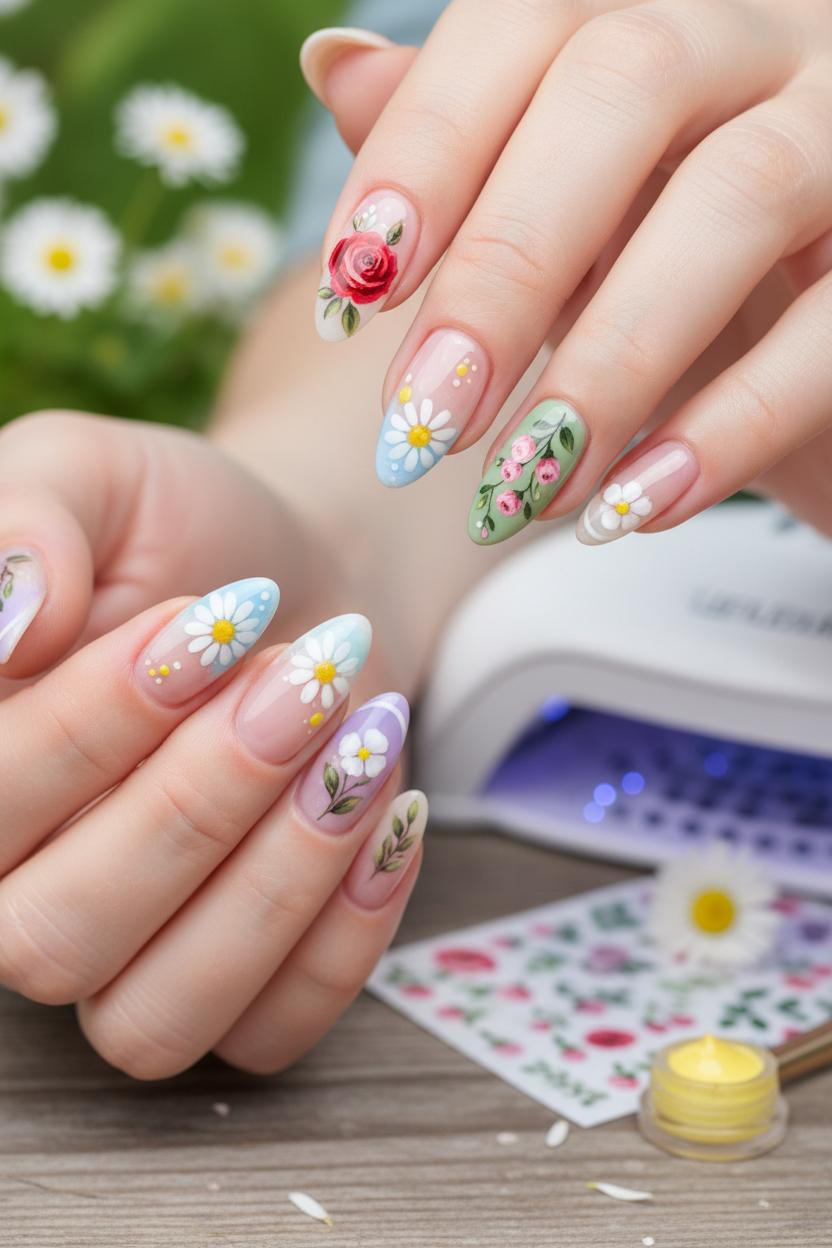
There’s something so charming about pairing airy daisies with romantic roses—like mixing a breezy Sunday picnic with a bouquet picked on the walk home. For a fresh spring manicure, try alternating daisy nails and rose nail art across your set: tiny white daisies clustered on your thumb and index, then a single painterly rose on the ring finger for a soft focal point. I love a milky sheer base with buttery yellow daisy centers and petal-pink roses, but you can also lean into dusty rose, blush, and a hint of sage for leaves. Keep it light with negative space French tips—sprinkle a few micro-daisies along the smile line—then anchor the look with one rosy accent nail. The result feels whimsical yet polished, and it plays beautifully with sundresses, denim jackets, or anything with a gentle floral print.
If you’re painting, a good gel polish set in soft pastels makes all the difference. Start with a sheer nude and cure under a UV LED nail lamp so your canvas doesn’t budge. For the daisies, dip dotting tools into a sunny yellow to tap tiny centers, then use fine nail art brushes to pull five quick white petals around each dot—imperfect petals actually look more natural. For roses, switch to a thin liner brush and two pinks: a lighter base rose and a deeper shade for definition. Paint loose, curved commas that overlap and spiral inward, adding the deeper color in the folds to suggest petals; finish with a whisper of sage leaves tucked at the edge. Cure between layers to keep the details crisp. If freehand isn’t your mood, floral nail stickers are a great shortcut—mix daisy clusters with a single rose decal and seal with a glossy top coat.
Little extras make these flower nail designs sing: a dot of micro-glitter in daisy centers, a tiny gold stud at the base of the rose, or a velvet matte top coat to give your floral nail art that soft, petal-like finish. However you style it, the mix-and-match approach keeps daisy nails playful while letting rose nail art add that romantic whisper—perfect for ushering in spring.
From airy petals to painterly blooms, these floral nail art ideas make your spring manicure feel soft, fresh, and effortlessly feminine. Whether you’re smitten with minimal daisy nails, romantic rose nail art, or whimsical flower nail designs scattered like wildflowers, let your fingertips whisper spring. Cozy up with a pastel palette, a glossy topcoat, and a cup of tea, then paint at your own pace—one tiny bloom at a time. Here’s to delicate details, longer days, and nails that feel like a pocket garden wherever you go.