Physical Address
304 North Cardinal St.
Dorchester Center, MA 02124
Physical Address
304 North Cardinal St.
Dorchester Center, MA 02124
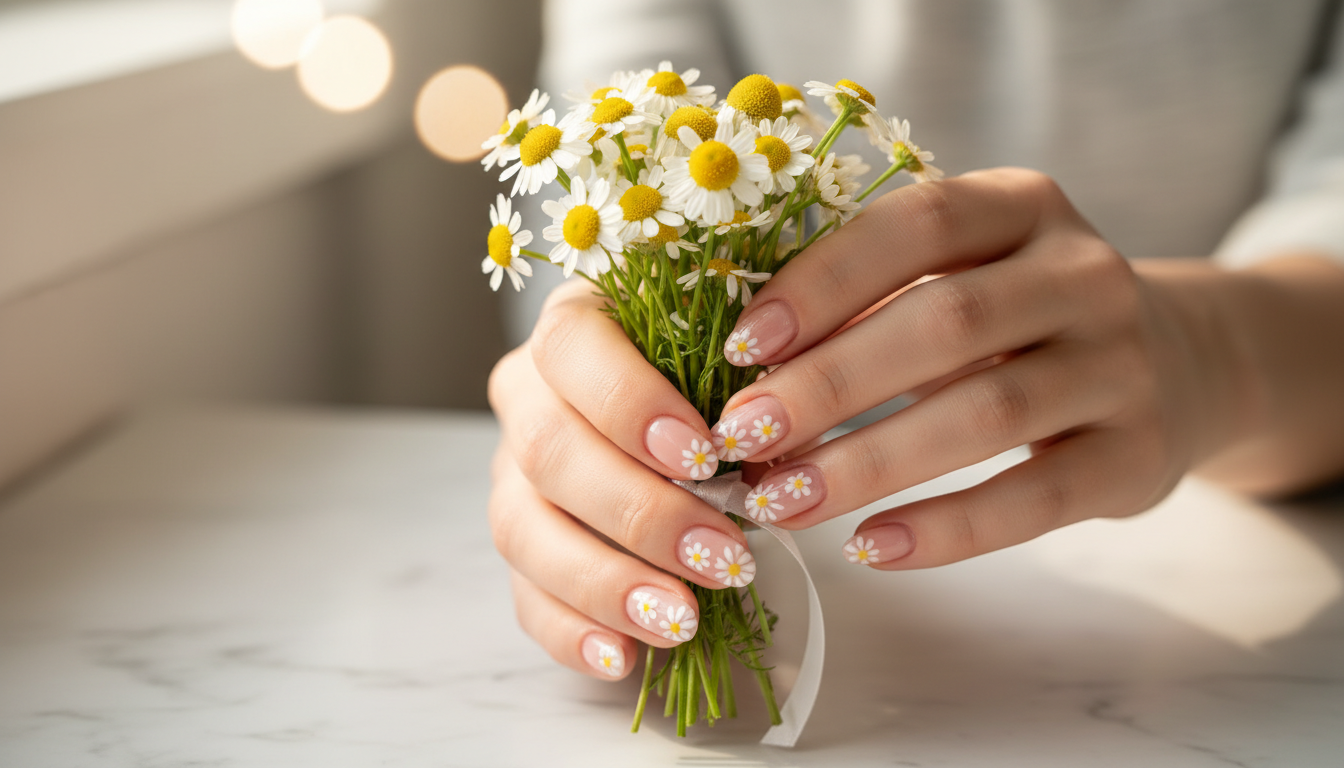
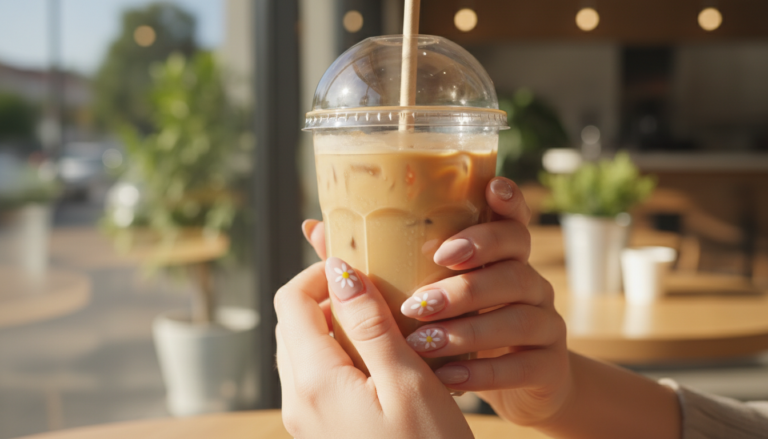
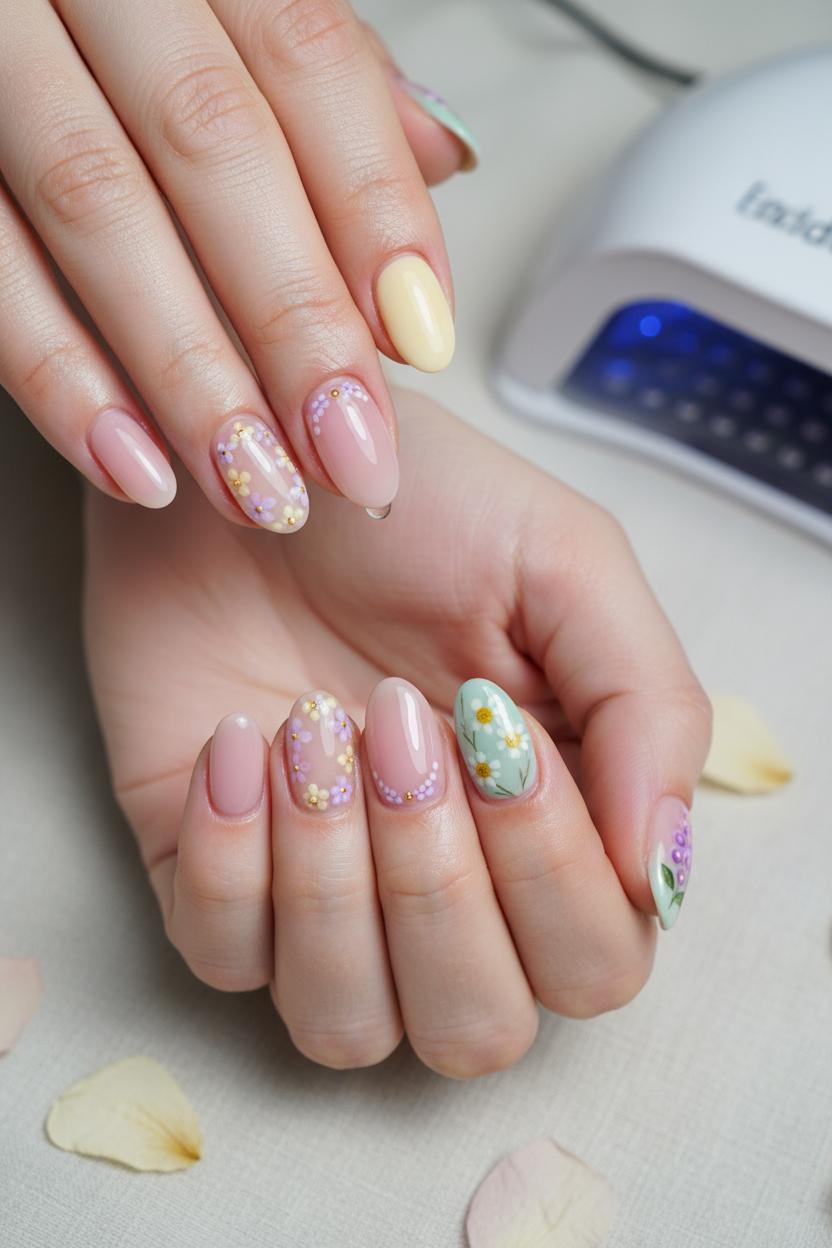
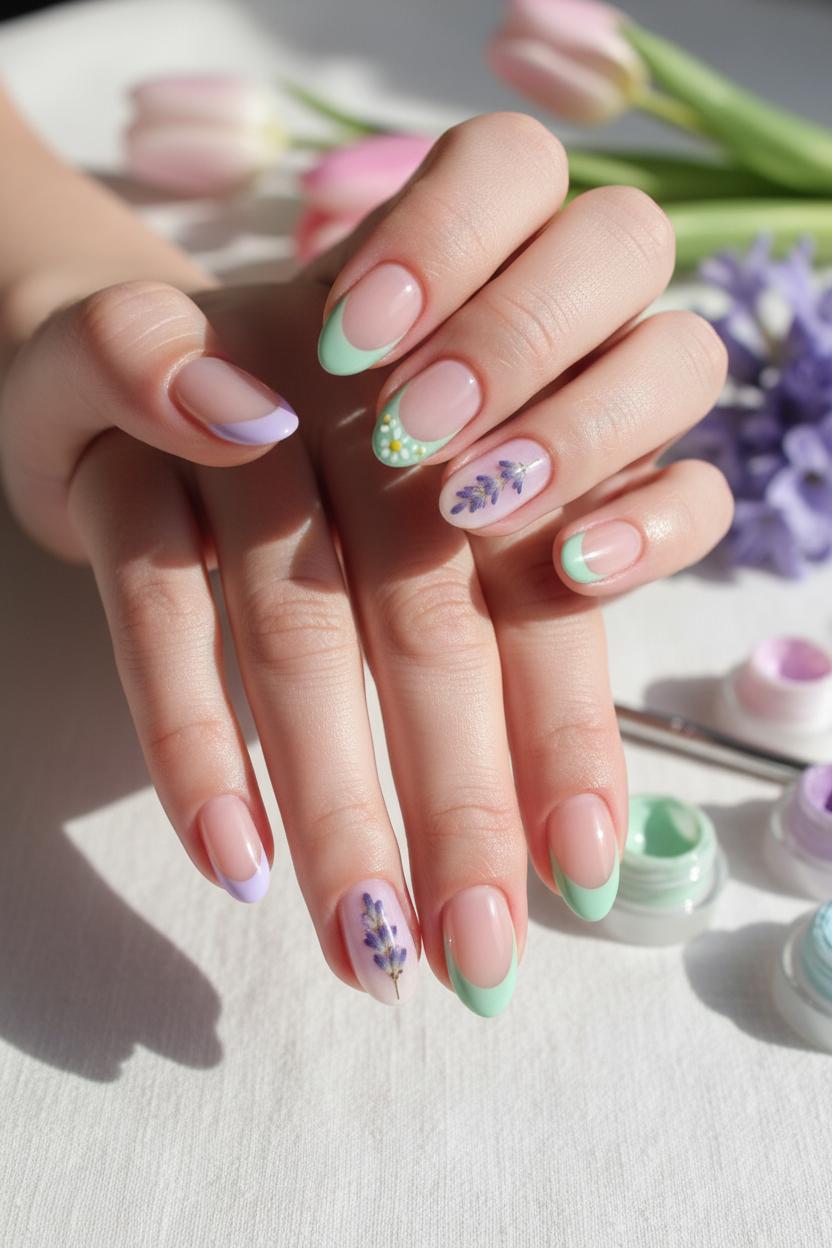
Say hello to spring with soft pastel floral gel nails that bloom on your fingertips. This guide rounds up dreamy spring nail designs and a fresh pastel manicure palette, plus easy flower nail art you can recreate at home. We’ll share gel nail ideas using a gel nail polish set, UV LED nail lamp, and nail art brushes, and show how to layer dried flower nail decals under a glossy gel top coat for salon shine. Save for inspo and get ready to flaunt your prettiest petals!
There’s something about the first warm breeze that makes a soft pastel manicure feel instantly right—like swapping heavy knits for a breezy dress. Pastel tones echo the tender greens and candy-colored blossoms popping up everywhere, and when you pair them with delicate flower nail art, you get an effortless nod to the season without going overboard. Floral gel nails strike that dreamy balance: they’re feminine yet fresh, polished yet playful, and they slip seamlessly into your everyday wardrobe. From brunches and farmers’ market strolls to wedding-guest moments, these are the spring nail designs that look as pretty with a white tee and jeans as they do with a floaty midi dress, catching the light with that signature glassy gel sheen.
Beyond their beauty, the practicality is hard to beat. Gel lasts through busy weeks and spontaneous road trips, keeping petals pristine and color soft and even. With a quality glossy gel top coat, your blooms stay chip-free and camera-ready. And if you love a DIY moment, it’s easy to re-create salon-level details at home: a coordinated gel nail polish set gives you the perfect palette of blush, lilac, butter, and sky; a compact UV LED nail lamp cures each layer fast; fine nail art brushes let you sketch dainty vines or dot tiny pistils; and dried flower nail decals add a botanical “pressed-in-time” effect in seconds. Try gel nail ideas like a milky base with a single stem accent, pastel French tips with micro-florals, or an airy ombré meadow—each little nail a miniature garden.
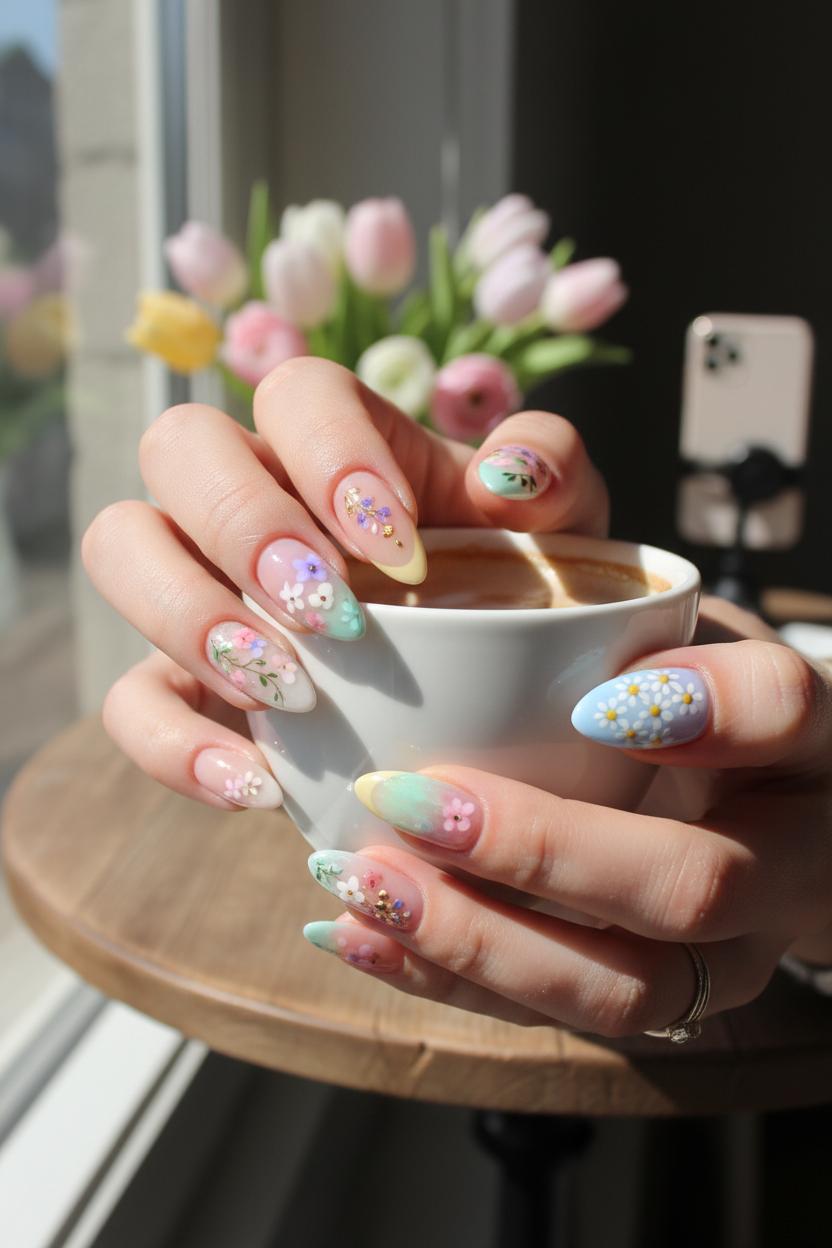
The best part is how customizable it all is. Keep it whisper-soft with translucent washes and negative space, or lean romantic with clustered blooms and gilded centers. Short squoval shapes feel chic and modern; almond tips add a soft, petal-like silhouette. However you arrange your palette, floral gel nails are a mood-lifting accessory that telegraph spring without saying a word. They’re versatile, durable, and irresistibly photogenic—the kind of spring nail designs that make every latte, bouquet, and sunlit selfie look a touch more magical.
When you’re curating a pastel manicure that actually feels like a little bouquet on your fingertips, think of your palette the way you’d gather stems at the market—soft, balanced, and just varied enough to keep the eye moving. A good gel nail polish set should cover the full bloom spectrum: a petal pink, lavender haze, buttercream yellow, mint sprig, and a sky-washed blue, with a creamy peach or apricot as your warm anchor. For floral gel nails, the magic is in undertones. Cooler skin sings with blue-leaning lilac and mint, while warmer tones love blush, buttery shades, and soft coral. Try to include at least one milky sheer for watercolor petals and one crisp white to mix a lighter tint when a shade feels too loud.
Pastels can be finicky, so look for formulas that self-level and reach smooth coverage in two thin coats—streaky creams will wilt the look. Swatch in daylight if you can; your bouquet should read cohesive, not chalky. A set that mixes jelly translucence with buttery creams gives you depth for buds and blossoms, French tips, and negative space vines. If you’re building a custom collection, aim for a 3–2 rhythm: three gentle neutrals (think porcelain pink, almond milk, powder blue) and two mood lifters (pistachio, lilac mist). That ratio makes spring nail designs feel intentional rather than candy-coated.
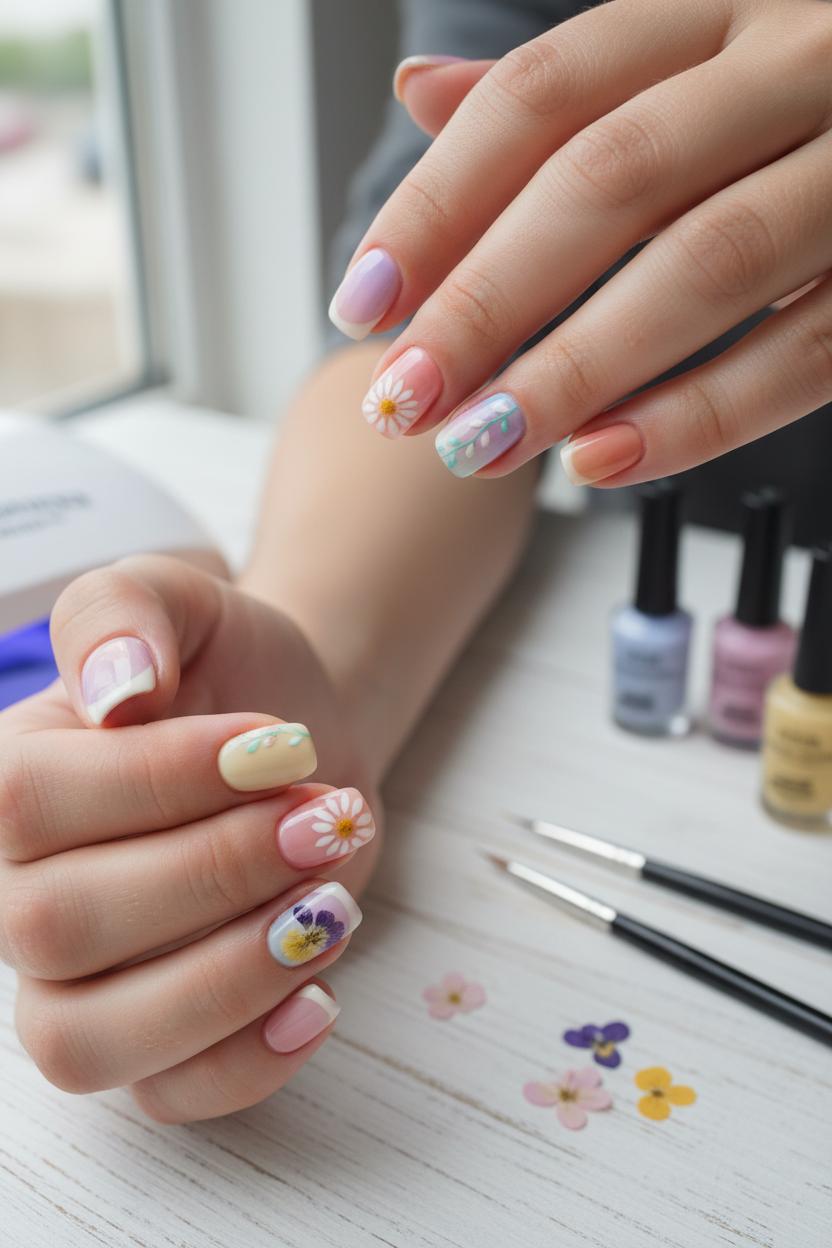
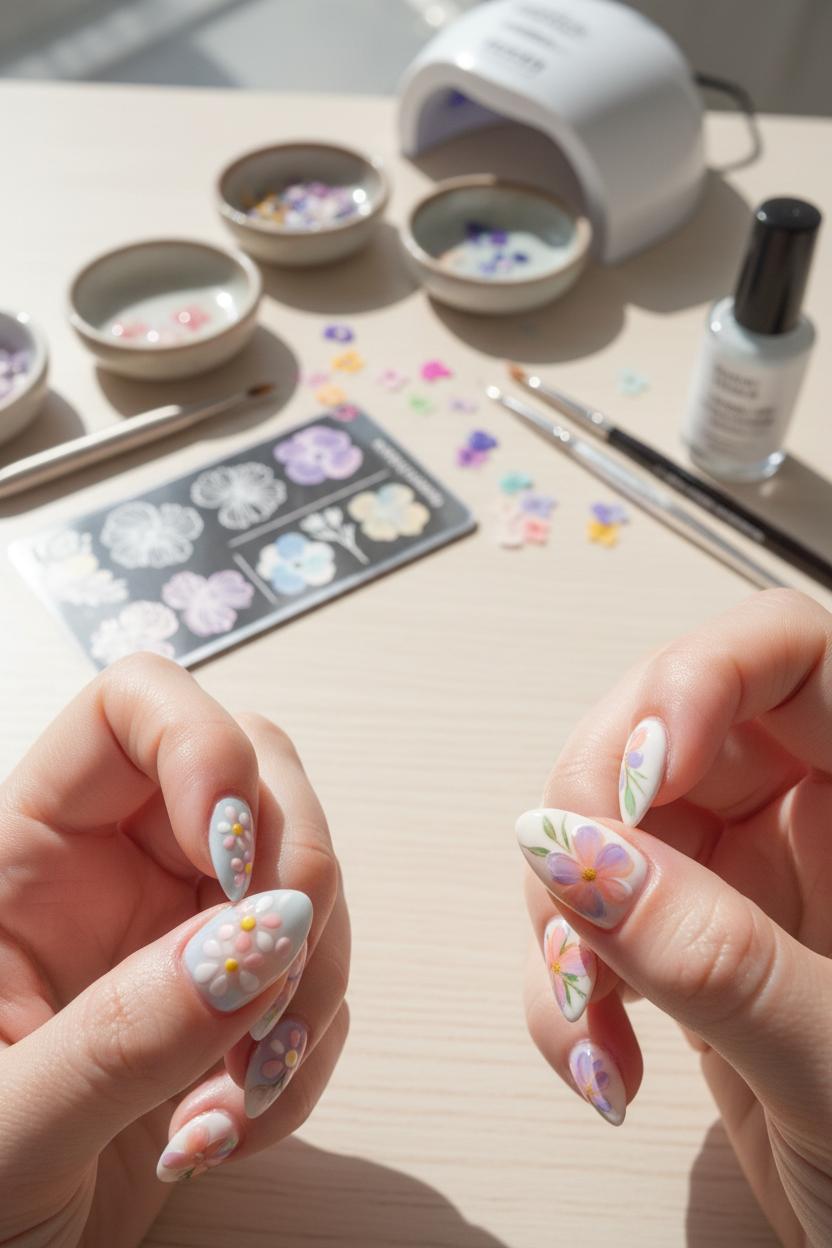
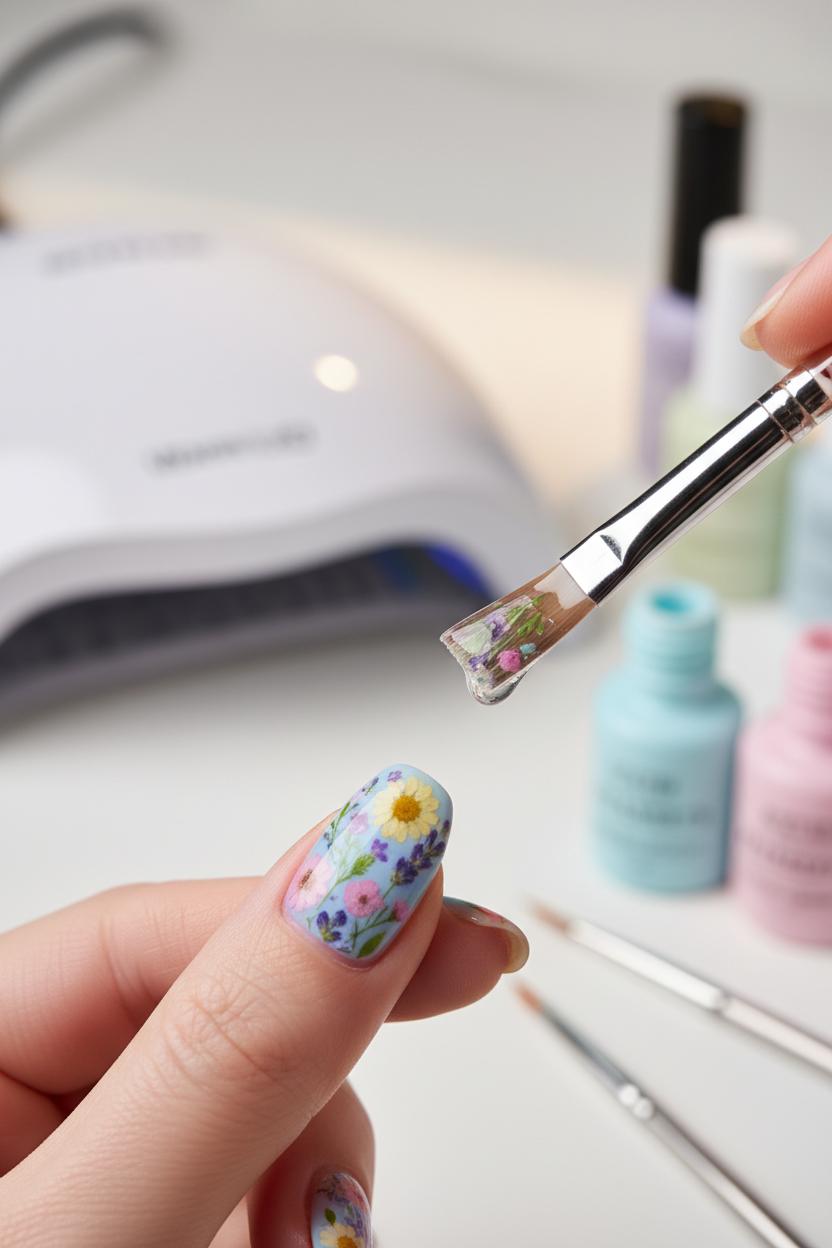
Once your colors are picked, let the details bloom. A precise pair of nail art brushes—one ultra-fine liner and one petite round—makes leaf flicks and micro-daisy dots effortless, while dried flower nail decals add instant, pressed-garden texture on accent nails. Cure each layer under a UV LED nail lamp to keep petals crisp, and seal everything with a glossy gel top coat for that dew-drop shine. For soft gradients, feather a sheer over a cream base; for petite bouquets, dot the centers first, then pull petals outward with the tip of your brush. These gel nail ideas keep the palette delicate but never dull, and they play beautifully with everyday outfits. With the right hues and a few thoughtful tools, your flower nail art becomes a wearable meadow—fresh, floaty, and perfectly in bloom.
Before any petals or dainty details, the secret to dreamy, long-wearing pastel color is a flawless canvas. Start by shaping your nails to a soft oval or squoval, then gently push back cuticles and refine the surface with a very light buff to even out ridges—think smoothing, not thinning. Cleanse with alcohol to remove oils, and if you’re prone to lifting, add a thin layer of dehydrator and primer. A quality base gel makes all the difference: apply a whisper-thin slip layer, then float a second thin coat to self-level and fill in tiny imperfections. Cap the free edge to prevent chipping and keep product off skin by using the edge of your nail art brushes dipped in alcohol for tidy lines. Cure each layer under your UV LED nail lamp according to the brand’s timing; consistent, even curing is the backbone of chip-resistant floral gel nails.
Pastels can be a little shy and streaky, so give them a supportive underlayer. A sheer, milky base or a neutral builder-style base will blur discoloration and help pale shades look plush with fewer coats. If your gel nail polish set includes a soft pink or beige, lay down one thin coat before color to create that plush “marshmallow” effect. Work in thin, even layers to avoid bulk near the cuticle, and let the gel self-level for a glassy base that makes flower nail art glide on later. Planning to press in dried flower nail decals? A smooth, slightly tacky base helps delicate petals lie flat without trapped air, setting you up for seamless, botanical spring nail designs that look hand-pressed and airy.
Once your base is cured and buttery-smooth, you’re ready for color and blossoms—and that long wear we’re all after. Keep each pastel manicure coat thin and precise, cleaning sidewalls as you go, then lock in your petals with a layer of builder or a rubbery base if you want extra strength. Finish, after your art, with a glossy gel top coat to seal in shine and protect edges, so your gel nail ideas stay fresh from brunch to sunset strolls. With this prep, those soft hues and dainty blooms won’t just look pretty—they’ll last.
Start by creating a clean, smooth canvas—shape your nails, gently buff, and wipe with alcohol so your gel clings beautifully. Apply a thin base coat and cure under your UV LED nail lamp. Now the fun: choose three or four whisper-soft shades from a gel nail polish set—think petal pink, buttercream yellow, lilac haze, and sea-glass mint—for the dreamiest pastel manicure. Paint two thin coats of your lightest hue on each nail, curing between layers for that glassy, bubble-free finish. Already, you’ve got a soft backdrop that feels like a fresh bouquet, the perfect start to floral gel nails that look salon-level but cozy-at-home.
For the flowers, you can go two ways. If you love painting, dip fine nail art brushes into your pastels to create tiny five-dot blossoms, micro-daisies, and baby buds, adding a golden or white dot at the center for pop—cure each detail to lock in your petals. Prefer instant bloom? Press a few dried flower nail decals into a tacky layer after curing your color, trimming the edges so they lay flush. Cluster a couple at the cuticle for a crescent garden, or scatter single stems across the nails for airy, negative-space flower nail art. Seal your artwork with a layer of glossy gel top coat, float it gently so you don’t drag the petals, and cure until everything looks glassy and gleaming.
Finish with cuticle oil and snap a photo—you’ve just created one of the prettiest spring nail designs to bookmark. If you want variations, try alternating sheer milky bases with pastel tips, or add a single accent nail packed with blooms while keeping the rest minimal for a chic balance. Tuck this look under your gel nail ideas board, because it wears beautifully for weeks and pairs with everything from sundresses to denim. Sweet, fresh, and softly romantic—these floral gel nails are like carrying a mini spring garden at your fingertips.
If you’re easing into flower nail art, start with dotting. A simple dotting tool (or the rounded end of a bobby pin) turns a pastel manicure into whimsical floral gel nails in minutes. After applying your favorite gel nail polish set and curing under a UV LED nail lamp, add five tiny dots in a circle for a petal, then a contrasting dot in the center. Vary the pressure to get different petal sizes, or gently drag each dot inward with a fine brush to make teardrop petals. Layer a few clusters near the cuticle for a delicate garden vibe, or scatter single blooms across negative space for airy spring nail designs. Cure each layer to lock in the shape, and finish with a glossy gel top coat to make the petals look dewy and dimensional.
For crisp, repeatable blooms, stamping is your best friend. Choose a plate with botanical motifs and pair it with a high‑pigment gel or stamping polish that pops against soft pastels. After your base is cured, pick up the design and roll it onto the nail, then flash cure to prevent smudging before doing the next nail. Mix and match outlines with solid petals—stamp the outline in a deeper lilac over a pale pink base, or reverse it for a dreamy silhouette effect. You can even double‑stamp in two pastel tones for a watercolor overlap that reads romantic without being fussy. Stamping is a time‑saver if you’re planning matching manis for a brunch crew and want cohesive, professional-looking gel nail ideas without spending all afternoon painting tiny petals.
When you’re ready to go full freehand, reach for nail art brushes in a few shapes: a fine liner for stems and filigree vines, a tiny round for micro‑petals, and a flat or angled brush for one‑stroke florals. Load two pastel shades on the brush to blend petals in a single sweep—think buttery peach melting into lavender—then add the softest hint of white at the edges for that petal‑soft highlight. Keep your touch light, cure in between details so nothing shifts, and add the thinnest stems to connect your blooms. If you’re short on time, tuck in a few dried flower nail decals on an accent nail and encapsulate them; they pair beautifully with hand‑painted accents and elevate even the simplest spring nail designs. Seal everything with a glossy gel top coat so your bouquet stays fresh and chip‑resistant.
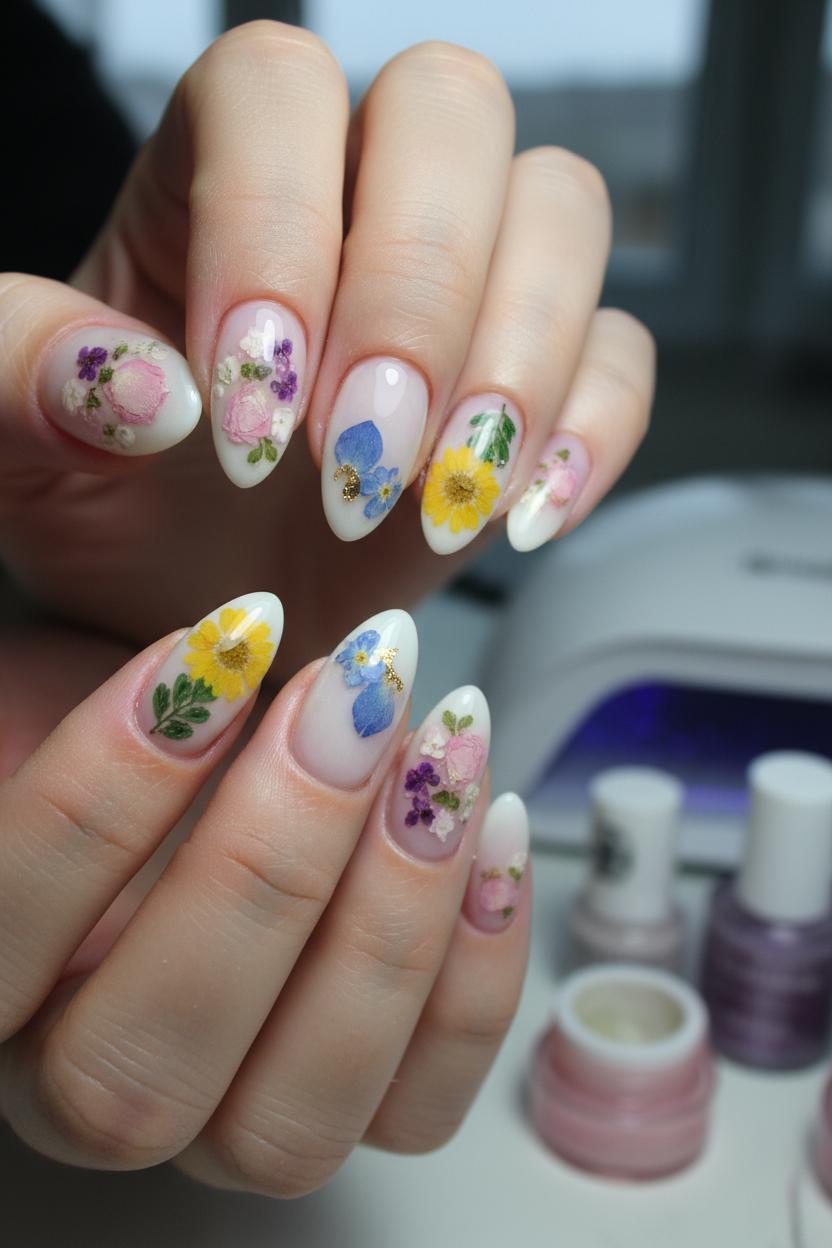
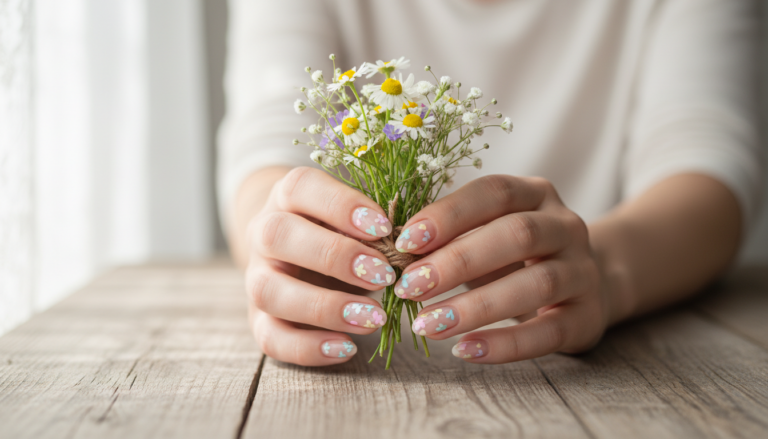
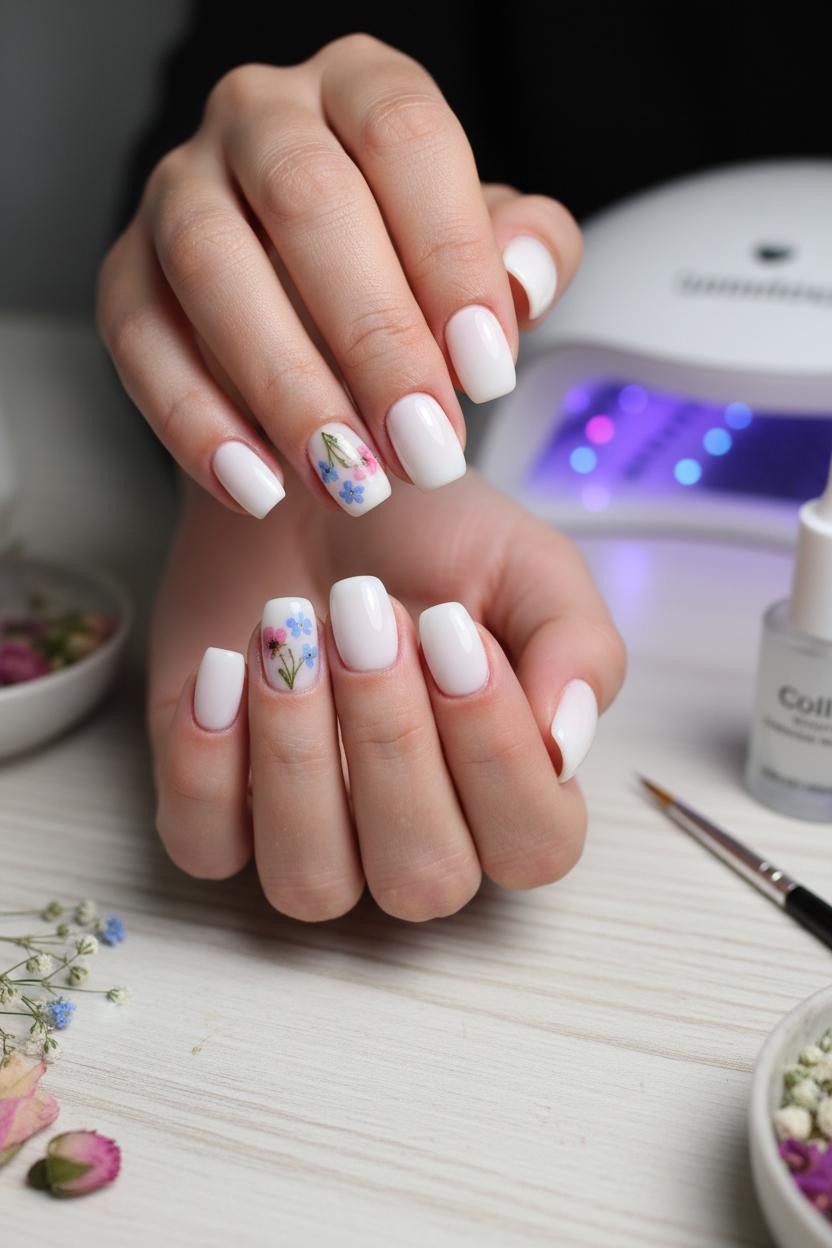
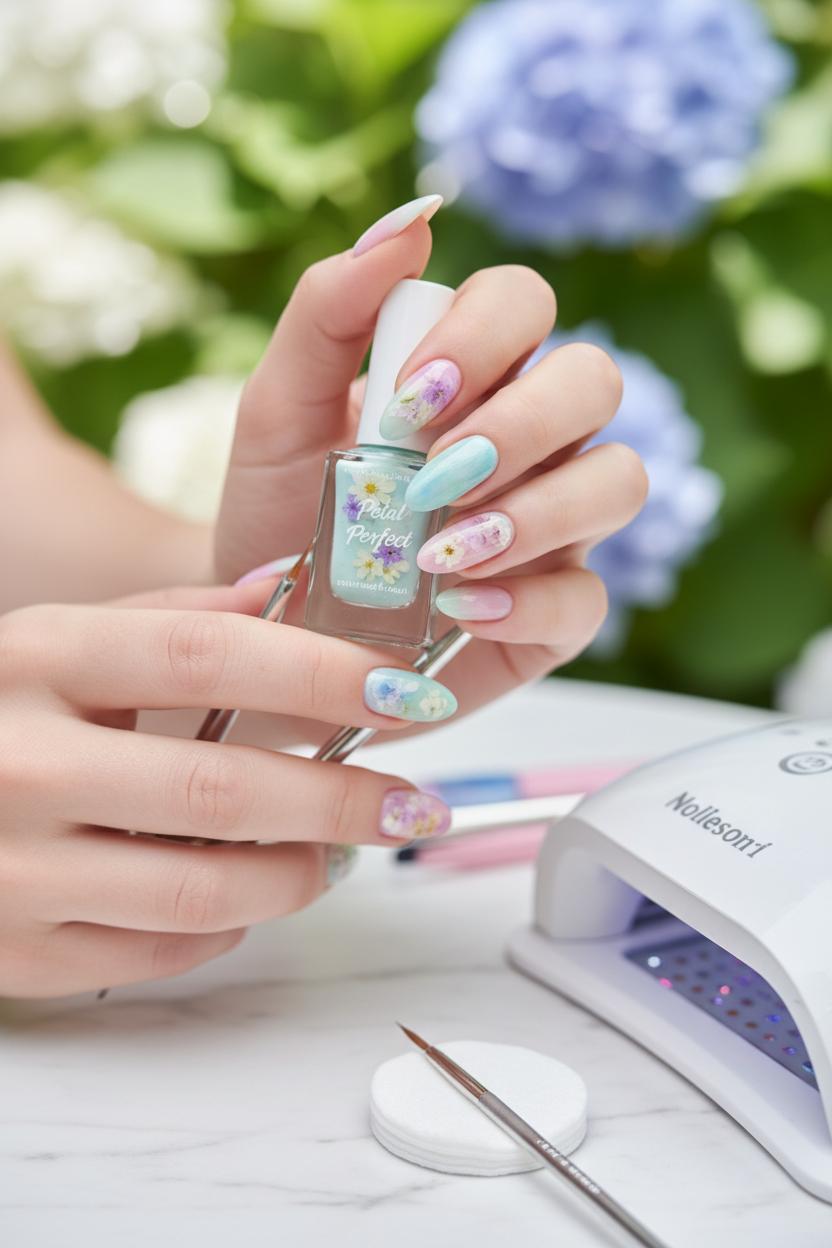
Here’s the dreamy trick that makes your manicure look like pressed petals under glass: layer tiny blooms beneath a crystal-clear finish. Start with a petal-soft base from your favorite gel nail polish set—milky white, buttercream peach, or the palest lilac give that airy, pastel manicure vibe that screams spring. After your base color, cure under your UV LED nail lamp and leave the tacky layer intact; it’s the perfect grip for placement. Lay out your dried flower nail decals and trim them into petite sprigs or single buds so they hug the nail’s curve. I like to paint a whisper-thin “slip” layer of clear base on one nail, then use tweezers and nail art brushes to float the blossom where I want it—along the cuticle for a crescent, or drifting diagonally for a windswept feel. Press gently with a silicone tool or a fingertip wrapped in plastic to smooth the petals flat and chase out bubbles. Cure to lock them in place, then repeat on the next nail so your bouquet stays organized and symmetrical.
To make your floral gel nails look professionally encapsulated, think “pillow, then glass.” After the flowers are secured, add a slightly thicker layer of clear builder or a cushiony top, floating it so it domes over any textured edges. Cure, then check for tiny bumps; if a petal tip is still peeking, lightly buff just the high spot and dust clean. Now comes the gleam: apply a glossy gel top coat, cap the free edge, and cure for that dew-kissed shine that makes the colors pop. For extra depth, do a second thin layer of glossy gel top coat and cure again—the flowers will look suspended, like botanical jewelry. Finish with cuticle oil and admire the way the blooms glow against those soft pastels. This technique is a sweetheart addition to your spring nail designs, and it’s endlessly customizable: sprinkle one delicate bud on a negative-space accent, cluster tiny daisies for garden-party flower nail art, or pair a micro-French with a single pressed petal. If you’re collecting gel nail ideas, this one’s a keeper—simple tools, a few thoughtful placements, and your UV LED nail lamp are all you need to turn dried botanicals into a wearable bouquet.
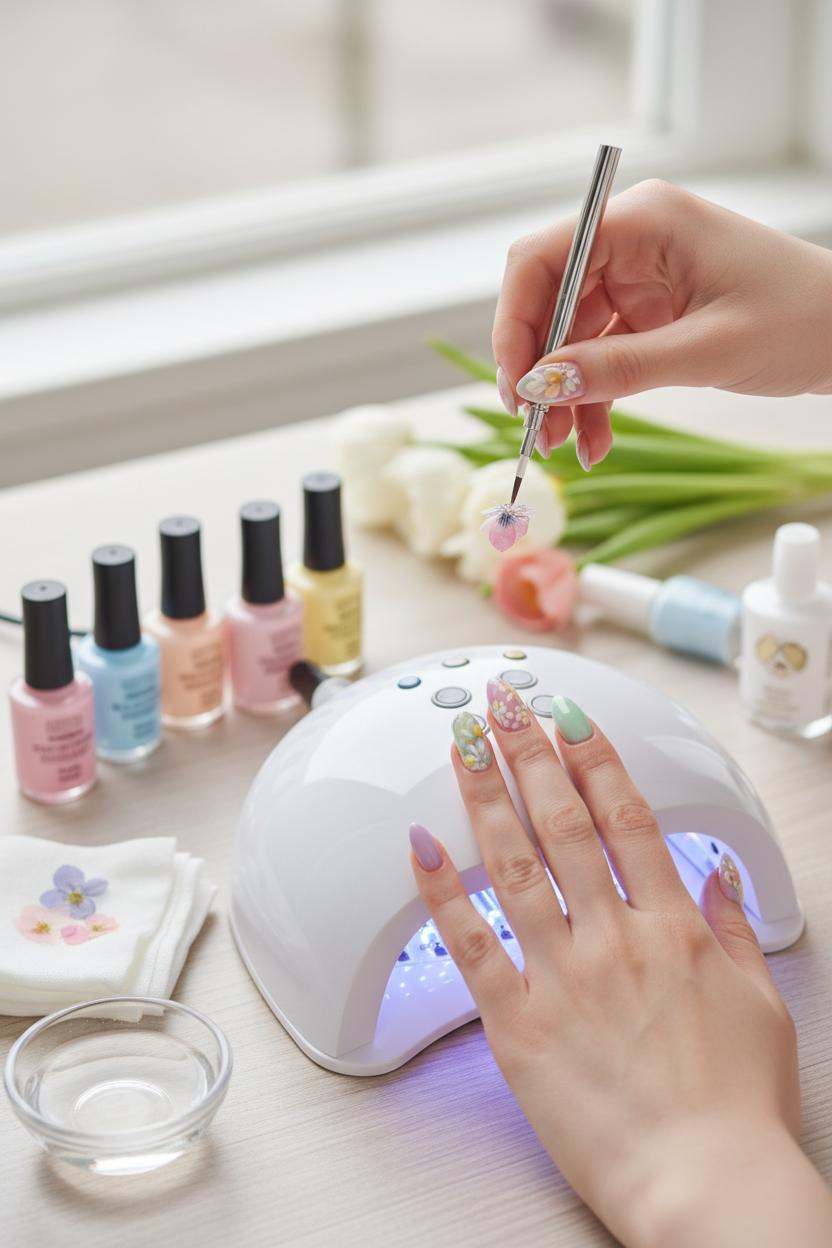
Once your soft petals are painted, the real magic happens under the UV LED nail lamp. For the smoothest, fastest set on your floral gel nails, start with whisper-thin layers from your favorite gel nail polish set—thin coats cure cleaner, wear longer, and keep that pastel manicure from wrinkling. Roll bottles between your palms to mix, cap the free edge, and flash cure for 10–15 seconds after each layer of color or detail so nothing shifts while you build your flower nail art. If you’re tucking in dried flower nail decals, press them perfectly flat and encapsulate with a sheer builder or two thin coats before you move on; the lamp will seal everything crystal clear. Aim for a dual-light 36W+ UV LED nail lamp, place your hand flat so every nail sits directly under the bulbs, and cure the thumb separately to avoid shadows. Pastels usually set in 30–60 seconds per coat, but deeper accents may need a touch longer—if you feel a heat spike, “pulse cure” by easing your hand in and out for the first few seconds.
Keep a lint-free wipe and alcohol on standby to whisk away the inhibition layer only after a full cure, and give your glossy gel top coat a generous 60–90 seconds for that glassy, salon shine that makes spring nail designs look professionally polished. Clean the inside of your lamp regularly so stray polish doesn’t block light, and don’t rush the cool-down—let nails rest for a minute before cuticle oil so the finish sets hard and bright. Use fine nail art brushes for tiny leaves and petal veins, flash cure as you go, and finish with one last top-coat seal to smooth any raised details. With these quick-cure habits, your flower nail art goes from delicate to durable in minutes—and you’ll have extra time to try new gel nail ideas, from airy negative space to layered blossoms. It’s a quick, calm ritual that turns your pastel manicure into a bouquet you can wear all week.
Spring is the perfect time to play mix-and-match with your nails, blending soft French tips, airy negative space, and just-right accents into one dreamy pastel manicure. Start with a sheer, milky base from your favorite gel nail polish set, then pick two or three complementary shades—think lilac haze, petal pink, and pistachio—to paint slender micro-French tips on alternating fingers. On others, leave intentional negative space: a curved crescent hugging the cuticle, a diagonal window at the corner, or a slim arc along the sidewall. These little “breathers” let the design feel modern and light, while still tying into the season’s prettiest spring nail designs. A fine liner from your nail art brushes will give you those crisp edges and delicate swoops that make the whole look feel elevated.
For the floral lovers, add petals without overpowering the palette. Keep it cohesive by choosing one or two accent nails for flower nail art: a tiny daisy dot trio along a French smile line, or a single pressed bloom nestled near the cuticle. If you want the garden-party moment, encapsulate dried flower nail decals on the ring finger—float them over a whispery wash of color, then seal with a glossy gel top coat and cure under a UV LED nail lamp so the flowers look suspended like glass. On the remaining nails, keep things minimal with a negative-space stripe or soft colorblock tip for balance. The result is the kind of floral gel nails that feel fresh, clean, and Pinterest-pretty without going full bouquet on every finger.
The magic of these gel nail ideas is in the mix: alternate sheer and opaque finishes, pair a micro-French with a negative-space swoop, and let one or two petals steal the spotlight. Short nails can absolutely join in—just scale down the French and opt for a petite cuticle crescent or a single micro-daisy. Whatever combination you choose, cap everything with a glossy gel top coat for that glassy, salon-level shine and long wear. It’s an easy, customizable way to create soft, romantic floral gel nails that whisper spring while still feeling chic and modern.
Once your petals and sprigs are in place, the magic really happens when you float on a glossy gel top coat. Think of it as the dewy morning light that makes every bloom look even fresher—suddenly your pastel manicure gleams like glass and every stroke of flower nail art looks crisp and protected. Load your brush, then “float” the product so it self-levels without dragging your design; cap the free edge to keep chips away. If you used dried flower nail decals or any slightly raised details, start with a thin sealing layer, cure, then add a second, slightly fuller layer to smooth everything into a seamless dome. Pop your nails under a UV LED nail lamp for a full cure (check your bottle’s timing), and if you’re using a no-wipe formula, you’ll step out instantly shiny. Prefer a traditional top? A quick alcohol wipe removes the inhibition layer for that mirror-finish glow. It’s the final flourish that makes floral gel nails look professionally done and spring-ready.
For longevity, keep your layers thin and even—flooded cuticles lift faster—holding the brush nearly parallel so the top coat glides. If your decals create texture, a gentle buff after the first cure gives the second layer an ultra-smooth landing. Wrap the tips again, let the nails cool for a minute post-cure so the surface hardens fully, then finish with cuticle oil. Daily life matters, too: wear gloves for dishes and avoid harsh cleaners to protect that shine. If you want a mid-mani refresh, lightly buff and add a whisper-thin coat to revive the gloss. Paired with a coordinated gel nail polish set, fine nail art brushes for delicate petals, and a reliable lamp, this step ties together all your gel nail ideas and makes your spring nail designs last. A truly radiant glossy gel top coat doesn’t just seal your artwork—it amplifies it, keeping your flower fields intact until you’re ready for your next set of floral gel nails.
If tiny bubbles keep popping up the moment you aim for dreamy floral gel nails, think thin, calm, and clean. Start with squeaky-clean prep—wipe oils away and avoid lotions right before painting—then apply whisper-thin coats from your gel nail polish set, letting each layer self-level for a few seconds before curing. Don’t shake your bottles; roll them between your palms to avoid trapped air, and use soft, steady strokes with your nail art brushes rather than overworking the same spot. If you’re layering dried flower nail decals for that delicate, meadow-like touch, press them flat with a silicone tool and encapsulate them fully so there are no air pockets. A reliable UV LED nail lamp matters, too: check your lamp’s wattage and follow the brand’s cure times, especially with opaque pastels that can be stubborn. When in doubt, flash-cure for a few seconds after placement, then fully cure—thin layers won’t wrinkle, and encapsulated florals will stay smooth and glassy.
Wrinkling usually means the coat is too thick or undercured, so resist the urge to get full coverage in one pass—two or three light coats are better for a soft pastel manicure that lasts. Keep the free edge capped to lock in your color, then seal everything with a glossy gel top coat, floating it gently so it doesn’t drag your flower nail art. To prevent fading or yellowing as you show off your spring nail designs, store your gels away from bright windows, minimize direct sun when possible, and reapply a thin veil of top coat mid-wear for extra UV protection. Sunscreens and hair dye can stain pale shades, so rinse hands after applying products and wear gloves for chores. With these gel nail ideas in mind—clean prep, thin layers, proper curing, and full encapsulation—your pastel petals will stay smooth, shiny, and photo-ready from the first blossom to the last.
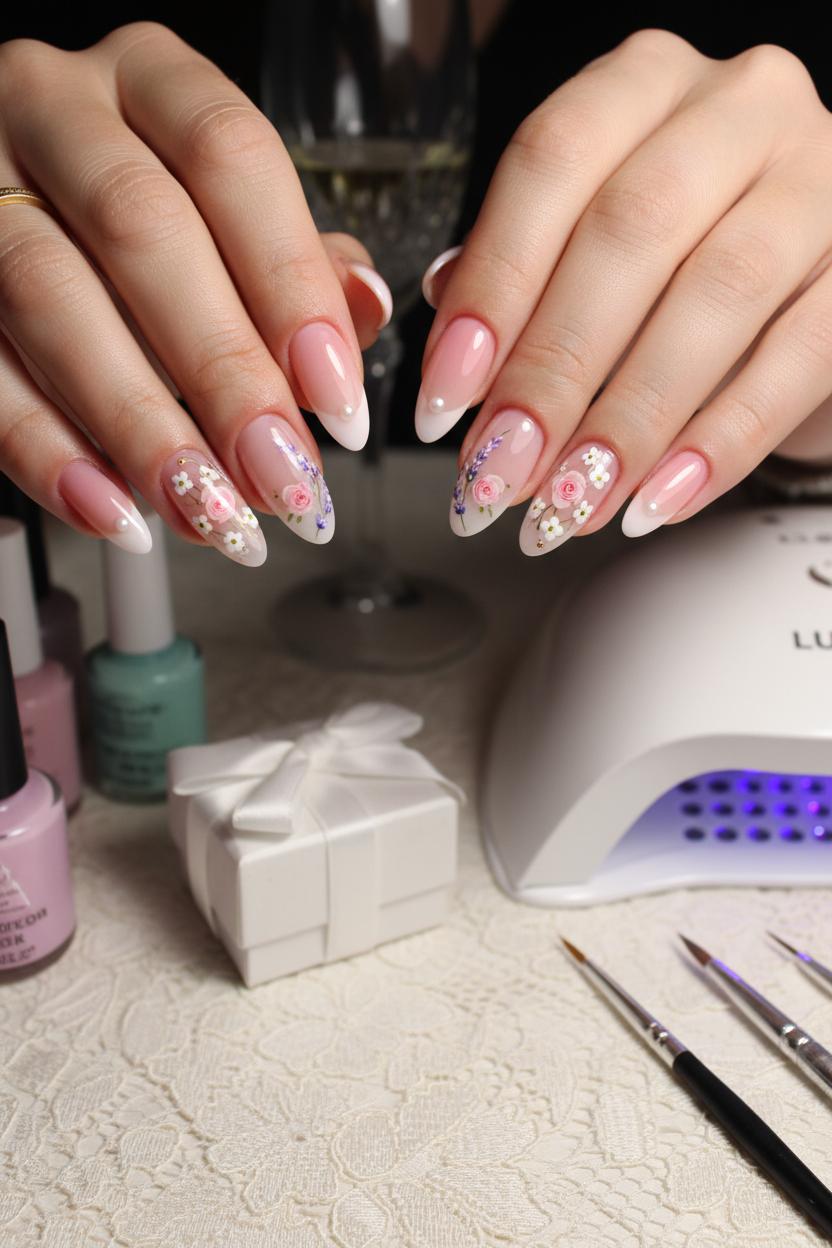
When the calendar starts filling with weddings, brunches, and picnics, soft pastel floral gel nails become the prettiest accessory you can wear. For a romantic ceremony, imagine a whisper-sheer base in milky pink or porcelain nude, then float tiny blossoms across a couple of accent nails—think baby’s breath dots, miniature roses, or a single stem of lavender. A pastel manicure in blush, lilac, or mint feels bridal without stealing the spotlight, especially when paired with a delicate French curve or pearly center dots. If you’re DIY-ing, reach for a gel nail polish set in sorbet shades and cure between layers with a UV LED nail lamp so everything stays crisp and chip-resistant from “I do” to last dance. Use fine nail art brushes to sketch petal outlines, tuck in a few micro leaves for balance, and finish with a glassy, photo-ready shine from a glossy gel top coat.
Easter gatherings call for playful spring nail designs that still feel polished: a speckled “robin’s egg” accent, a daisy chain trailing across two nails, or pastel color-blocking with soft edges that mimic watercolor. This is where flower nail art really blooms—mix painterly petals with dried flower nail decals for texture that looks boutique-salon fancy in minutes. For garden parties, channel a meadow-at-dusk palette: buttercup yellow, periwinkle blue, and the palest pistachio, layered in translucent washes so the flowers seem to float. Try negative-space buds near the cuticle, a curved vine tracing one sidewall, or a single wildflower framed by a minimalist French tip—simple gel nail ideas that read intentional and chic. Keep your tools close (a detail liner, a dotting tool, and those trusty nail art brushes) and build in ultra-thin layers, curing under your UV LED nail lamp to lock in each bloom. Seal everything with a glossy gel top coat so your petals catch the light like dew on fresh grass, and you’ve got floral gel nails that stay flawless from egg hunts to clinking glasses on the lawn—proof that spring’s prettiest bouquet can be right at your fingertips.
When it’s time to retire your soft pastels, resist the urge to pick. If you created your floral gel nails with a gel nail polish set and cured under a UV LED nail lamp, a gentle soak-off is the secret to keeping your natural nails happy. Start by softly filing to break the seal of the glossy gel top coat—just enough to remove the shine. Protect your skin with a thin layer of balm, then place acetone-soaked cotton on each nail and wrap with foil. After 10–15 minutes, the gel should lift like soft petals; use an orangewood stick to coax it off, never scrape. Stubborn spots—especially where dried flower nail decals or layered flower nail art were placed—simply need a few extra minutes under the wraps. A small nail art brush dipped in acetone can target the edges without flooding your cuticles, and a quick re-wrap beats forcing anything every time.
Once the last bit slides away, rinse and pat dry, then lightly buff only if the surface feels uneven. Rehydrate immediately: massage in cuticle oil and follow with a rich hand cream to counteract acetone’s dryness. If you’re hopping right back into a fresh pastel manicure, give nails a short pause—an hour or two is great, overnight is dreamy—before applying base coat. Planning to stretch your existing look? A thin refresh of glossy gel top coat, capped at the free edge and fully cured, can revive shine and prevent chipping. Keep lengths practical to reduce leverage on edges, and slip on dish gloves for chores; a little protection keeps those spring nail designs crisp longer. Between sets, a “nail oil mask” (liberal oil under cotton gloves for 10 minutes) is a tiny spa moment your nails will love.
With care this simple, your flower nail art stays a treat from start to finish—and your nails stay strong for the next round of gel nail ideas. Whether you’re playing with new shades from a gel nail polish set, experimenting with dried flower nail decals, or sketching dainty stems with nail art brushes, these habits help every pastel manicure wear beautifully and soak off like a dream, ready for whatever fresh bloom you paint next.
Soft pastel florals meet glossy gel for a look that feels like a fresh bouquet at your fingertips. Whether you’re leaning into whispery petals, dainty daisies, or negative-space blooms, these floral gel nails prove that subtle can still be stunning. From salon-ready sets to DIY touches, try these spring nail designs to refresh your routine. Keep it sheer, mix gentle gradients, and layer delicate flower nail art for a dreamy pastel manicure that lasts. Save these gel nail ideas and bring a little spring to every gesture—cozy, charming, and effortlessly pretty.