Physical Address
304 North Cardinal St.
Dorchester Center, MA 02124
Physical Address
304 North Cardinal St.
Dorchester Center, MA 02124
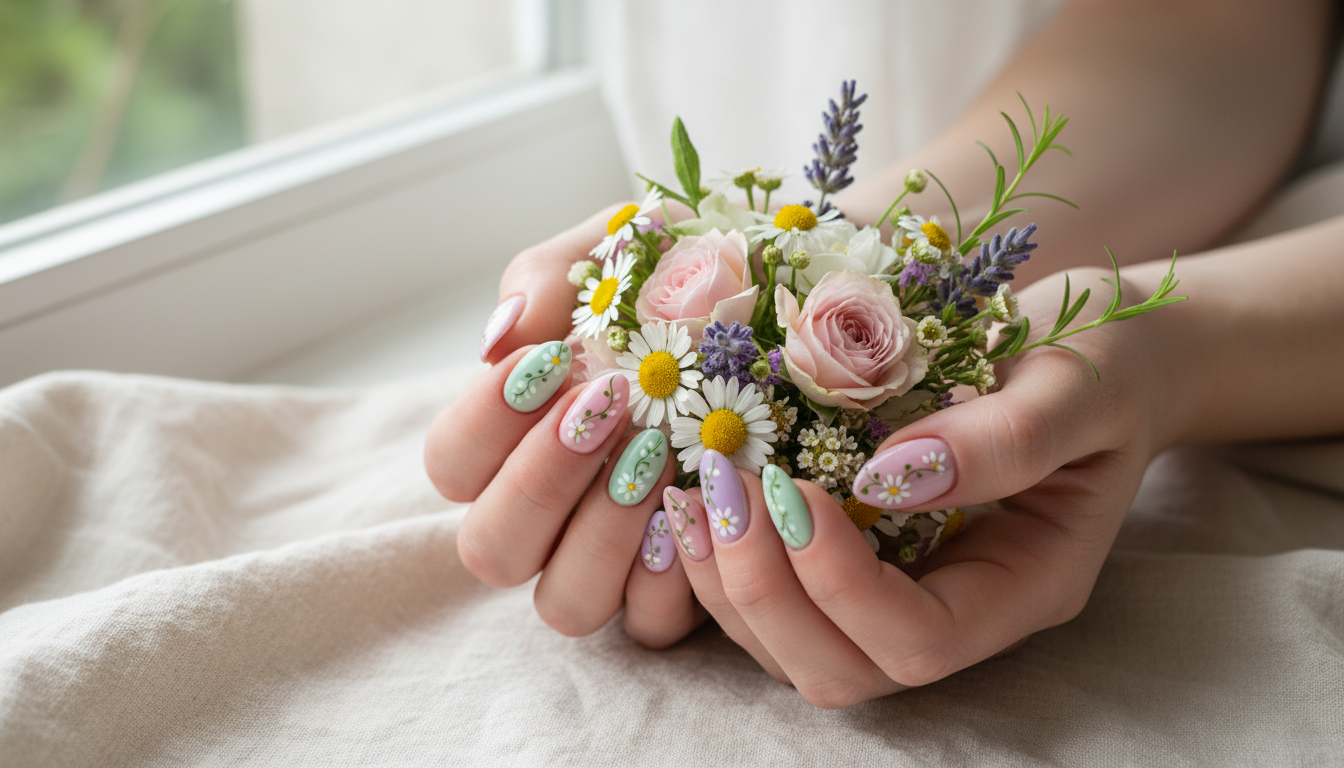
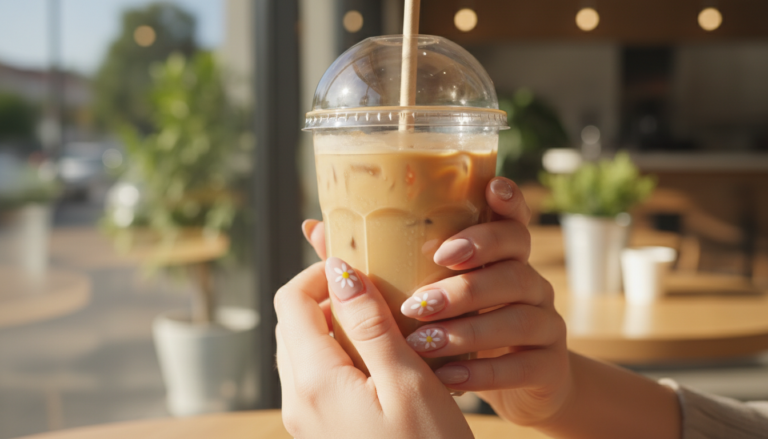
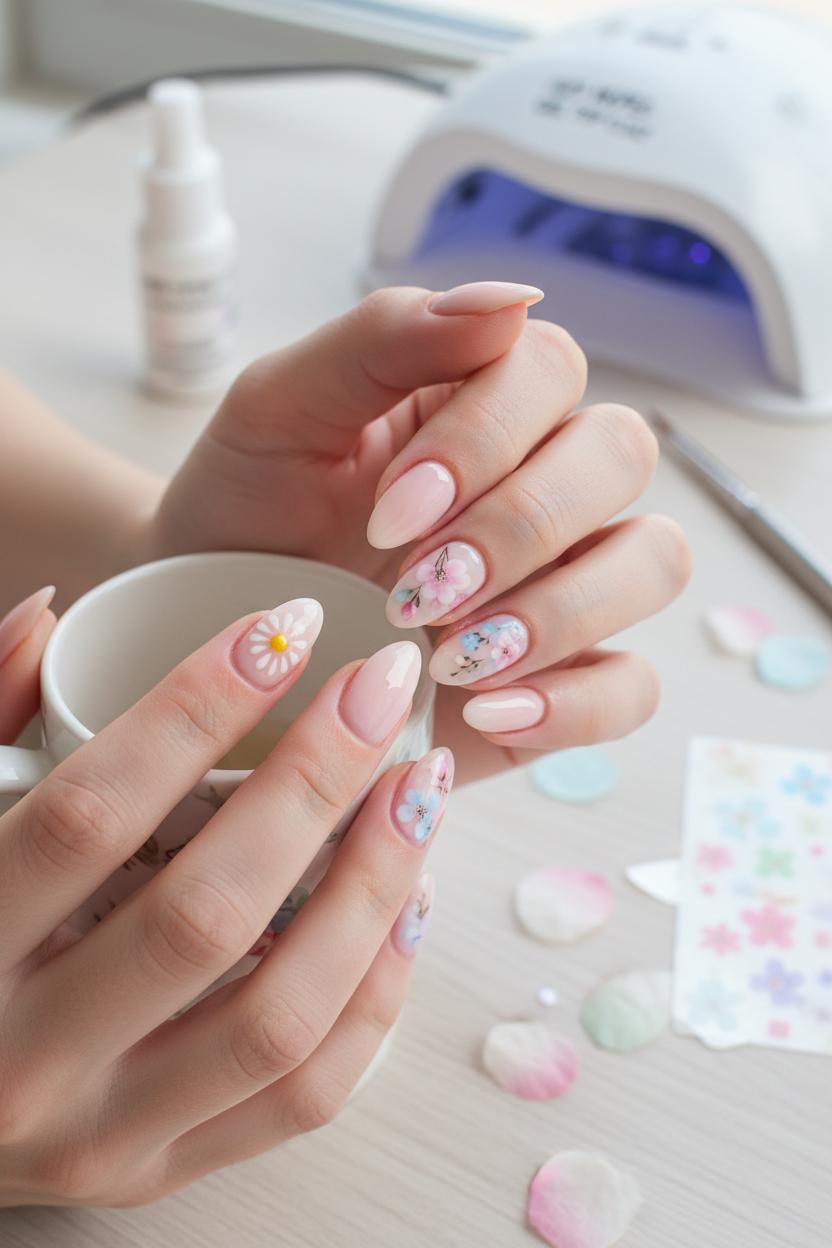
Bloom into the season with soft spring floral nails in dreamy pastels. This pastel nail art guide shows you how to create a delicate flower manicure—think airy daisy nails, whispery blossoms, and petal accents—all with long-lasting gel nails. We’ll share our favorite pastel gel nail polish shades, the easiest floral nail stickers for quick charm, and simple dotting tools nail art tricks for perfect petals. Plus, pro tips for using detail nail art brushes and curing under a UV LED nail lamp. Ready to wear a garden on your fingertips? Let’s paint those pastel blossoms.
There’s a reason everyone’s feeds are filling with soft petals and whispery hues: spring floral nails are the sweet spot between playful and polished. After months of deep tones, the Pastel Blossoms Manicure feels like opening a window—fresh, airy, and totally wearable with everything from a breezy linen set to your favorite trench. Pastel nail art in barely-there lilac, buttercream yellow, pistachio, and petal pink brings a gentle glow to every skin tone, while tiny blooms add just enough detail to feel special without being fussy. Think micro-prints scattered like a meadow, a single accent bud on a negative-space base, or French tips softened with little blossoms. Whether you’re headed to the office or a garden party, this flower manicure reads chic, not childish—especially when you lean into delicate proportions and soft, milky bases.
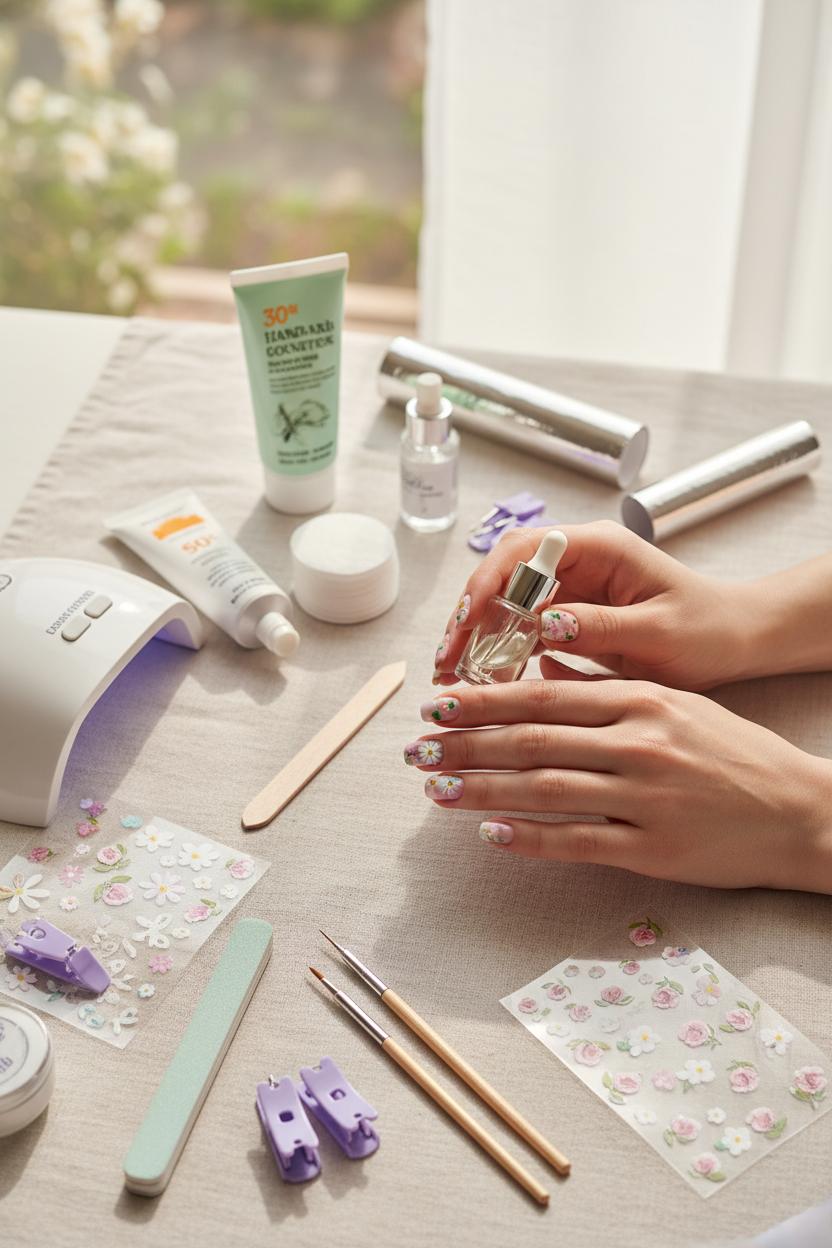
The best part? It’s wonderfully DIY-friendly. A sheer, buildable coat of pastel gel nail polish gives that plush, glassy finish, and gel nails mean chip-resistance that survives brunch, bouquets, and everything in between. If you’re crafting tiny petals, a set of detail nail art brushes helps sketch the thinnest stems and leaves, while dotting tools nail art makes perfect little centers for daisy nails. Prefer instant gratification? Floral nail stickers look shockingly hand-painted once sealed under a glossy top coat. Cure each layer with a UV LED nail lamp for long-lasting shine, and mix finishes—matte stems with glossy petals or vice versa—to add quiet dimension that catches the light without shouting.
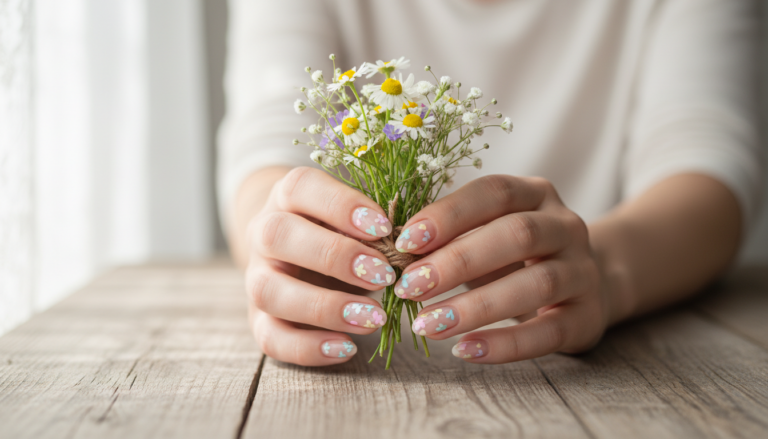
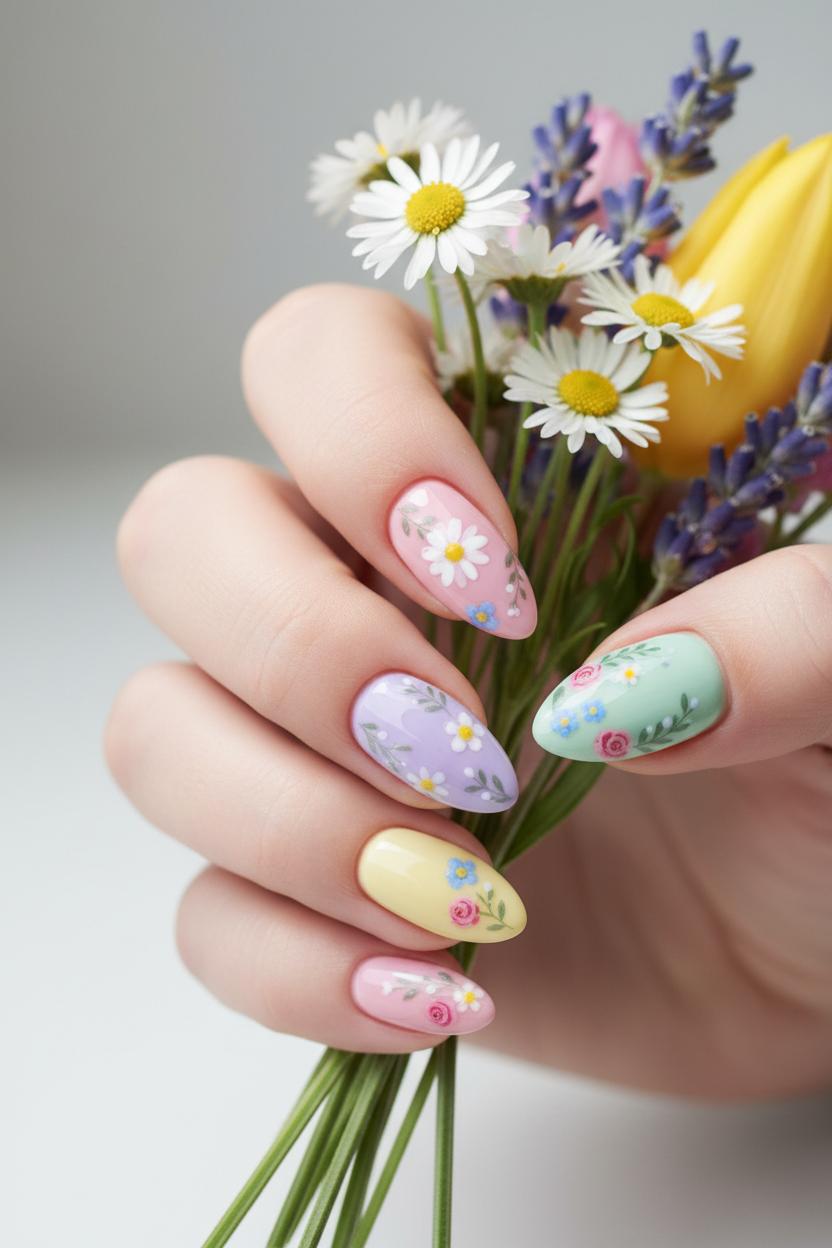
What truly makes soft florals the manicure of the season is their endless personalization. Go tonal with a single shade family across all ten, or create a garden of varied pastels for a subtle, mismatched moment. Short nails wear scattered buds beautifully; longer almond shapes love a delicate vine trailing the sidewall. Swap daisies for baby’s breath, tulip tips, or a minimalist blossom at the cuticle to match your mood. It’s easy to see why spring floral nails are the look everyone’s pinning: they feel curated but effortless, romantic yet modern, and they promise that little daily bloom whenever you glance down at your hands.
Think of your pastel palette as the soft-focus filter for your spring floral nails: it sets the mood before a single petal is painted. When choosing pastel gel nail polish, look first at undertones. Cool lilac, ballet-slipper pink, and mint with a touch of blue flatter fair and neutral skin, while peach sorbet, pistachio, and buttery yellow glow on warmer tones. A balanced palette gives your flower manicure dimension—pick one creamy hero shade, one milky sheer, and one whisper-light neutral to tie it together. Opacity matters with pastels; you want pigments that build without streaks in two thin coats so the shades stay airy, not chalky. If a color runs sheer, layer a soft-white base to make it pop while keeping that cloud-like translucence we love in pastel nail art.
Since we’re working with gel nails, the formula should self-level and cure clean under your UV LED nail lamp without bubbling. Look for soak-off gels with a slightly thicker viscosity; they’re easier to control for tiny petals and won’t flood your cuticles. Light colors can fade if overcured, so give them the recommended cure time and cap the free edge to keep your dainty blossoms chip-free. A glossy top coat will make colors look like sugared candies, while a velvet matte top coat turns your daisies into pressed-flower memories—both are beautiful, just choose what complements your design.
For daisy nails especially, tools make the difference between “cute” and “wow.” Dot yellow centers with dotting tools nail art, then pull out petals using detail nail art brushes dipped in your favorite pastel gel nail polish—try mixing a drop of white into your color for highlighted petal tips. Add tiny stems in sage or olive and layer a milky sheer on one accent nail for negative-space balance. If you’re short on time, floral nail stickers can be nestled into your design; seal with two thin top-coat layers so edges vanish. Store your bottles away from sunlight to protect pigments, and build a capsule of four to six shades you genuinely wear. With a curated pastel lineup and a little patience, your spring floral nails will look like a bouquet you painted yourself—soft, fresh, and perfectly in bloom.
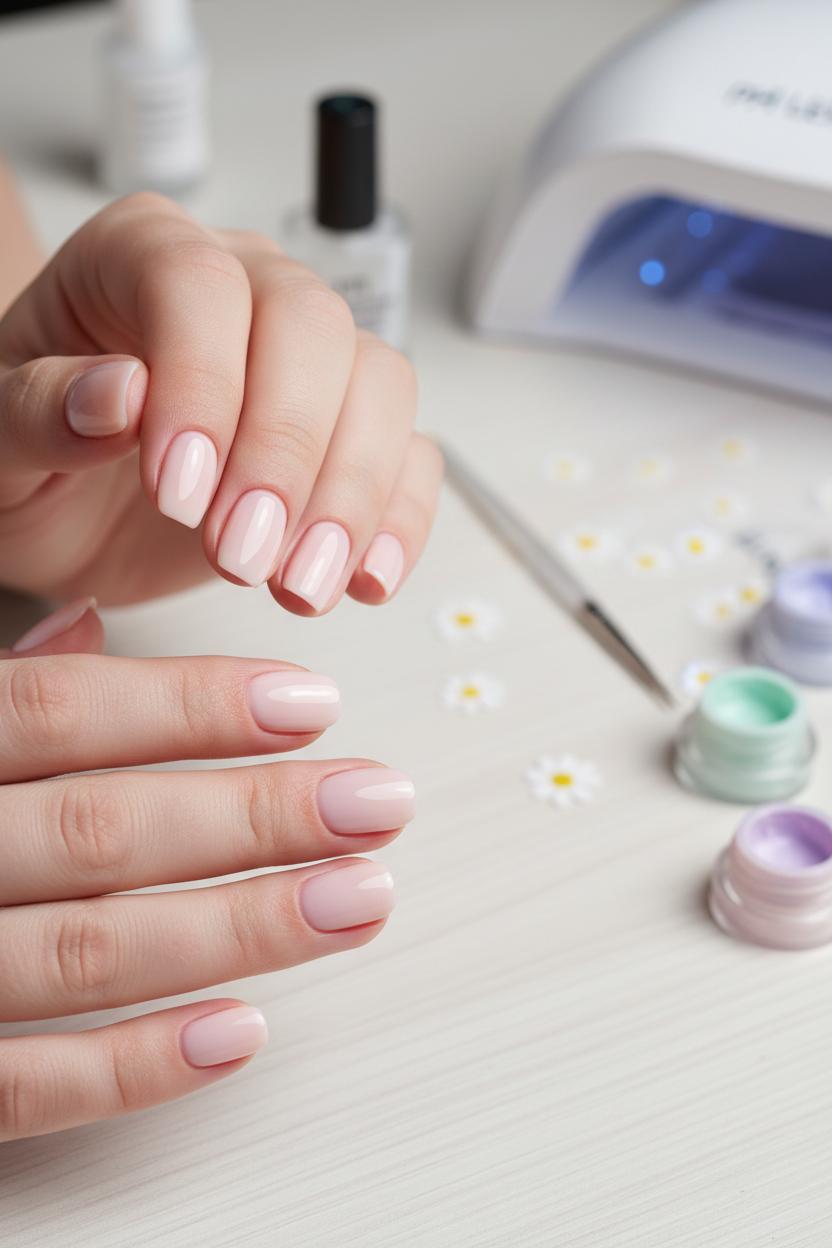
Before the petals come to life, set yourself up for success with thoughtful prep—it’s the secret to spring floral nails that actually last. Start by shaping each nail so your blossoms have a flattering canvas: a soft almond or squoval echoes the curves of a petal and makes daisy nails look especially delicate. Use a fine-grit file in one direction to avoid splitting, then gently push back and tidy your cuticles so there’s a clean frame for your flower manicure. Lightly buff to remove surface shine, not layers, and dust everything off with a dry brush before cleansing with alcohol to whisk away oils. This little ritual gives gel nails the best chance to grip—and it keeps pastel nail art from chipping before the picnic photos happen.
Next, lay down a base that supports your design. A pH bonder or dehydrator can help if you’re prone to lifting, followed by a thin, even layer of base coat. Float it on without flooding the cuticles, cap the free edge, and let it self-level for a few seconds; flipping your hand palm-up briefly helps the apex form on longer nails. Cure according to your bottle under a UV LED nail lamp—don’t rush this step. If your nails have ridges, a rubber or thicker base smooths them so pastel gel nail polish looks buttery and even. For that dreamy, soft-focus look, choose a sheer milky or barely-there pink base; it makes tiny petals pop while keeping the overall vibe airy and fresh.
Think ahead to your details: clean prep means dots and lines stay crisp when you reach for dotting tools nail art and detail nail art brushes. If you’re layering floral nail stickers for a quick bouquet, they adhere flatter and wear longer on a perfectly buffed, fully cured base. After curing, check sidewalls and the cuticle line—any stray base will cause lifting—then cleanse the inhibition layer only if your color requires it next. With the canvas smooth, edges sealed, and foundation cured to perfection, your pastel blossoms can bloom for weeks, whether you paint whisper-thin petals or scatter a few playful daisies across accent nails. A little extra care now makes every swipe of color—and every spring snapshot—look effortlessly polished.
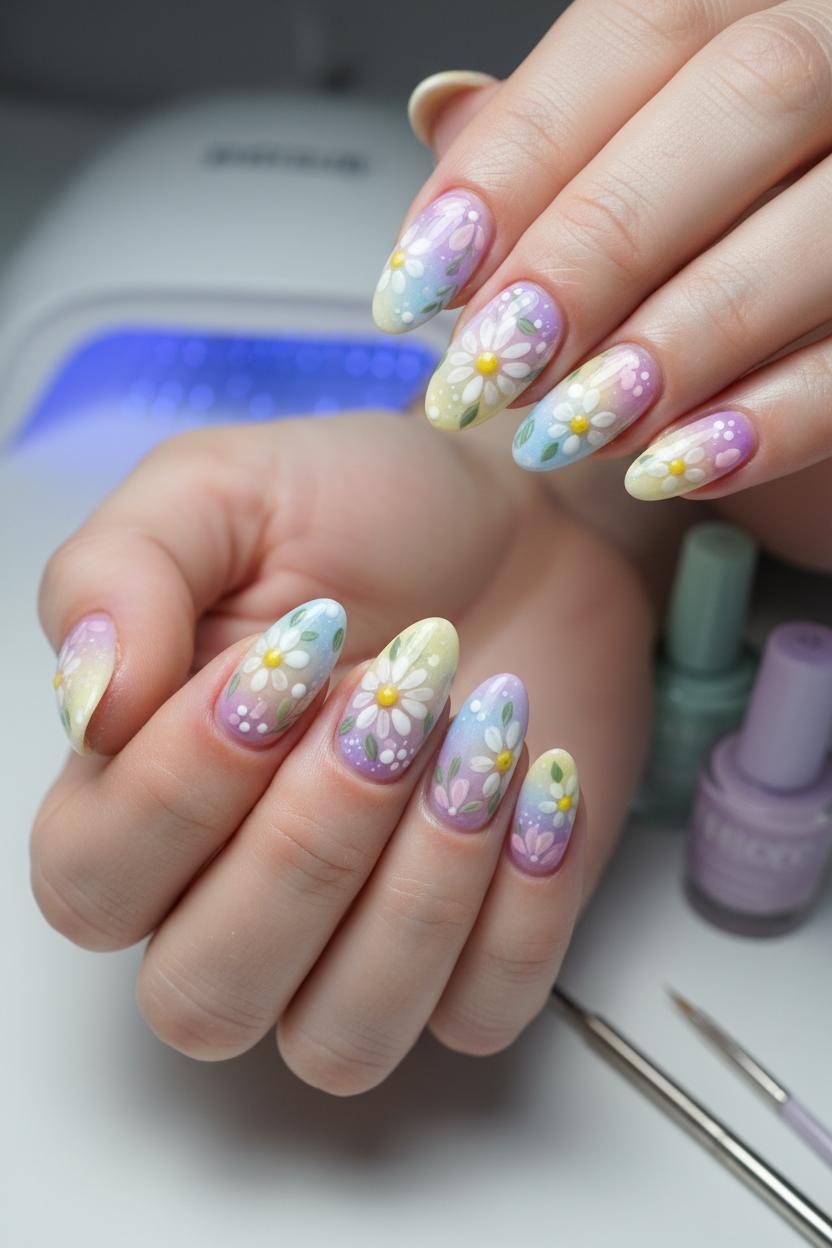
There’s a certain magic that happens when you pick up detail nail art brushes and start sketching petals—like tiny paintings unfolding on a pastel meadow. Begin with a soft wash of color using pastel gel nail polish; think whispery lilac, butter yellow, and cloud-blue to set the mood for spring floral nails. Once your base is cured under a UV LED nail lamp, load the thinnest brush with a creamy white or a toned-down pink and try the “press-and-pull” motion: press the belly of the brush near the center of your bloom, then gently lift as you pull outward to taper the petal. Repeat in a circle to form a classic daisy shape, or try three-petal clusters for a sweet, scattered flower manicure. For daisy nails, I like to flash-cure each bloom as I go so nothing smudges while I work on the next nail. Dot the centers with a sunny yellow using dotting tools nail art, then add a couple of wispy leaf flicks in sage to balance the composition.
Thin, milky layers are the secret to delicate blossoms. Mix a speck of white into your pastel gel polish for that sheer petal look, and don’t overload the brush—micro-dips keep the strokes crisp. Rotate your finger instead of the brush when you need a smoother curve, and breathe out as you place each petal; it sounds funny, but it steadies your hand for ultra-fine lines on gel nails. If freehand feels intimidating, lay down a few floral nail stickers as anchors and paint extra petals around them to create a hybrid, hand-painted effect that still looks artisanal. Clean your detail nail art brushes between colors with a quick swipe of alcohol on a lint-free pad so your petals stay bright and not muddy. When every bloom is in place, give everything a final cure under the UV LED nail lamp and seal with a glossy top coat, capping the edges so your pastel nail art wears beautifully. The result is soft, airy, and so very spring—tiny gardens on your fingertips that make even the simplest outfit feel intentional and fresh.
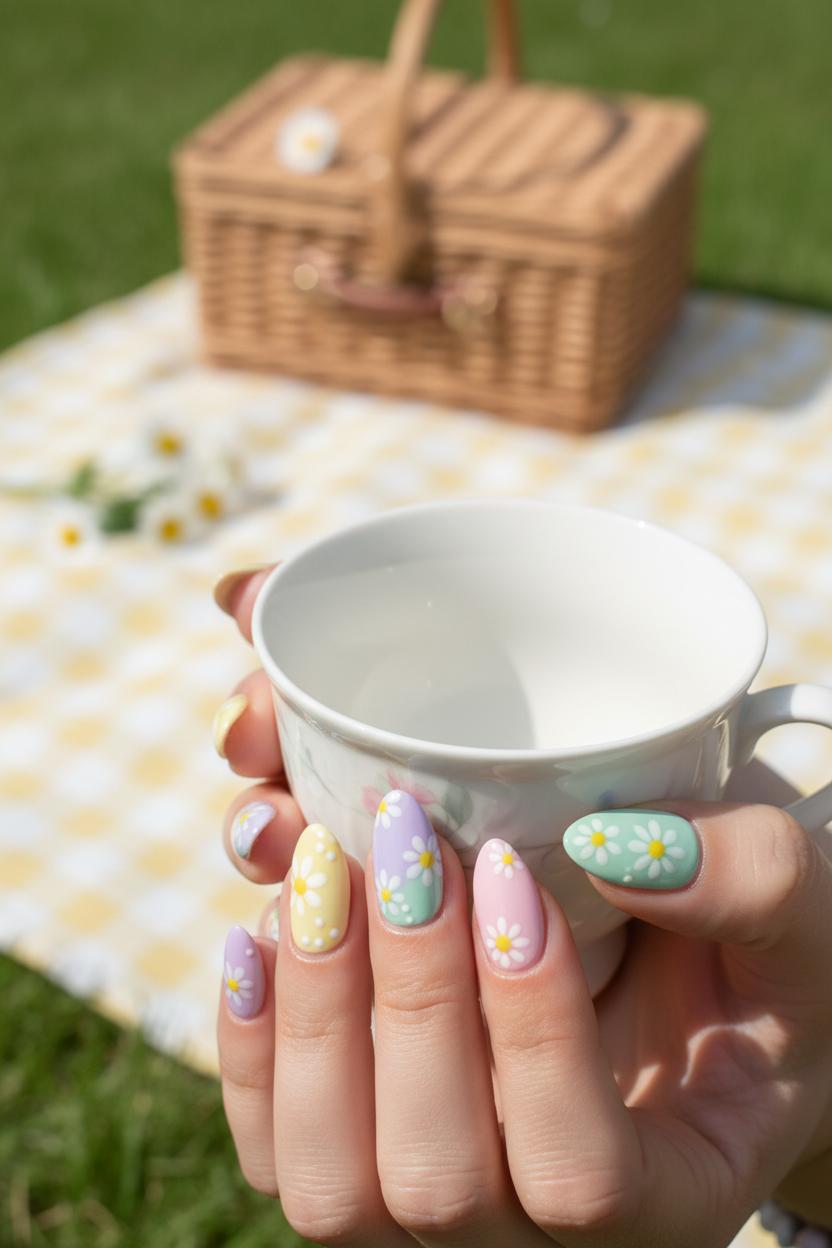
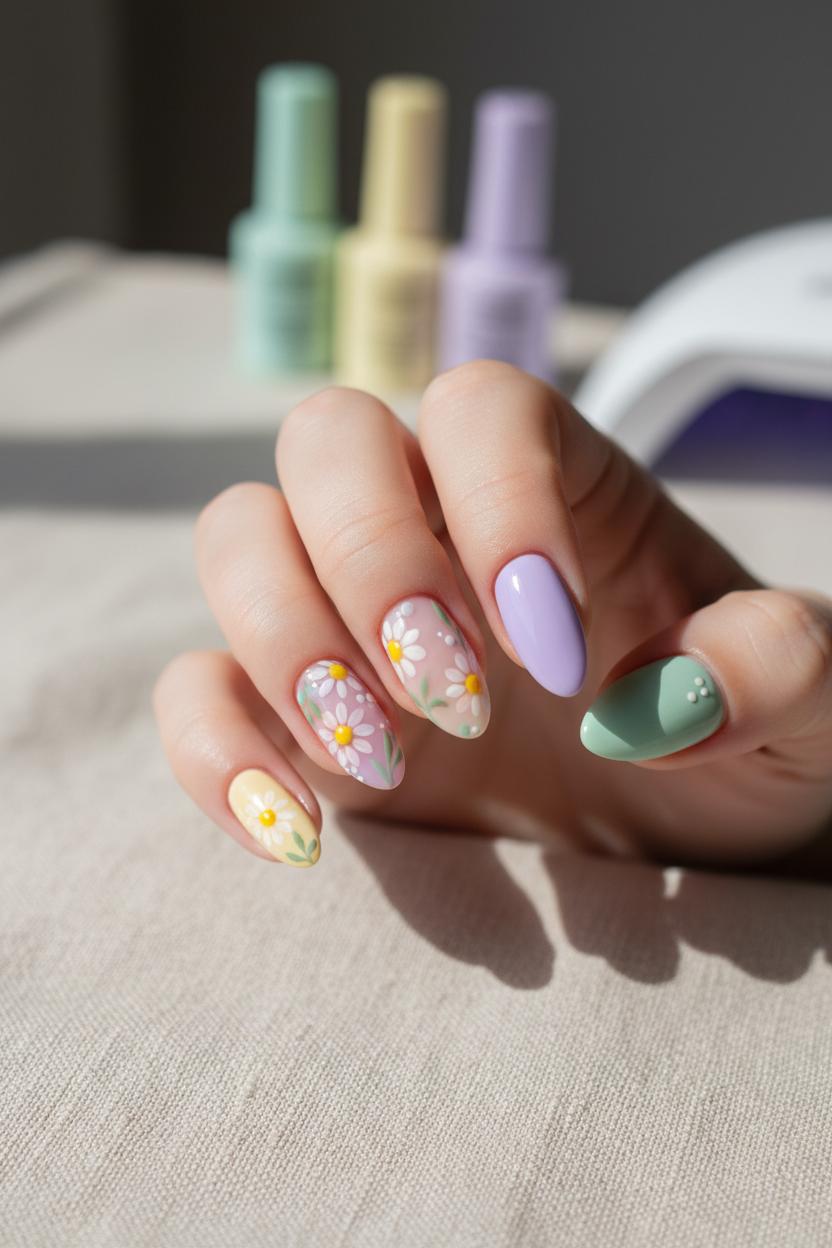
If daisies make you think of fresh air and picnic blankets, you’re going to love how easy they are to paint when you lean on dotting tools nail art. Start with a soft base of pastel gel nail polish—think buttercream yellow, mint, lilac, or the palest petal pink—to set that dreamy, spring floral nails mood. Apply two thin coats, curing each under a UV LED nail lamp, so your canvas stays smooth and dent-free. For the petals, you can use the smaller end of a dotting tool or switch to detail nail art brushes if you prefer more delicate, feathery strokes. I like to sketch the daisy shape in my head first, then place a tiny invisible “guide dot” where the center will be, so the whole flower sits exactly where I want it.
For perfect centers every time, try the “anchor and breathe” method: brace your pinky against your table or the side of your hand, take a gentle breath out, then touch down with the dotting tool straight up and down—no wiggling. Load the tool evenly and test a dot on foil first to check size. Make the center dot last so it stays crisp and domed; cure the petals first, then add the center and flash-cure so it doesn’t spread. If you’re doing larger daisies, make a petite center dot, cure, and then add a second, slightly darker or lighter dot on top for a cute bullseye effect that looks ultra-polished. Place petals like a clock at 12, 3, 6, and 9, then fill between, gently pulling paint outward with a brush to taper the ends. Clean your tool between colors on a lint-free wipe to keep whites bright, and don’t be afraid to use floral nail stickers as accents—add a hand-painted center dot to tie stickers and freehand flowers into one cohesive flower manicure.
Finish with a glossy top coat, floating it lightly so you don’t smear your daisy nails, and cure for that glassy, long-wear gel nails shine. A few micro-dots scattered like baby’s breath make your pastel nail art feel airy and intentional. Fresh, soft, and effortless—the kind of mani that makes your whole week feel like a bouquet.
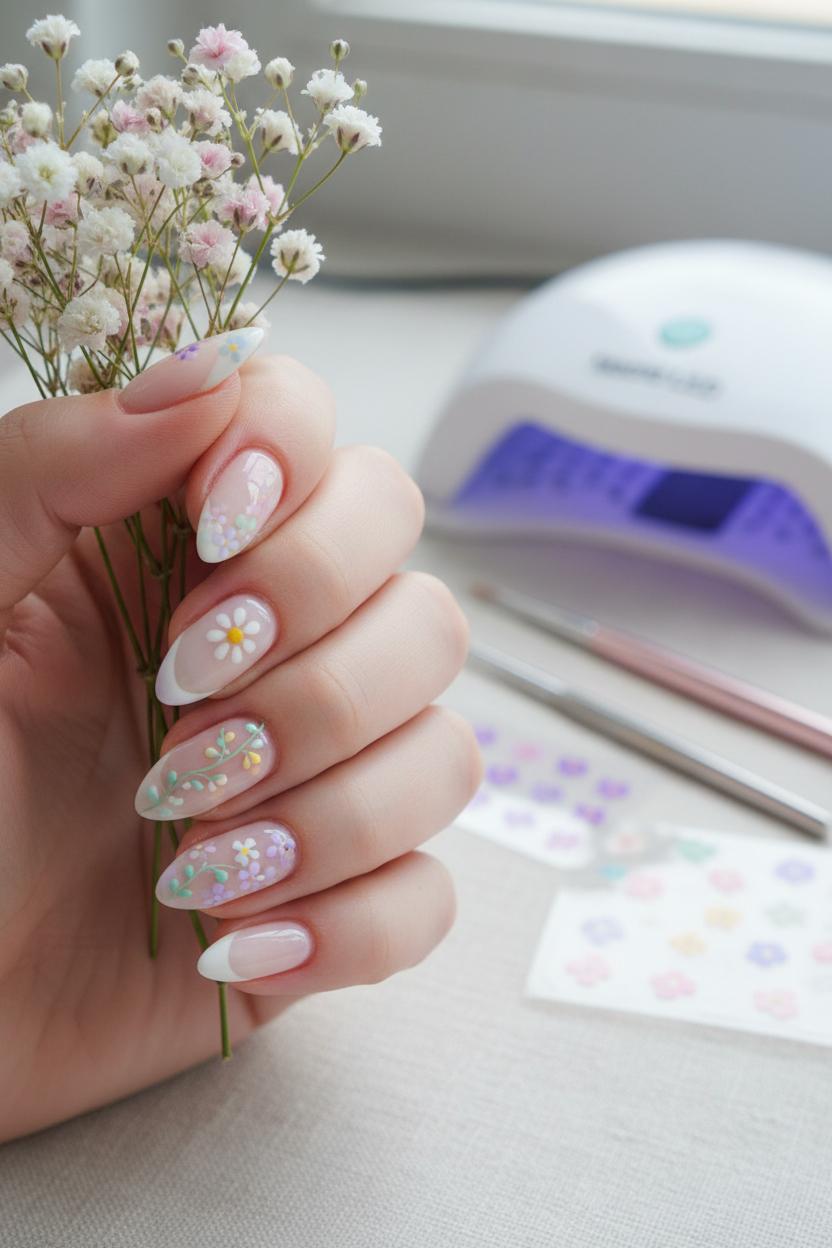
If you love the look of hand-painted blossoms but want something quick and beginner-friendly, floral nail stickers are the sweetest shortcut to spring floral nails. Think of them as tiny decals that instantly turn a simple base into pastel nail art without the pressure of freehand painting. Start with a soft wash of color—one or two coats of pastel gel nail polish in baby pink, lilac, butter yellow, or mint set the tone for a dreamy flower manicure—and cure between layers under a UV LED nail lamp so your canvas is smooth and glossy. Once your gel base is set, float a few floral nail stickers across each nail, mixing sizes and styles for that effortless “picked-from-the-garden” scatter. Place a single bloom at the cuticle for a minimalist accent or create a curved cluster along one side for a dainty French twist; either way, you’ll be halfway to daisy nails with almost no effort.
For a custom touch that looks salon-level, layer in small details after your stickers. Dot a sunny center onto white blooms with dotting tools nail art, or sketch the thinnest stems and teeny leaves with detail nail art brushes in a muted green; the extra strokes add dimension and make the stickers read as hand-painted. Seal everything with a gel top coat, floating it over the surface so you don’t drag the edges of your stickers, and remember to cap the free edge for longer wear. If you’re craving more texture, try mixing finishes—glossy petals on a satin or matte base—or leave a negative-space nail bare except for a single blossom for that airy, modern feel.
Little pro tips make all the difference: slide stickers off their backing with tweezers so you don’t crease them, press them down firmly—especially at the sides—to prevent lifting, and stack a tiny sticker over a larger one for a layered bouquet effect. The result is soft, romantic gel nails that look intricately painted in a fraction of the time, perfect for brunch, picnics, or any day you want your hands to feel like a bouquet. With a few sheets of stickers and your favorite pastels, this quick-blooms trick turns your everyday into a garden-party flower manicure—no art degree required.
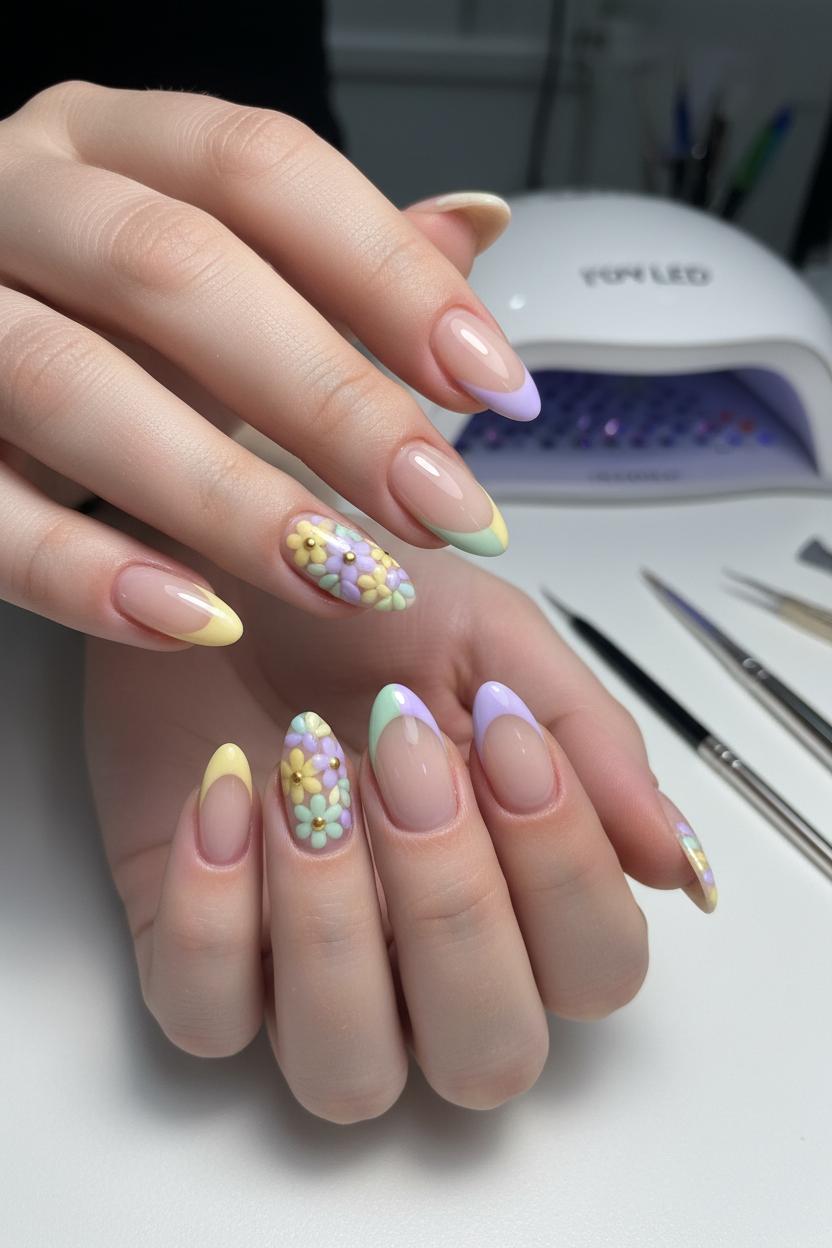
Think of accent nails as your little floral moments in a meadow of minimalism. For a fresh take on spring floral nails, let one or two nails bloom while the rest breathe with negative space. Start with a sheer, milky base and sketch a slim pastel French arc that leaves plenty of bare nail showing; then cluster tiny petals at the edge so they look like blossoms drifting into view. It’s modern pastel nail art at its softest—airy, light, and totally wearable. If you love daisy nails, try a single micro-bouquet on the ring finger paired with clean, naked half-moons on the others. Or flip it: keep your accent nail mostly clear with just a curved band of color and scatter two or three tiny daisies along the cuticle line for that “freshly picked” vibe. Negative space side swipes and outlined French tips also frame delicate petals without crowding them, giving your flower manicure that gallery-wall feel.
Color-wise, imagine buttercup yellow, lilac mist, and mint cream spaced against transparent windows. A clear nail with a pastel French outline looks extra crisp when the petal edges mirror the curve. For dimension, mix finishes—matte petals with glossy centers or a shiny topcoat over nude negative space only—so your florals feel dewy. Keep everything scaled small: mini ovals for petals, whisper-thin stems, and a single dot of pollen to keep it chic rather than cutesy. If you’re short on time, floral nail stickers placed asymmetrically on one accent nail can give the look instantly; just float them near a blank half-moon or along a negative-space stripe to maintain that airy balance.
Tools make it easy. Pastel gel nail polish self-levels beautifully for clean negative space, and gel nails let you pause and perfect each step. Use detail nail art brushes for ultra-fine outlines and dotting tools nail art for flawless daisy centers. Cure as you go under a UV LED nail lamp to lock in crisp lines, then finish with a glossy topcoat on accents only to keep the contrast intentional. Whether you choose soft daisies or abstract petals, these accents-and-air ideas keep your spring floral nails modern, delicate, and perfectly in bloom.
When your pastel blossoms are in place, the secret to turning cute into long-lasting lies in the top coat. For spring floral nails that survive grocery runs, laptop tapping, and garden daydreams, float a thin, even layer of no-wipe gel top coat over your design instead of pressing the brush down. This gentle “float” keeps your pastel nail art from streaking and helps the gel self-level into a glassy finish. Always cap the free edge—run the brush lightly across the very tip—to lock in chip resistance. If your look includes floral nail stickers, tiny decals, or raised centers for daisy nails made with dotting tools nail art, start with a whisper-thin layer to anchor everything, cure, then add a second slightly thicker layer for that smooth, dome-like seal. Cure each coat fully under a UV LED nail lamp according to the bottle’s timing; under-curing dulls shine, over-curing can lead to brittleness. If your top coat isn’t no-wipe, finish with an alcohol cleanse to reveal the gleam.
A few pro touches make your gel nails feel salon-made. Before top coat, brush away any dust and lightly refine bulky areas so your flower manicure doesn’t look uneven under the shine. Keep product off the skin—use a cleanup brush dipped in alcohol around the cuticle if needed—so your seal won’t lift. For extra durability on longer nails, add a thin layer of clear builder or a reinforcing base under your pastel gel nail polish, then top coat as usual. Prefer a soft-focus vibe? Swap the gloss for a velvet matte top coat and cure for a petal-soft finish that still resists chips. Let nails cool for a minute after curing to set the shine, then nourish with cuticle oil. With the right top coat, your detail nail art brushes, floral nail stickers, and those delicate pastel petals stay crisp and bright, transforming simple daisies and tiny buds into a polished bouquet that lasts well beyond the weekend.
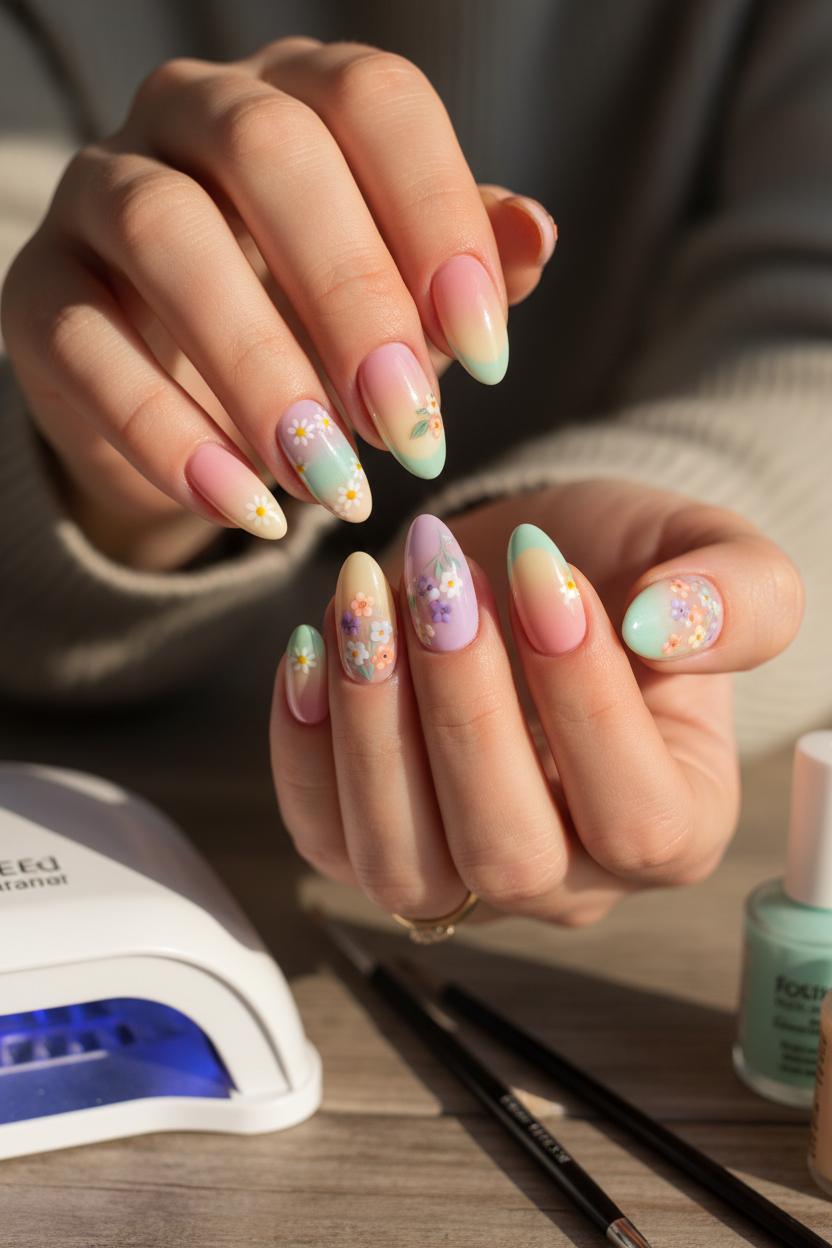
Think of your nails like a watercolor sky at golden hour: soft gradients make pastel nail art feel dreamy instead of sugary. Try a blush-to-mint ombré, a buttery vanilla fading into lilac, or periwinkle melting into peach—each combo instantly reads spring floral nails without a single petal. Apply two or three shades of pastel gel nail polish with a sponge for that cloudlike blend, then refine the fade with detail nail art brushes before curing. Because gel nails keep everything glossy and smooth, you’ll get that pillowy, light-diffusing finish that makes colors look extra velvety under a top coat. A quick cure under a UV LED nail lamp locks in your gradient so it won’t dent while you’re planning the floral moment to layer on top.
Micro-florals are the secret to making a flower manicure feel modern and not too precious. Think tiny blossoms spaced like freckles—just a handful per nail—so your gradient still peeks through. Use dotting tools nail art to tap five petite dots around a center for effortless daisy nails; white petals with a lemon or honey center always pop, but lilac petals with a champagne dot are stunning over nude-pink fades. Scatter a few along the cuticle, trail a diagonal “vine” across two nails, or cluster a mini bouquet on one accent nail. If you’re short on time, floral nail stickers deliver crisp, painterly petals in seconds; seal them into the gel for a seamless, glassy look. A whisper of sage leaves or a single baby’s-breath sprig can balance brighter petals and keep everything airy.
For a polished twist, pair florals with French tips in pastels. Swap stark white for buttercream, pistachio, or lavender, and keep the tip skinny for that minimalist micro-French that lets the art breathe. You can even do gradient tips—ombre just the smile line from peach to pink—then perch one or two tiny blooms on a corner for a chic, editorial finish. Reverse French half-moons in milky rose at the base look gorgeous with scattered micro-daisies, too. Mix a couple of these ideas across your hand for that curated, Pinterest-ready vibe: a gradient here, a micro-floral accent there, and a pastel French to tie it together. With the right tools—detail nail art brushes, dotting tools, and your UV LED nail lamp—you’ll have a soft, blooming set that feels fresh all season.
Between appointments, the secret to keeping your gel nails happy is all about gentle habits and tiny touch-ups. Treat your hands like silk: wear gloves for dishes and cleaning, avoid super-hot showers that can cause lifting, and massage cuticle oil around the nail beds morning and night to keep that floral glow going. If your spring floral nails start to lose their shine, lightly buff the surface, cleanse with alcohol, and add a thin swipe of gel top coat—seal the free edge to prevent chips. Keep your length practical and a little squoval so there’s less leverage on the tips while you type and text. A rich hand cream before bed, plus a sunscreen on the backs of hands during the day (especially if you’re curing at home) helps your pastel nail art look fresh and keeps your skin happy too.
When it’s time to say goodbye to your flower manicure, resist the urge to peel. Break the topcoat seal with a gentle 180-grit file, then soak cotton in pure acetone, wrap with foil (or use soak-off clips), and let it sit 10–15 minutes. Wiggle the foil off and nudge softened gel with an orangewood stick; re-wrap any stubborn spots rather than scraping. Finish with a soft buffer, wash, and feed nails with oil and a hydrating treatment. If you’re reapplying, go for thin, even coats of pastel gel nail polish, curing each layer under a UV LED nail lamp. Cap the tips, then play: use detail nail art brushes for tiny petals, dotting tools nail art to pop crisp centers on daisy nails, or press on floral nail stickers for a speedy accent that still feels hand-painted. A breathable break every few weeks plus mindful removal keeps your gel nails strong, so your next round of spring floral nails looks even sweeter.
From whisper-soft petals to delicate dots, these spring floral nails bring a gentle garden to your fingertips. Mix pastel nail art with a simple flower manicure—think daisy nails, tiny buds, and airy negative space—and seal with gel nails for long-lasting shine. Keep shapes short and sweet, layer sheer colors, and let one accent bloom do the talking. Cozy, fresh, and effortless, this pastel blossoms manicure feels like a warm breeze and a cup of tea. Save these ideas for your next salon visit or DIY night and let your hands bloom.