Physical Address
304 North Cardinal St.
Dorchester Center, MA 02124
Physical Address
304 North Cardinal St.
Dorchester Center, MA 02124

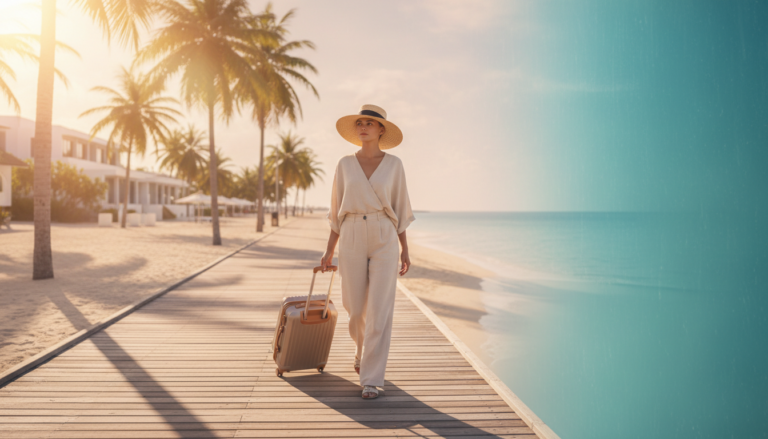
Chasing sun-kissed skies? This travel photography guide unlocks golden hour tips for glowing portraits and epic landscapes on your 2026 travel adventures. Learn fail-proof camera settings, smart composition tricks, and gear must-haves: a lightweight mirrorless camera, sturdy travel tripod, ND filter for silky light, spacious camera backpack, and extra SD card. From city rooftops to coastal cliffs, we’ll show you when to shoot, how to meter, and what to pack so every frame shimmers. Pin now, capture later—the golden hour is calling.
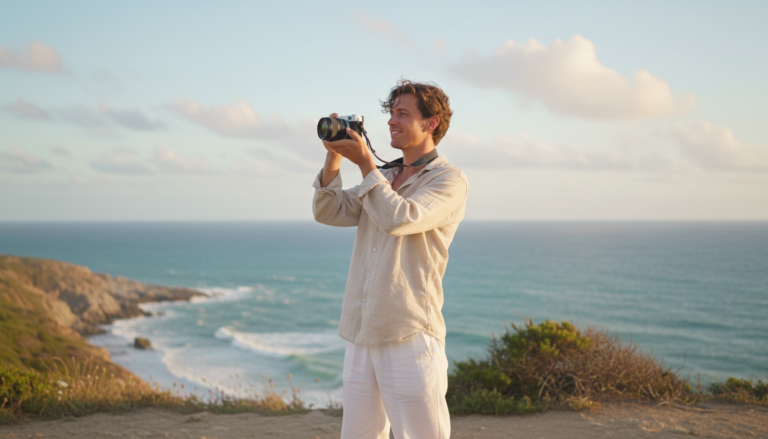
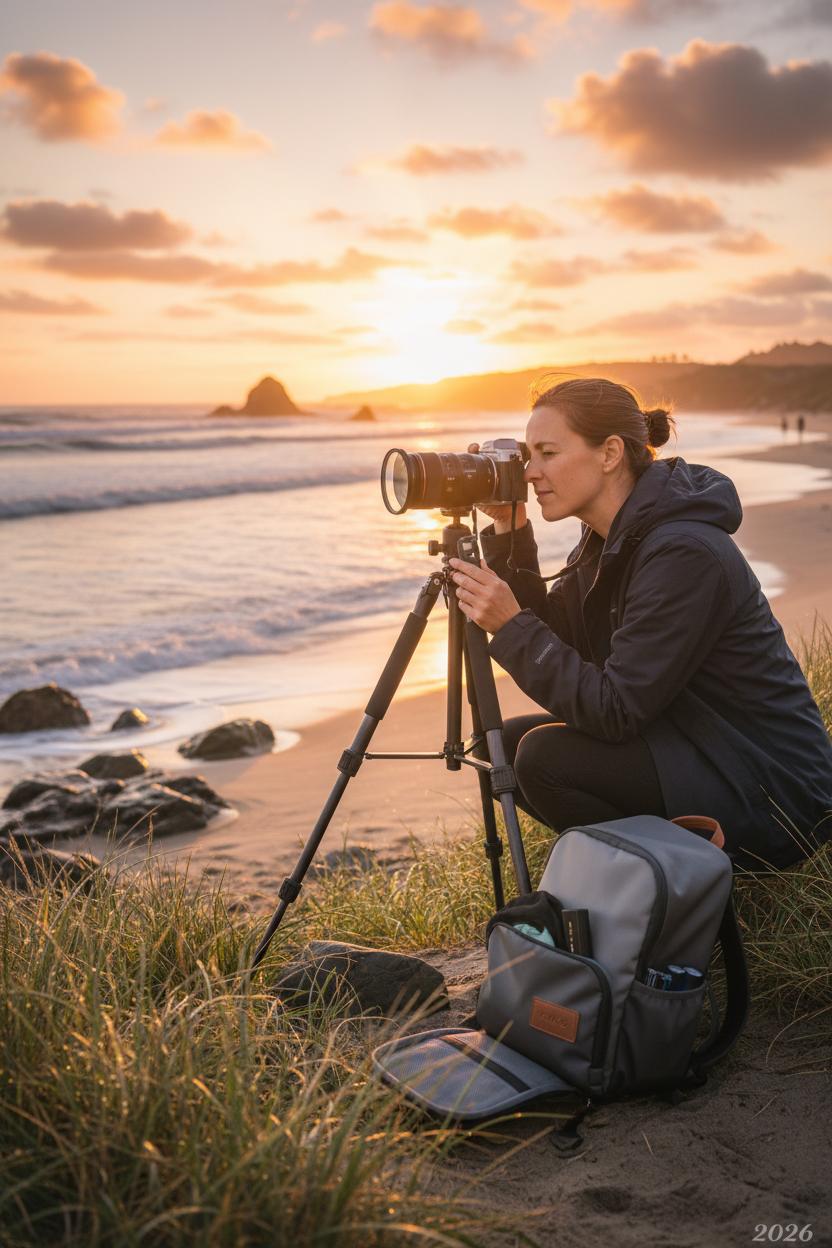
Golden hour is that soft, honey-dipped window when the world seems to exhale—and in 2026, it matters more than ever for travel photography. With sensors sharper and phones smarter, midday shots can look clinically perfect but emotionally flat; the low sun brings back the romance with long shadows, gentle contrast, and skin tones that glow without heavy editing. Think of it as nature’s built-in filter that adds depth and atmosphere to mountains, alleys, and market stalls alike. For 2026 travel, when popular spots are busier and itineraries are tighter, those first and last rays help you carve out a mood that feels intimate even in crowded places. It’s also kinder to faces and architecture—highlighting textures, softening edges, and layering a scene with light that practically paints your composition for you. If you’re chasing color, this is when blues and golds mingle, reflections sparkle, and silhouettes pop against pastel skies for a timeless, dreamy feel.
A few golden hour tips to make the most of it: arrive early to scout angles, then plan your composition around side light or backlight for halos and flare. Keep camera settings simple—start around ISO 100–400, use a wide aperture for dreamy backgrounds, and adjust shutter speed as the light drops. A lightweight mirrorless camera makes quick tweaks easy, while a travel tripod helps nail slower shutters without shake, especially for water or city-light blur. Slip an ND filter into your kit if you love creamy motion in waves or crowds, and always carry extra space and speed with a reliable SD card so you never miss that fleeting glow. Pack smart in a snug camera backpack, and you can move freely as the light shifts from gold to rose to blue. In the end, golden hour doesn’t just flatter your subject—it tells a fuller story of place and time, turning snapshots into scenes you can feel long after the sun dips below the horizon.

When you’re mapping out your 2026 travel, let sunrise and sunset be the anchors that shape your days. Golden hour wraps the world in soft light that flatters skin tones, deepens colors, and adds a touch of magic to even simple scenes—think pastel skies over city rooftops or a misty cove turning copper. Start by checking sun paths and local weather patterns for your destinations; coastal cities with marine layers often bloom with dramatic fog at dawn, while desert locations reward you with clear, contrasty sunsets. In higher latitudes, golden hour lingers in summer and vanishes quickly in winter, so time your itineraries accordingly and build in buffer days for fickle weather. Scout locations during midday when you have time to wander, noting foreground interest—wildflowers, textured walls, tide pools—and where the sun will rise or set relative to your composition, so when the light turns buttery you’re not scrambling.
Pack with intention so your gear supports your vision instead of slowing you down. A lightweight mirrorless camera with good dynamic range helps retain detail in glowing skies and shadowy foregrounds; pair it with a sturdy travel tripod for tack-sharp frames and dreamy, long exposures of waves or traffic trails. Slip an ND filter into your camera backpack so you can stretch shutter speeds without blowing highlights, and bring more than one SD card so you never have to choose between shooting and deleting. For camera settings, think of golden hour as a gentle invitation to experiment: start with aperture priority around f/4–f/8 for portraits and landscapes, watch your histogram, and ride ISO low to keep files clean; when the sun dips below the horizon, switch to manual, slow your shutter, and lean on that tripod.
As for golden hour tips that elevate your travel photography, chase layers and stories. Let leading lines pull the eye toward the glow, frame a subject with silhouetted branches or doorways, and leave breathing room—negative space that feels like a deep exhale. Shoot wide for the scene, then step closer for details bathed in warm rim light. And if clouds roll in, don’t pack up; broken skies scatter color in unexpected ways. With a little location scouting and a flexible plan, your 2026 travel becomes a string of soft-lit moments you’ll want to linger in—long after the sun slips away.
When the sky starts painting itself in apricot and rose, a lightweight mirrorless camera becomes your best friend. You’ll love how the EVF previews exposure in real time, so you can dial in camera settings without guesswork as the light changes minute by minute. Shoot RAW, keep ISO low (100–400), and choose aperture based on mood: f/2–f/4 for dreamy portraits, f/8–f/11 for crisp landscapes. Set white balance to Cloudy or Shade to lean into that warmth, and watch your histogram to protect highlights. A fast SD card keeps burst shots and bracketing snappy when you need multiple exposures before the sun slips away. For lenses, a small zoom (24–70mm) plus a bright 35mm prime covers most travel photography moments on your 2026 travel wishlist without weighing down your daypack.
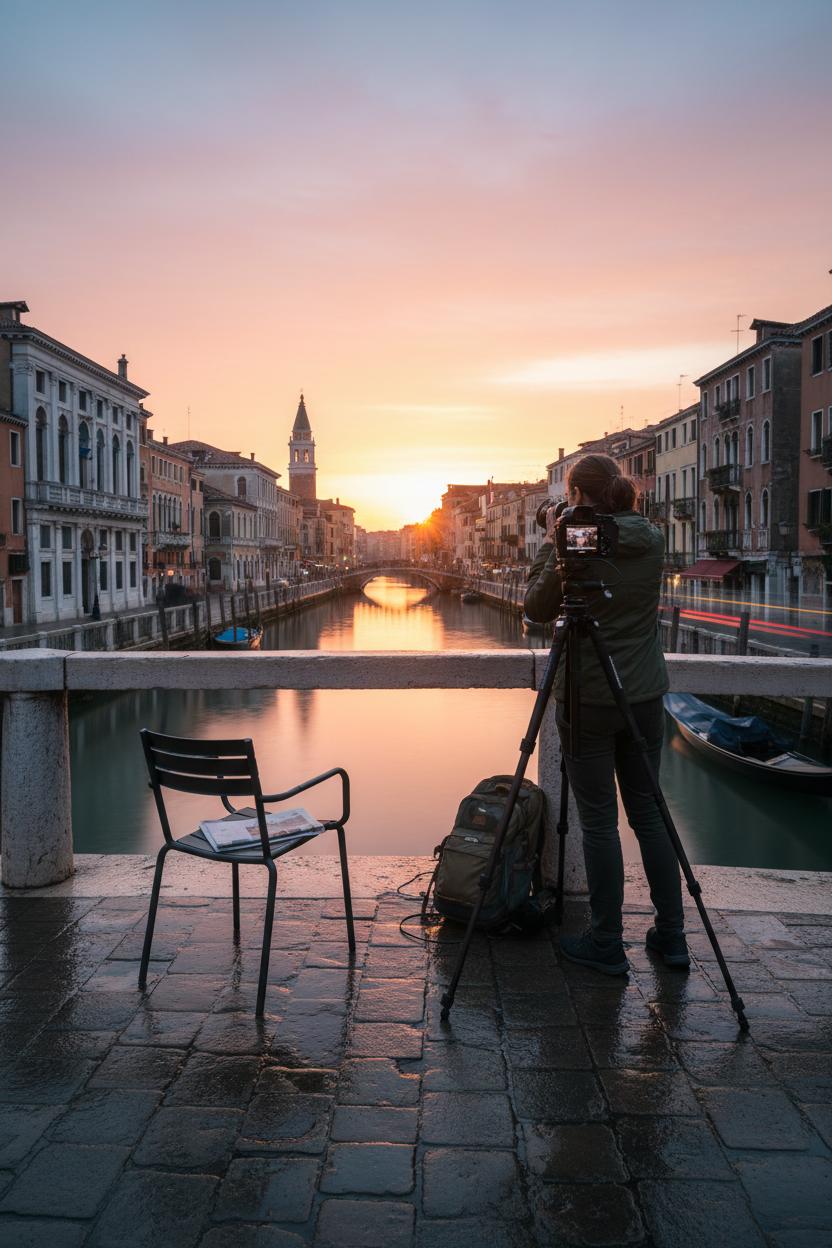
A featherweight travel tripod is the unsung hero of golden hour. It steadies your frame for longer shutters, cleaner detail, and silky skies, and it frees you to refine composition—shifting a few inches to catch leading lines, or lowering to ground level for foreground texture that glows in sidelight. Use a 2-second timer or remote to avoid shake, and try subtle exposure bracketing to blend that luminous sky with moody shadows later. Pack it all in a comfortable camera backpack with a quick side access pocket, so you can grab your kit the instant the clouds flare pink. Golden hour tips aren’t just technical—arrive early, breathe, walk the scene, and let the light tell you where to stand.
For extra magic, slip on an ND filter. A 3-stop is perfect for gentle motion blur in waves or grasses; a 6-stop pushes you into dreamy long exposures even before sunset. Start around 1–2 seconds and adjust until water turns to satin and crowds melt into soft ghosts, checking the histogram so highlights don’t clip. If you travel light, a variable ND and a step-up ring can cover multiple lenses in one. Tuck a microfiber cloth, spare batteries, and a backup SD card into a small pouch, and you’re set. With the right tools and a calm, observant eye, the golden hour turns into a generous collaborator—making your 2026 travel stories feel sun-kissed, atmospheric, and wonderfully alive.
When the first blush of sunrise hits your hotel window, you’ll be grateful your kit is light, tidy, and ready. I keep my mirrorless camera snug in a small camera backpack with just two lenses: a fast prime for soft, creamy bokeh and a compact zoom for spontaneity. A slim travel tripod rides on the side, and an ND filter slips into the front pocket for silky water or to stretch shutter speeds when the light is already glowing. Batteries, a microfiber cloth, and a tiny blower live in a zip pouch, along with a rain cover because weather loves drama at dawn. This minimalist setup keeps me quick on my feet for travel photography, lets me play with composition without lug fatigue, and makes golden hour tips easy to follow: arrive early, move often, and let the light do the styling.
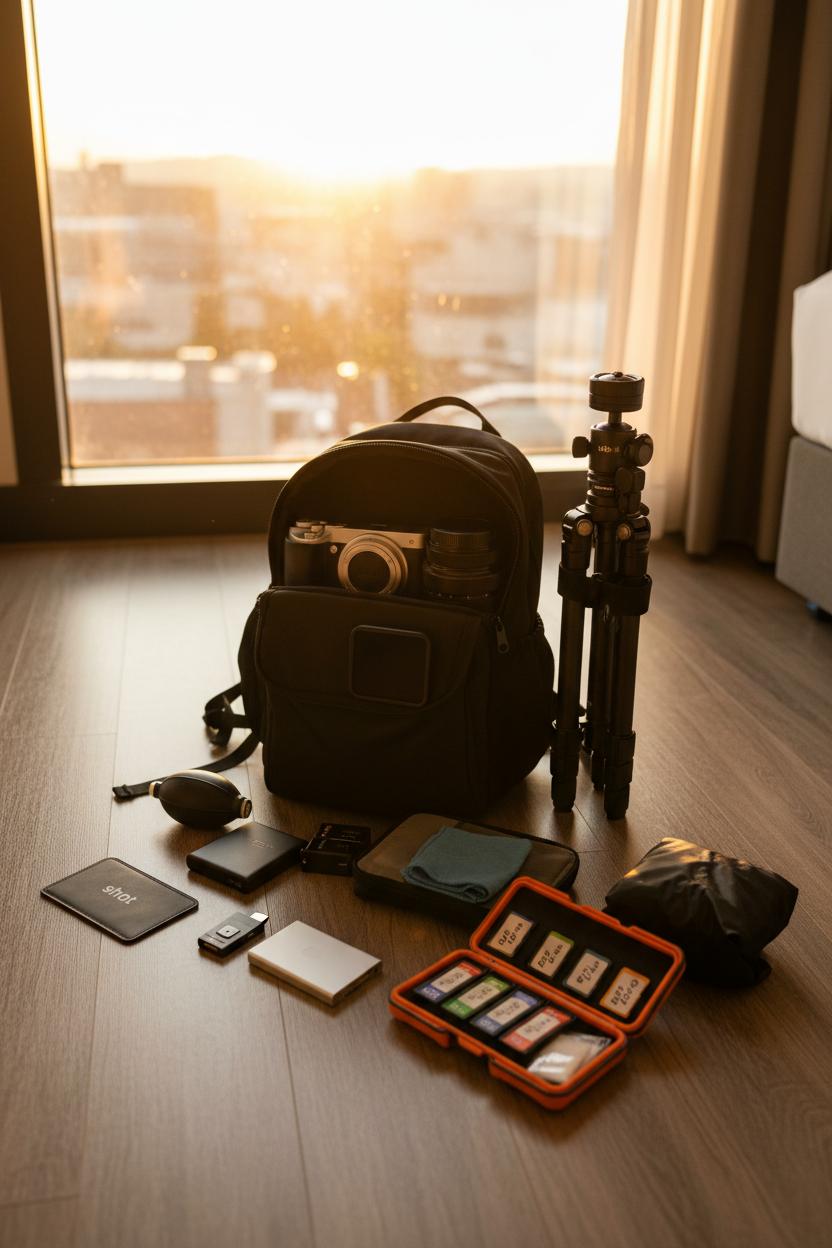
SD card management can make or break your day, especially on 2026 travel when we’re juggling more content than ever. I carry several SD cards instead of one huge one—U3 or V30 rated—and label them by date and location, stashing them in a waterproof case with a few silica packets. I shoot RAW+JPEG, use dual slots when available (slot two as backup), and never delete in-camera. At lunch or sunset, I back up to a phone or tablet with a compact card reader, or a palm-size SSD, then pop the full card into a “shot” sleeve that lives separate from my bag. If you’re with a friend, split backups between you—distributed safety is real safety. Before each new day, I format in-camera to avoid file gremlins, and I keep one clean card in my wallet as an emergency reserve. This rhythm means fewer tech worries and more attention for camera settings like low ISO, a sweet-spot aperture around f/5.6–f/8, and shutter choices to match the mood.
Pack light, think ahead, and let your gear disappear into the moment. A tiny remote shutter and a pocket flashlight help with pre-dawn setups, and that ND filter earns its keep for dreamy long exposures once the sun edges higher. With a lean camera backpack, a dependable travel tripod, and a calm SD card plan, you’ll have the freedom to wander, notice, and capture the glow—because the best golden hour tips are really about feeling unhurried and ready when the light kisses the world awake.
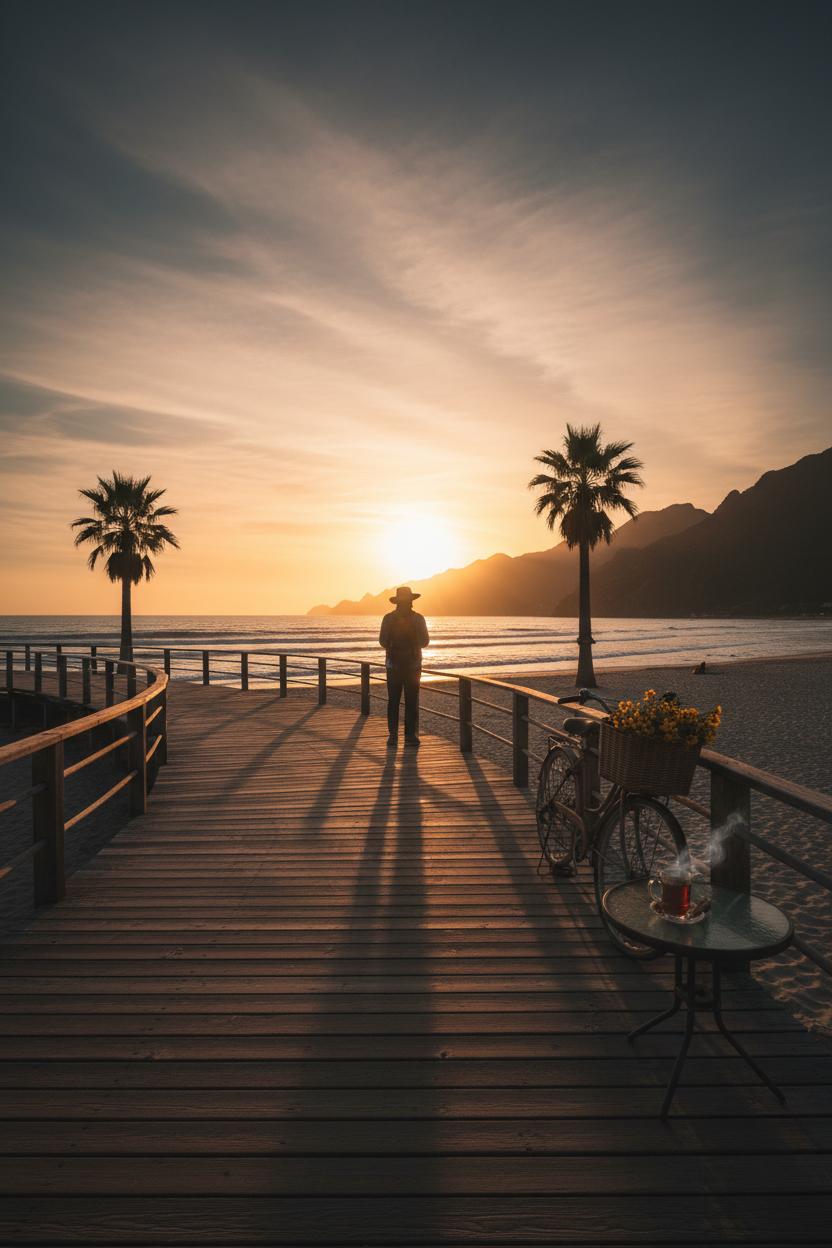
When the sky slips into honey and apricot, think in pathways, anchors, and silhouettes. Start by hunting for leading lines that naturally guide the eye to your subject—boardwalk planks, stone steps, a curving shoreline, even café shadows stretching across a plaza. Drop low with your mirrorless camera and let those lines slice through the frame from a corner to the glow. This is where composition becomes playful: move your feet, tilt slightly, and watch how the scene rearranges itself in the viewfinder. For foreground interest, collect little stories—a cluster of wildflowers, a bicycle basket, a steaming tea glass—then layer them against your hero scene so your travel photography feels immersive and dimensional, like you could step into it.
Silhouettes are the golden hour showstopper. Face your subject toward the light and meter for the sky; underexpose by about one to two stops so the colors stay saturated and the edges stay crisp. Clean shapes work best—palm fronds, mountain ridgelines, a traveler with a hat. If you’re chasing motion (waves, traffic, swaying grass), an ND filter helps you drag the shutter without blowing highlights; use a travel tripod for stability and let the blur paint a dreamy texture under that warm light. Keep your camera settings nimble: aperture around f/4–f/8 for depth control, ISO as low as you can keep it, and a shutter that matches your creative intent. Live histograms on modern bodies make dialing exposure a breeze, and bracketing gives you a safety net when the light changes by the second.
Pack with intention for 2026 travel: a lightweight camera backpack with a small travel tripod strapped on, a couple of fast primes, that ND filter, and more than one SD card so you’re never forced to delete a keeper. These golden hour tips are really about patience and micro-adjustments—arrive early, test compositions, and wait for the moment when the light kisses your subject just right. In travel photography, the difference between “nice” and “stop-scrolling” is often a step to the left, a stronger foreground, or a silhouette sharpened against a blazing sky.
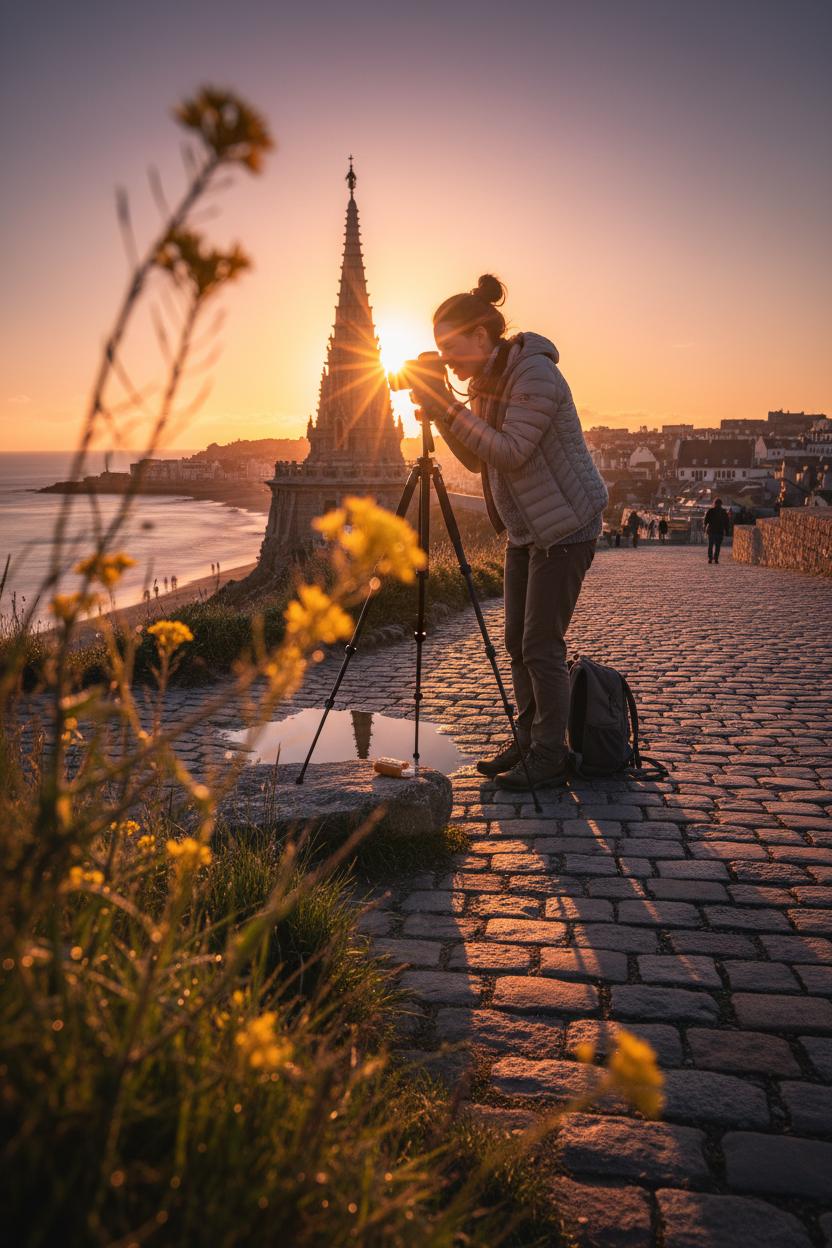
Golden hour moves fast, so the best golden hour tips start with timing. Aim to arrive 45–60 minutes early to scout, breathe, and watch the light change. Sunrise is calmer and cleaner; sunset is moodier and more social—choose based on the vibe you want for your travel photography. For 2026 travel, use light-tracking apps and offline maps to pin exact sun paths behind landmarks, then plan where you’ll stand before the show begins. I love parking my mirrorless camera on a travel tripod, framing a test shot, and then waiting for the moment when the sky softens to peach and the shadows stretch like velvet ribbons. Pack layers and a small snack in your camera backpack so you can linger without rushing; golden light rewards patience.
Angle is your secret ingredient for composition. Side light sculpts texture on cobblestones and cliffs; backlight creates dreamy rim-lit portraits and delicate silhouettes of palm fronds or temple spires. Move your feet—drop low to catch reflections in puddles, or climb a few steps for a layered cityscape. Look for foregrounds that glow (grasses, flowers, café glassware) and use them as a hazy frame. Try rule-of-thirds for clean balance, then break it with a bold centered sunburst. Leading lines—boardwalks, shorelines, alleyways—pull the eye straight into the warmth. If the sun is strong, hide it just behind an edge to make a starburst at f/16; if it’s hazy, embrace negative space and let color carry the story.
Smart exposure keeps that glow intact. Start with simple camera settings: ISO 100–400, aperture around f/4–f/5.6 for people or f/8 for landscapes, and use exposure compensation between –0.3 and –1 to protect highlights. Spot meter near the bright sky and shoot RAW; your mirrorless camera’s highlight warnings and subject detection will save you from blown detail and soft focus. Bracket a quick series for high-contrast scenes, or pop on an ND filter to drag the shutter for silky water and painterly crowds. Set white balance to Cloudy or 6000–7000K for extra warmth, and keep a fast SD card handy so you never miss the last five minutes when the colors go electric. Golden hour is fleeting, but with a steady travel tripod, a thoughtful composition, and mindful exposure, it feels like you bottled the sunset for later.
When the sky blushes at the edges, your mirrorless camera becomes a little time machine, capturing scenes our eyes can barely hold. At dawn and dusk, try exposure bracketing as your first golden hour tip: set auto bracketing to shoot, say, -2/0/+2 EV and keep your finger down in continuous drive so the frames align. The dynamic range at these times is delicious and tricky, and bracketing lets you blend a gentle HDR later—or lean on subtle in‑camera HDR—to protect pastel skies without crushing shadowy foregrounds. Lock your white balance to keep tones consistent, shoot RAW for flexibility, and watch the histogram rather than the LCD glow. For composition, anchor the scene with a clean foreground—wet cobblestones, a curving shoreline, a café chair waiting for its first guest—then let leading lines guide the eye into the light. If water is involved, a light ND filter (3 stops is plenty at blue hour) will smooth ripples into silk, adding a calm counterpoint to radiant clouds.
Timelapse is where travel photography turns cinematic. Set up a sturdy travel tripod before the color show begins, frame a composition with a bit of movement—tide, traffic, drifting clouds—and start with an interval of 2–4 seconds at dawn as the light rises quickly, or 5–8 seconds at dusk when things linger. Choose manual exposure once the scene stabilizes, or use aperture priority with auto ISO capped to keep noise tame; either way, lock focus and white balance so your sequence doesn’t flicker. Pack a high‑capacity SD card and a fresh battery (timelapse chews through both), and stash extras in a comfy camera backpack so you can roam between rooftops and riverbanks on your 2026 travel adventures without missing the color peak.
A few cozy, real‑world camera settings to keep in your pocket: start around f/5.6–f/8 for crispness, dial ISO as low as the scene allows, and embrace silhouettes when the sun sits just off‑frame. Compose for layers—foreground texture, midground story, background glow—and let HDR be seasoning, not sauce. With these golden hour tips, gentle bracketing safety nets, and a mindful timelapse, you’ll bottle that brief hush between night and day and bring home photographs that feel like postcards you can step into.
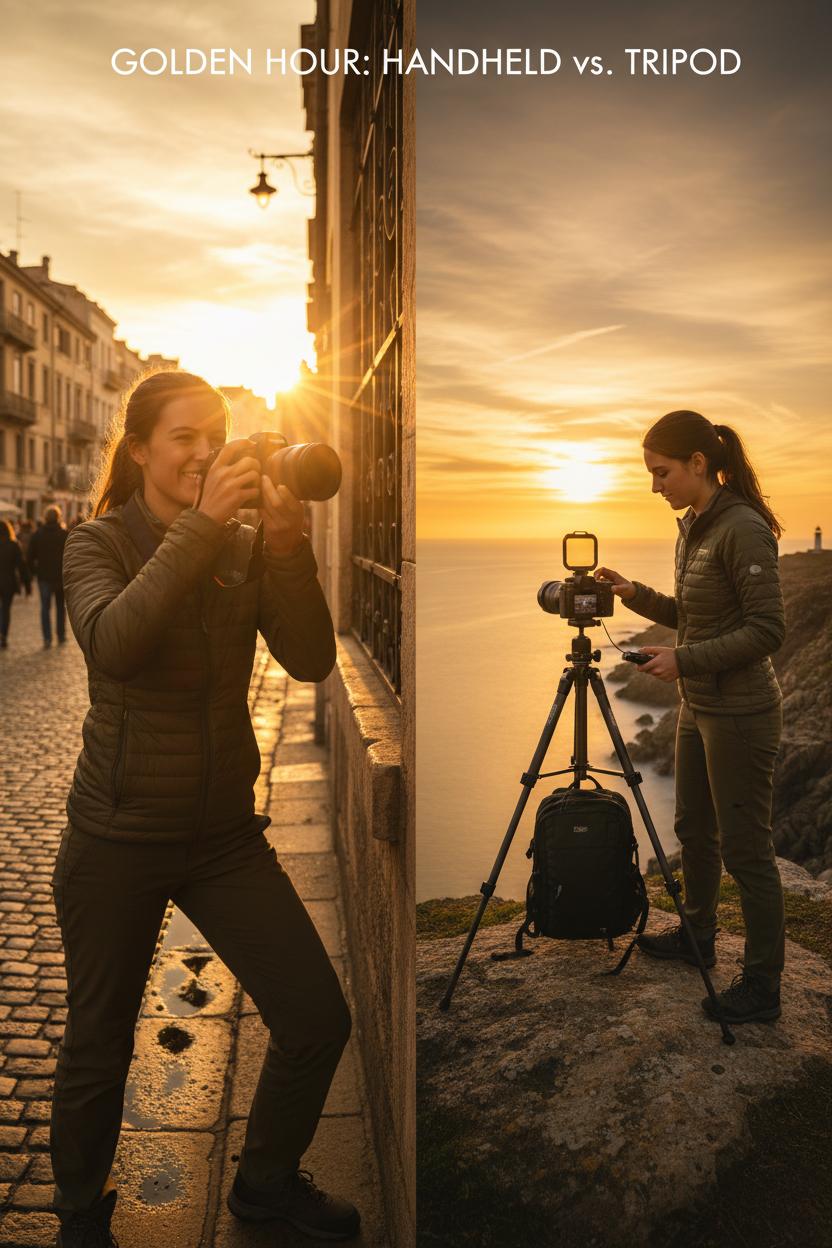
Golden hour is dreamy, but it’s also dimmer than it looks—so the first decision is whether to embrace the freedom of handheld or anchor down with a travel tripod. Handheld shines when you’re chasing fleeting light, city reflections, or candid silhouettes. With a modern mirrorless camera and in-body stabilization, you can stay nimble and still pull off crisp frames. Use these golden hour tips: set Auto ISO with a minimum shutter (try 1/250 for people, 1/(focal length) for static scenes), keep aperture around f/4–f/5.6 for flattering portraits, and bump to f/8 for landscape depth. Squeeze the camera to your face, tuck your elbows in, lean on a wall, and shoot in short bursts—your SD card can handle it. Exhale before pressing the shutter, or use the 2-second timer to avoid micro-shake. Handheld is also great for reactive composition; you can pivot quickly to catch that warm flare on a doorway or the last rays painting a mountain ridge.
When the light drops or you’re crafting long exposures, a lightweight travel tripod becomes your evening bestie. It lets you keep ISO low for cleaner files, dial in precise camera settings like f/11–f/16 for sunstars, and bracket exposures without frame shift. Hang your camera backpack from the center column for extra stability, avoid extending the thinnest leg sections, and use a remote or self-timer. This is where an ND filter sings: slow the shutter to smooth water, stretch cloud motion, or dissolve crowds into ghostly whispers while the sky glows. A travel tripod also forces deliberate composition—perfect horizons, steady leading lines, and the patience to wait until the light kisses the scene just right. If you’re planning 2026 travel to coastlines or cities with reflective canals, this setup pays off at both sunrise and sunset.
Choose based on your story: movement and spontaneity favor handheld; layered landscapes, silky water, and tack-sharp architecture favor the tripod. Either way, pack thoughtfully—mirrorless camera, spare SD card, ND filter, and a compact travel tripod tucked in a comfortable camera backpack—and let the light guide your framing. In travel photography, there’s no single rule; the best golden hour shots happen when technique meets intention, and your composition is as steady as your breath.
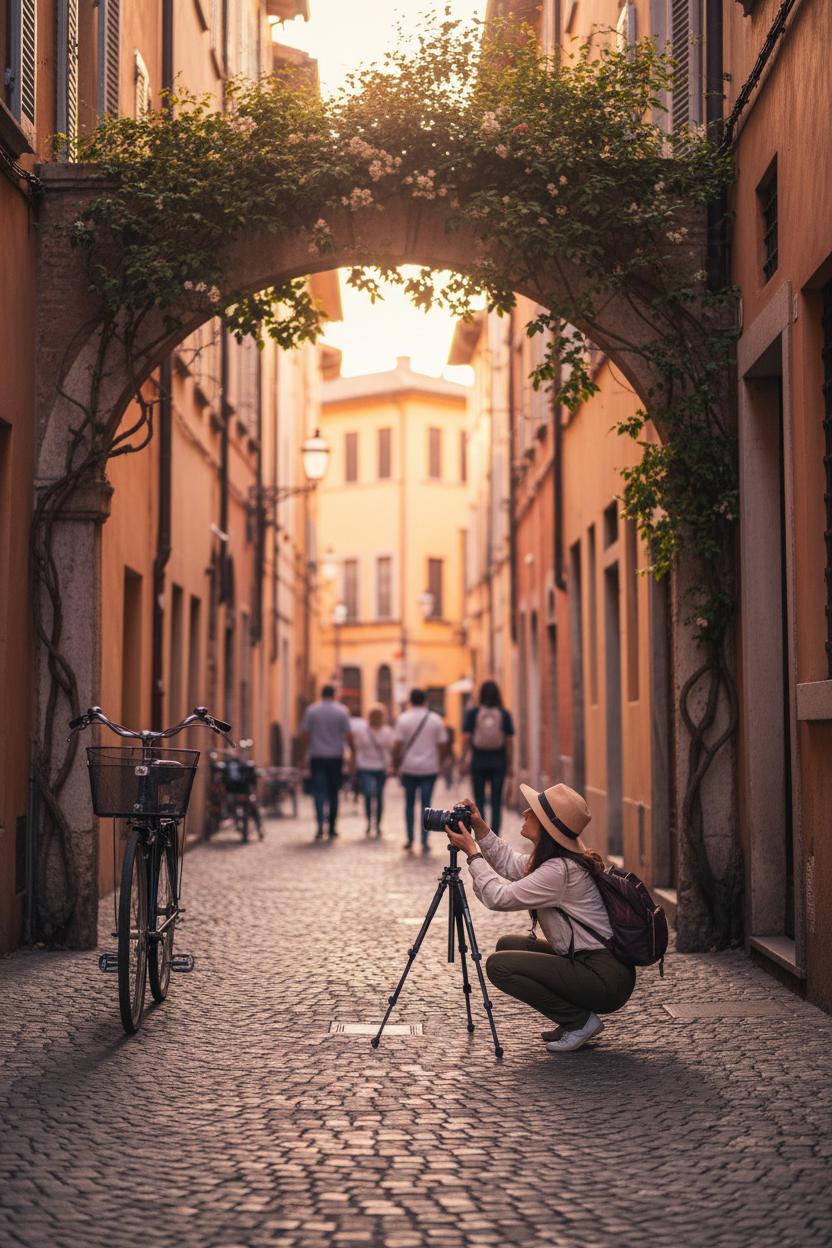
When the world is buzzing with 2026 travel energy and every landmark seems wrapped in a ribbon of selfie sticks, the secret to soulful travel photography is to go lighter, look sideways, and wait longer than everyone else. Pack a slim mirrorless camera, one prime lens, and a foldable travel tripod that tucks into a small camera backpack; you’ll move faster, slip into tighter spots, and be less conspicuous. I keep an ND filter in my pocket to stretch shutter speeds just enough to soften waves or blur foot traffic into a dreamy wash, and an extra SD card so I’m never forced to delete a favorite. For golden hour tips, arrive early or linger after the rush: that honeyed light hugs edges, opens shadows, and makes even quiet corners feel cinematic. Start with simple camera settings—ISO 100–200, aperture around f/5.6–f/8 for crisp detail, and adjust shutter speed to taste. If you’re handholding, watch that minimum 1/125; on the tripod, take your time and let the scene breathe.
Off-angles are your crowd-proof superpower. Step one block back from the famous view and use doorways, archways, or leafy branches as natural frames; a strong composition often lives in the margins. Shoot low from the cobblestones to stretch leading lines, or press your lens to a café window and let reflections layer the story. Rooftop terraces, ferry decks, side streets at 45 degrees—these little detours turn clichés into keepers. Be patient: compose first, visualize the clean frame, then wait for a pedestrian to exit the edge or a single cyclist to anchor the foreground. In bustling plazas, a 2–3 second exposure with the ND filter can erase most passersby while static architecture glows. If the light shifts, pivot quickly—switch to backlit silhouettes or catch the rim light on a hat brim. This is the spirit of 2026 travel: nimble, observant, and unhurried. With thoughtful composition, a minimalist kit, and a willingness to pause between breaths, you’ll bring home golden hour photographs that feel like memories, not just proof you were there.
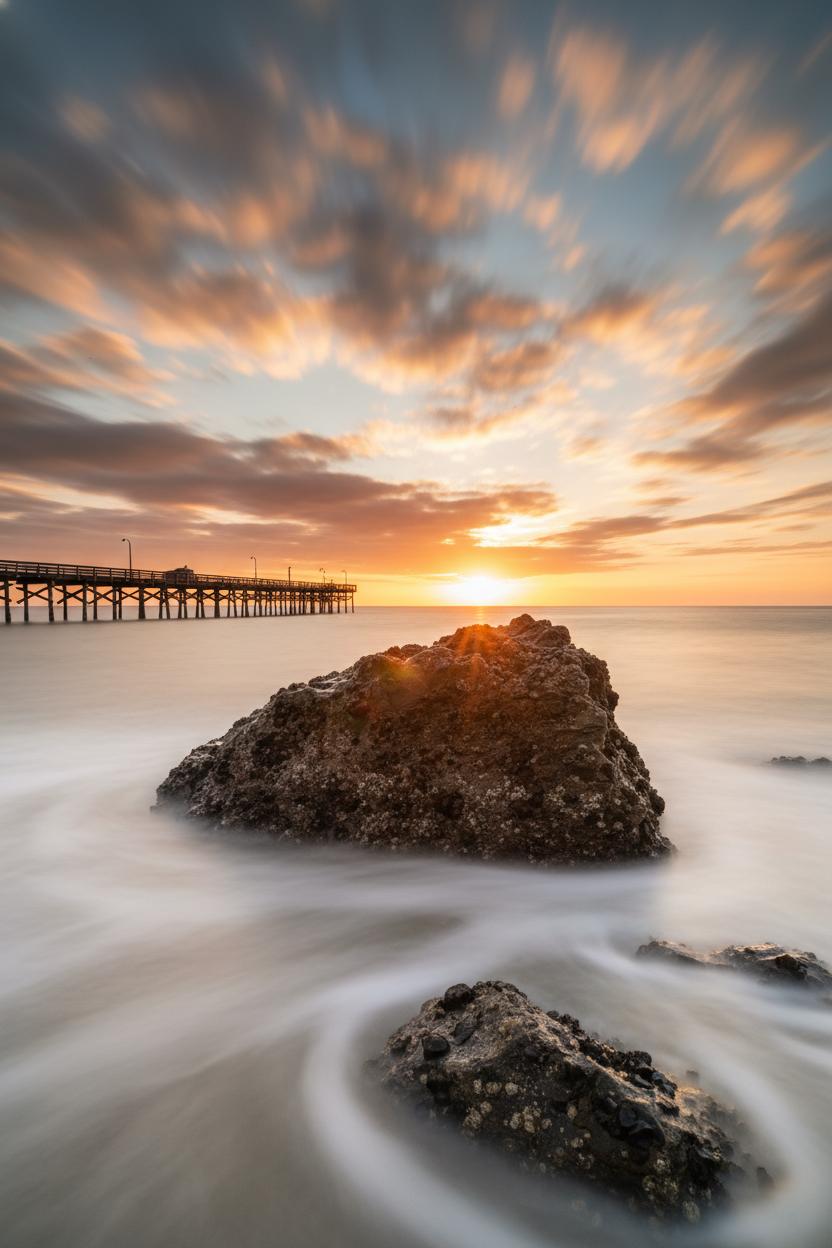
There’s a special kind of magic when you pair an ND filter with golden hour—like turning down the world’s dimmer switch so you can paint motion with light. As the sun slips low, attach a 3–6 stop ND filter to your mirrorless camera and watch waves smooth into silk, clouds stretch into brushstrokes, and traffic turn to glowing ribbons. Start with sturdy basics: mount everything on a travel tripod, set ISO 100, choose f/8–f/11 for crisp detail, and then drag the shutter. For water, try 1–4 seconds; for clouds, 10–30 seconds if the wind cooperates; for traffic, 5–15 seconds as the city lights wake up. These camera settings let golden hour do the heavy lifting for color while the ND filter gives you time. Use a 2-second timer or a remote, switch off stabilization when tripod-mounted, and lock focus manually so the scene doesn’t hunt in the fading light. If you’re in Shutter Priority, dial the time you want and let the camera choose the aperture—just keep an eye on diffraction above f/16.
Composition is where long exposure truly sings. Frame a tide-washed rock as your anchor while the sea softens around it, or align a pier as a leading line under streaking clouds. In the city, step a bit higher to stack lanes of traffic, and leave space for those light trails to travel through the frame. These golden hour tips also include protecting highlights: meter for the brightest sky and let the shadows fall moody, or bracket if you need a safety net. Keep a clean workflow—wipe the filter for flare, check your histogram, and carry backup on an SD card so you can shoot freely. Pack light but smart in a camera backpack, slipping in a small ND set and that travel tripod you won’t regret hauling. For your 2026 travel plans, build a tiny ritual: arrive early, scout how the wind moves the clouds and how the tide pulls, visualize the motion you want, and then slow everything down. This is travel photography as meditation—letting time pass through the frame until the scene feels like memory.
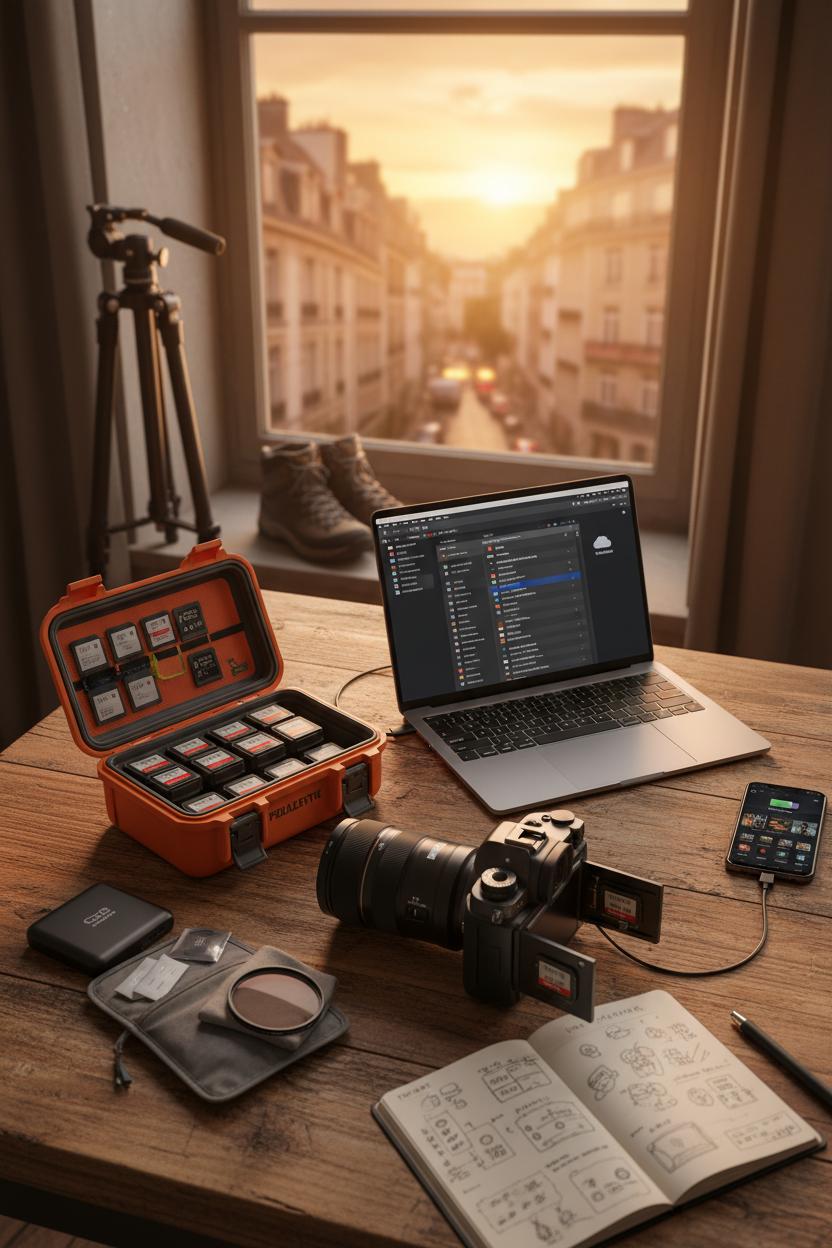
The secret to fearless travel photography isn’t just nailing golden hour tips, camera settings, and composition—it’s knowing your images are safe before you even leave the overlook. On the road, treat each SD card like a roll of priceless film. Carry several medium-size cards, label them by day, and rotate; don’t format until that day’s shots live in two other places. If your mirrorless camera has dual slots, set RAW to slot one and JPEG to slot two for instant redundancy. Single-slot? Shoot RAW+JPEG and auto-send the small JPEGs to your phone for a quick safety net and easy shares while you wander. Keep a fresh SD card tucked in your wallet for emergencies, and store filled cards in a tiny, weather-sealed case rather than loose in your camera backpack. It’s a small ritual that lets you relax into the glow and focus on those buttery skies and thoughtful composition choices.
Each night, make a cozy backup routine while your batteries and travel tripod dry by the door. Offload to a lightweight SSD, then kick off a cloud sync via hotel Wi‑Fi or your phone’s hotspot. Many camera apps will push selects directly to your cloud; otherwise, import to your phone or tablet and let them upload while you plan tomorrow’s 2026 travel route. Encrypt the SSD, and split your safety net: one copy stays with you, another goes in a different bag. I keep the SSD buried in my clothes pouch and the filled cards in a side pocket of the camera backpack—never together. Slip a few silica packs in your pouch, wipe down any ND filter that met sea spray, and baby those cards like jewelry.
A quick end-of-day checklist keeps everything humming: cull obvious misfires, rename folders by city-date, verify copies, then—and only then—format the next-day card in-camera. This gentle workflow frees brain space for sunrise alarms, playful camera settings experiments, and framing that dreamy rim light on faces and facades. With backups sorted, you can wander into the gold with confidence, knowing every fleeting flare is already halfway home.
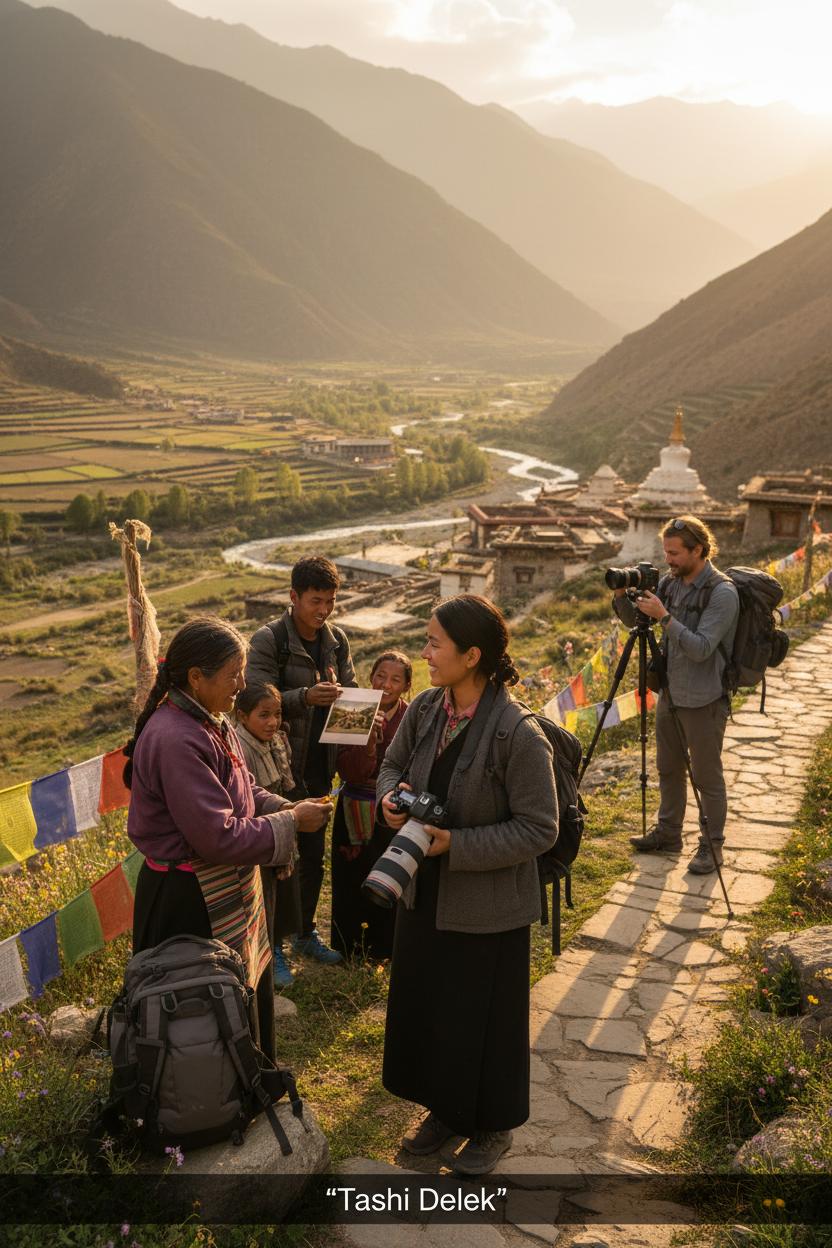
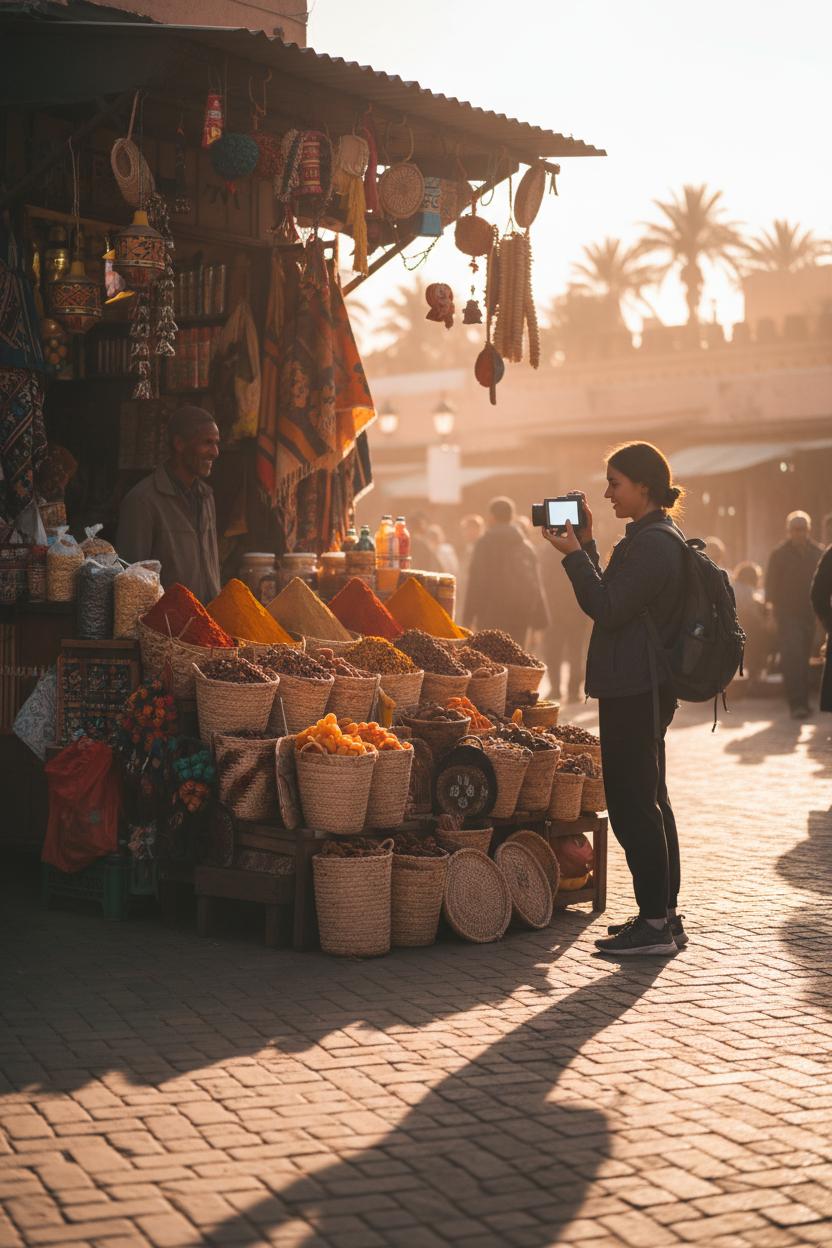
Golden hour may be soft and dreamy, but in 2026 travel the most important light is the one you shine on your subjects—with care, consent, and intention. When your travel photography includes people, start with a smile and a hello in the local language, then ask before you raise the lens. If someone says no, thank them and move on; your story is richer for the boundaries you honor. Keep a respectful distance and let your composition do the work—step back, use a longer focal length, and rely on a quiet shutter if your mirrorless camera has one. Avoid photographing children without a guardian’s permission, be mindful around sacred sites and ceremonies, and offer to share the image afterward. These human moments at golden hour glow brighter when everyone feels seen, not taken from.
Places deserve the same respect. Practice Leave No Trace by staying on paths, skipping the wildflower trampling for “just one shot,” and keeping your travel tripod’s feet off delicate surfaces. If it’s breezy, hang your camera backpack as a weight instead of digging the legs into soil or moss, and cap your ND filter when you’re moving so you’re not leaving smudged cloths behind. At popular sunrise viewpoints, share the space—take your frame, then make room. Try alternative angles or a layered composition from a few steps back to avoid crowding fragile ledges. Many parks now have permits and time slots for 2026 travel; a little planning pairs beautifully with your golden hour tips and keeps pressure off sensitive environments.
Finally, think about the footprint you leave digitally and temporally. Skip geotagging sensitive spots; describe the region instead of the pin. Pre-dial your camera settings—custom modes for low ISO, a starting aperture, and a safe shutter—so you can shoot efficiently and step away quickly. Keep a spare SD card handy to avoid frantic swapping in the field, and pack light so you’re nimble, with essentials tucked in a comfortable camera backpack. If you’re shooting long exposures to smooth crowds or water, use an ND filter thoughtfully and never block trails. Support local guides, purchase permits, and say thank you—sometimes with a tip, sometimes with a printed photo sent later. In the end, the best golden hour shots feel good because they were made with respect, patience, and heart.

Planning your 2026 travel itinerary? Add a golden hour shot list right alongside your must-eat spots. Start with city rooftops at sunrise, when pastel light kisses domes and chimneys and commuters cast long, storybook shadows. Seek reflections: quiet canals, harbor water ruffling into painterly streaks, puddles after a quick rainstorm, mirror-flat mountain lakes with cotton-candy skies. Chase edges where light meets texture—terracotta lanes, blue-painted doors, rippled sand dunes, rice terraces banded with glow. Capture everyday poetry: bikes floating through honeyed haze, street vendors opening or closing shop, café windows steaming, ferries sliding across sparkly bays. Don’t forget backlit portraits with rim-lit hair, dramatic silhouettes on cliff paths, and food spreads near a window for that warm, edible shimmer. As the sun dips, pivot from fire to cobalt for the first glints of blue hour; bridges and lanterns become jewel tones that extend your travel photography magic.
To nail these scenes, think composition first: layer foreground shapes (grasses, archways, railings), place the sun just off-center for flare, use leading lines from boardwalks or tram tracks, and leave negative space for that airy, Pinterest-style feel. Keep camera settings simple: start around f/8 for landscapes, f/2.8–f/4 for portraits, ISO 100–400, and shutter speeds of 1/125–1/250 for moving subjects; try -0.3 to -1 exposure compensation to preserve color. Pack light but smart—a mirrorless camera with good dynamic range, a sturdy travel tripod for silky water or citylight streaks, an ND filter for long exposures at the coast or waterfalls, a reliable SD card (or three), and a comfy camera backpack to keep you nimble. Favorite golden hour tips: arrive 30 minutes early, stay 20 minutes after; turn around often (the best glow might be behind you); shoot wide, then step in for details; and bracket or burst when the sky is changing fast. Your 2026 travel memories will look like they feel—soft, golden, and unforgettable.
As the sun melts into the horizon, let this guide be your gentle nudge to slow down and savor the glow. From smart scouting to dialed-in camera settings and thoughtful composition, these golden hour tips make travel photography feel effortless. For 2026 travel, pack curiosity, arrive early, shoot RAW, and let warm light paint your story. Chase silhouettes, lean into leading lines, and breathe between frames—the magic lives in the pause. Wherever you wander next, may every sunset be soft, simple, and yours to keep.