Physical Address
304 North Cardinal St.
Dorchester Center, MA 02124
Physical Address
304 North Cardinal St.
Dorchester Center, MA 02124
Ready to turn curbside finds into showstoppers? This guide to DIY upcycled furniture reveals thrift flip tricks that make any furniture makeover feel effortless. Think bold chalk paint, warm wood stain, and statement furniture hardware pulls. With an orbital sander and chic replacement furniture legs, even dated pieces become designer-worthy. Whether your style is rustic or modern, these budget-friendly projects elevate DIY home decor while championing sustainable decor. Grab your brush, cue the playlists, and let’s transform thrift to chic—one gorgeous rescue at a time.
Upcycled furniture is the ultimate thrift flip because it blends creativity, sustainability, and serious style on a shoestring budget. There’s a special kind of thrill in spotting a scuffed dresser or wobbly side table and imagining it in your space—suddenly, you’re not just shopping, you’re curating. Instead of settling for mass-produced pieces, you’re choosing character: real wood, old-school joinery, and those charming details you just can’t fake. It’s also a love letter to sustainable decor, giving new life to what already exists and keeping beautiful materials out of the landfill. And the best part? You get custom, made-for-you vibes without the designer price tag—perfect for anyone craving personality-packed DIY home decor.
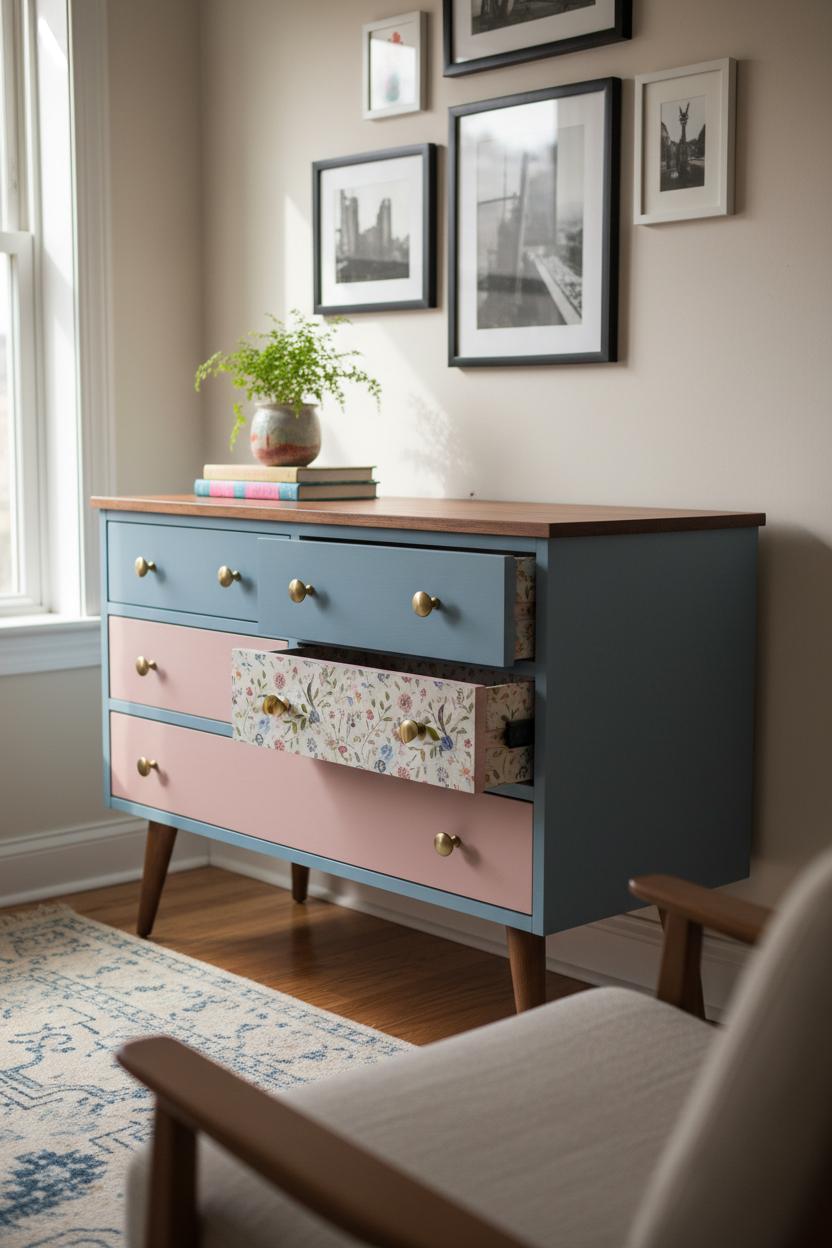
A great furniture makeover is all about the glow-up details. Start with an orbital sander to smooth away old finishes and prep the surface; then decide if your piece wants the soft, velvety look of chalk paint or the warmth of a rich wood stain to bring the grain back to life. Hardware can completely shift the mood—swap tired knobs for fresh furniture hardware pulls in matte black, brushed brass, or ceramic for instant polish. If the silhouette feels dated, consider new furniture legs (hello, tapered mid-century or chunky farmhouse) to change the stance and add height. You can color-block drawers, stencil a pattern inside, or line shelves with pretty paper so every open door feels like a tiny reveal. Each layer turns a castoff into a custom treasure.
Beyond the glow-up, upcycling is wonderfully practical. Older pieces are often sturdier than new budget buys, and you can tailor dimensions, storage, and finishes to fit your life—tiny entryways, toy-heavy living rooms, pet-friendly zones. The process invites play, but the results look intentional, like something you hunted for forever. Every brushstroke tells a story, and your home gets to wear those stories proudly. If you’ve been craving a weekend project that marries style and substance, consider this your sign: grab that thrifted find, pick your palette, and let your next thrift flip become the heart of your space.
Before you start any thrift flip, think like a treasure hunter with a practical eye. For truly sustainable decor, shop secondhand first—estate sales, Facebook Marketplace, curb alerts, and Habitat ReStore are gold mines. Look for “good bones”: solid wood frames, dovetail joints, sturdy drawer slides, and intact veneers (peel back a corner to make sure it’s not just printed laminate). Give every piece a wobble test, check for musty odors or water damage, and peek underneath for past repairs. Measure twice so your future furniture makeover actually fits your space and lifestyle. Choosing quality pieces you can love for decades is the heart of upcycled furniture—and the chicest kind of DIY home decor.
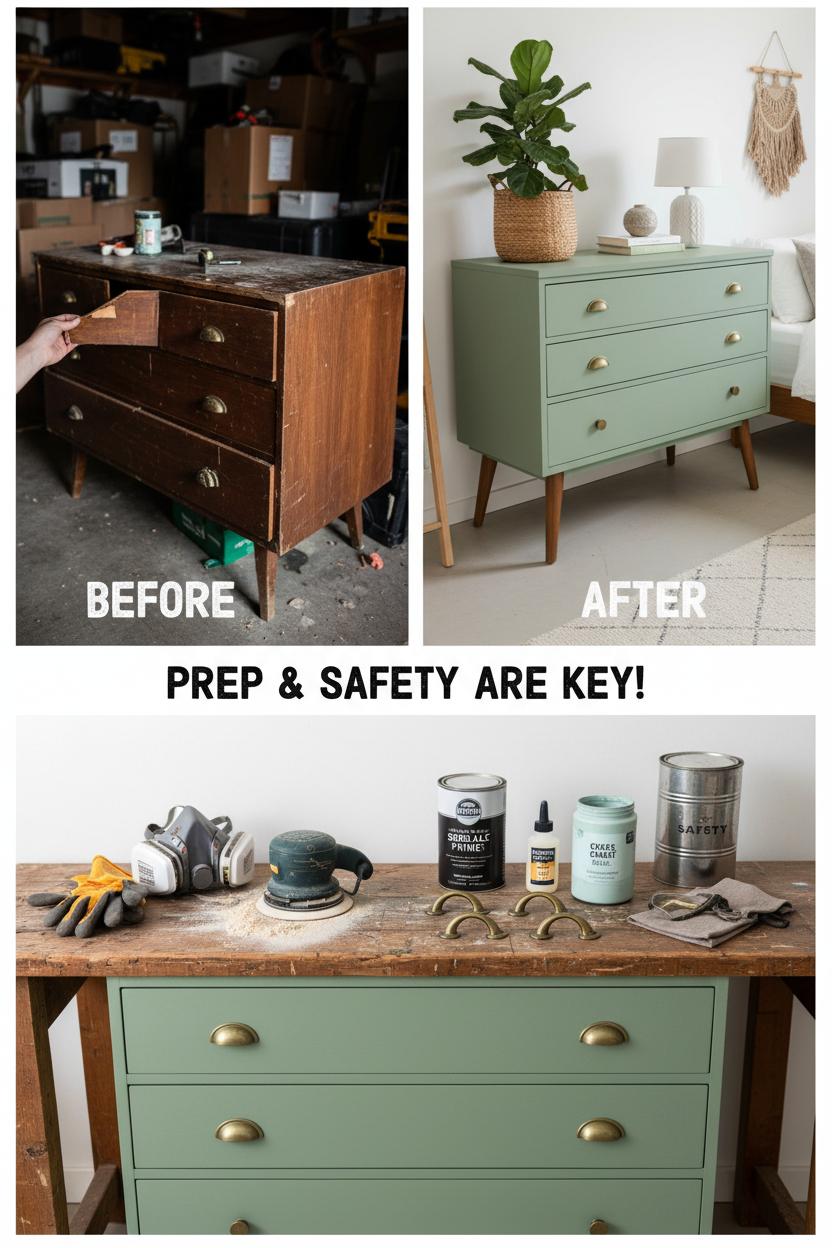
Prep is where the magic begins. Start with a deep clean: a mild soap or TSP substitute lifts grime, while a vinegar-water spritz helps with lingering odors (sun + airflow work wonders, too). Tighten joints with wood glue and clamps, and fill chips with wood filler. A quick scuff with an orbital sander evens surfaces—vacuum dust and wipe with a damp cloth before finishing. Decide your direction: chalk paint is a forgiving, matte dream for a vintage look, while wood stain lets beautiful grain shine. Either way, a quality primer (shellac-based for tannin bleed) sets you up for success, and a water-based topcoat keeps your hard work durable. Swap dated furniture hardware pulls for something modern or aged brass, and consider new furniture legs to tweak height and style. Small tweaks, big transformation.
Safety is non-negotiable. If a piece is pre-1980s, test painted surfaces with lead swabs; if lead is present, skip dry sanding and opt for encapsulating with a bonding primer or consult a pro for safe removal. Always wear a respirator rated for particulates and organic vapors when sanding or using stain, gloves to protect your skin, and eye protection; work outdoors or with great ventilation. Watch for pests (quarantine finds before bringing them inside), and be mindful that oily wood stain rags can self-heat—lay them flat to dry or store in a sealed metal container before disposal. Finally, check structural integrity before daily use and anchor tall dressers. With smart sourcing, thoughtful prep, and safety-first habits, your thrifted piece can live a long, stylish life—and that’s sustainable decor at its best.

If you’ve ever eyed a scuffed thrifted dresser and thought, “I wish someone would give you a second chance,” chalk paint is your new best friend. It’s beginner-friendly, fast, and oh-so-forgiving, turning upcycled furniture into a soft, velvety statement piece with minimal prep. Start with a solid piece from a yard sale or flea market—look for good bones, sturdy drawers, and classic lines. Give it a good clean, remove the old hardware, and if the finish is super glossy, a quick pass with an orbital sander or a simple scuff sand will help the paint grip. Stir your chalk paint well and lay on the first coat in long, even strokes, then let it dry while you cue up your favorite playlist and dream up styling ideas.
The magic really shows on coat two. Crosshatch your brush strokes for that charming, hand-finished texture, or keep them straight for a cleaner look. Want a touch of farmhouse romance? Lightly distress the edges with fine-grit sandpaper. Seal with clear wax for a buttery, touchable sheen, or a matte water-based topcoat if you expect heavy use. For a boutique-worthy thrift flip, try a two-tone finish: paint the body and refresh the top with a warm wood stain. Swap dated knobs for modern furniture hardware pulls—think brushed brass, ceramic, or leather—to elevate the silhouette in seconds. If the piece feels squat, screw in sleek tapered furniture legs to lift it up and add instant mid-century charm. The result is a furniture makeover that looks custom, not crafty.
Styling your new beauty is the cherry on top. Lean a framed print, stack a few favorite reads, and add a plant for that fresh, collected vibe—all easy, affordable wins for DIY home decor. This simple chalk paint process keeps things quick, joyful, and accessible, turning castoffs into keepers and proving that sustainable decor can be deeply stylish. Whether you’re furnishing your first apartment or refreshing a cozy corner, upcycled furniture delivers character and conscience in one gorgeous package. Consider this your permission slip to grab a brush, say yes to color, and let a weekend project become your next “I can’t believe I made this” moment.
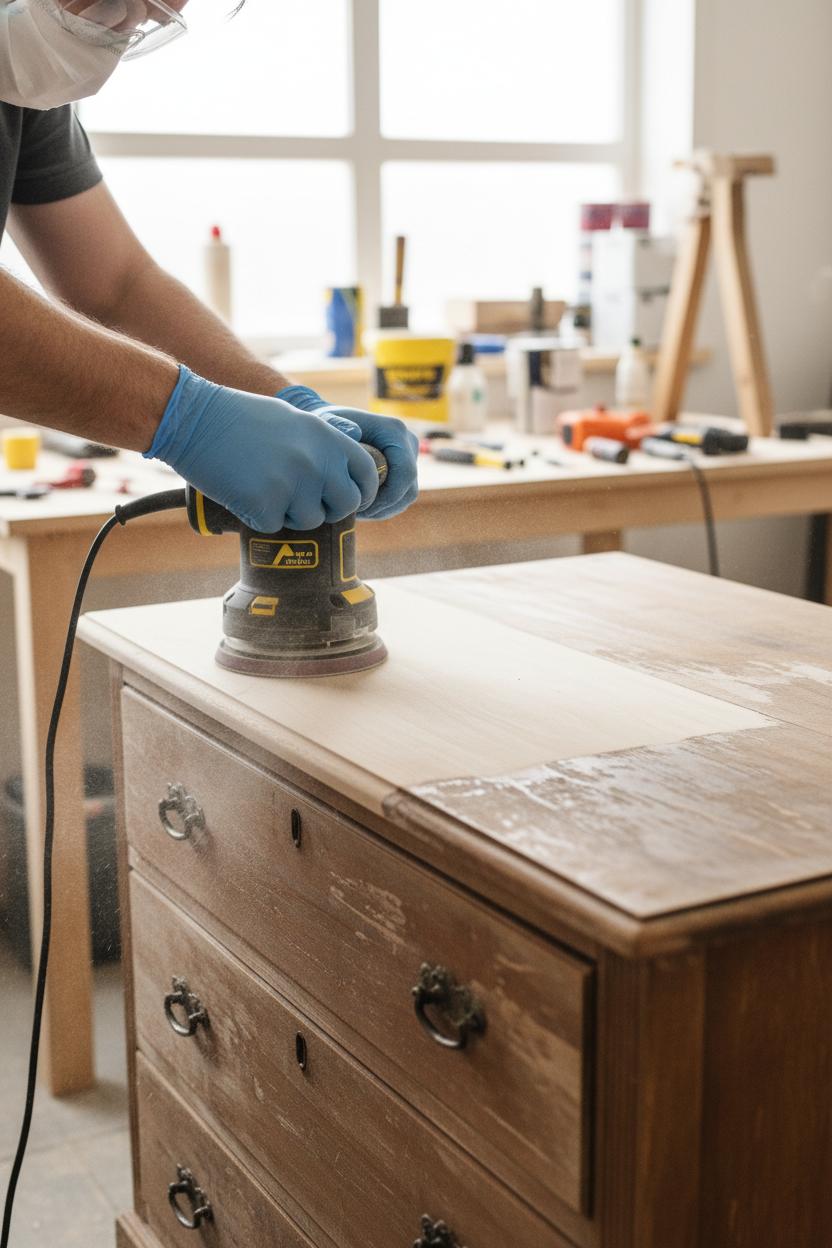
Before the color, the sheen, and the cute new knobs have their moment, the magic starts with a silky-smooth surface. An orbital sander is the quiet hero of any thrift flip, turning scuffed flea-market finds into ready-to-glow showpieces. Think of it as a magic eraser with manners: it works fast, but it’s forgiving, making it perfect for an upcycled furniture project where you want pro results without fuss. Start with fresh discs—80–120 grit to knock back old finish, then 180–220 to polish the surface to paint-ready. Keep the sander moving in slow, overlapping passes, and let it float; pressing down creates swirls you’ll only notice after you paint. For edges and curvy details, switch to a sanding sponge or hand-sand so you don’t flatten pretty profiles. If your piece has veneer, treat it like delicate lace—light pressure, higher grit, and check often. Finish with a final pass in the direction of the grain, vacuum the dust (a sander with a dust bag or vac port is a game-changer), then wipe with a barely damp cloth or tack cloth so your finish can stick like a dream.
Now comes the fun fork in the road. If the wood has gorgeous grain, a rich wood stain can bring out depth and warmth, perfect for a timeless, sustainable decor vibe. Prefer that velvety, cottage-chic look? Chalk paint goes on like frosting and loves a well-sanded base, whether you’re after crisp coverage or a soft, layered distress. Up the glow with fresh furniture hardware pulls, swap in tapered furniture legs for a custom silhouette, and suddenly your furniture makeover feels designer-made. Fill dings with wood filler before your final sanding, ease any harsh corners for a softer touch, and always seal your finish so it stands up to real life. A dust mask, eye protection, and a little patience are the only non-negotiables.
Sanding smarter sets the tone for the whole project—and it’s where DIY home decor turns from “good enough” to “how is this the same piece?” With an orbital sander doing the heavy lifting, you’re not just rescuing a castoff; you’re crafting upcycled furniture that tells a new story, one swirl-free, satin-smooth pass at a time.
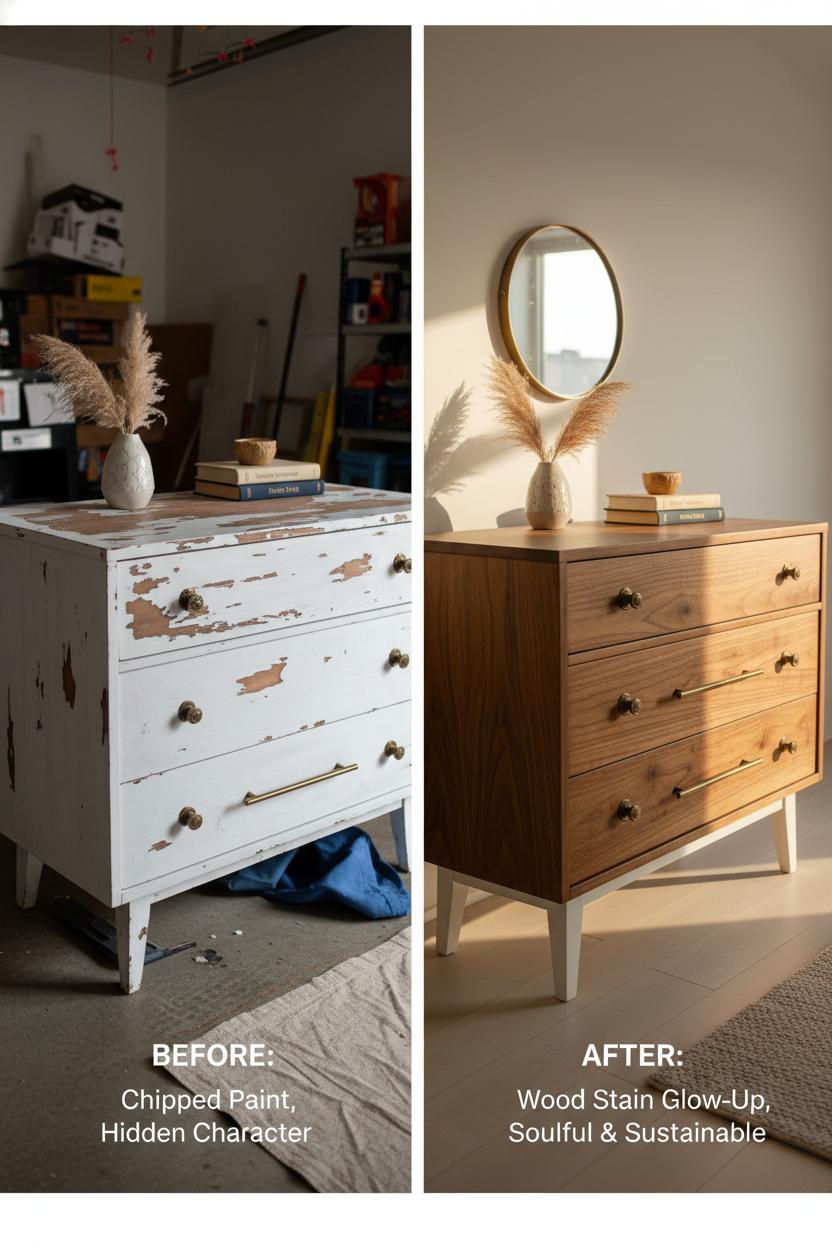
When you want your upcycled furniture to look luxe without losing its character, reach for wood stain. There’s a romance to watching grain come alive—those honeyed swirls and moody knots suddenly glow—turning a humble thrift flip into a heirloom-feeling furniture makeover. Stain celebrates the story already written in the wood, which makes it a beautiful choice for sustainable decor and DIY home decor lovers who crave warmth and authenticity. When you’re thrifting, look for solid wood or quality veneer tops on dressers, nightstands, and side tables; a quick peek inside drawers or the underside usually reveals the species and whether a rich finish is possible.
Prep is where the magic begins. Give the piece a thorough clean, then sand away the old finish with an orbital sander—start around 120–150 grit and glide up to 220 for that silky, ready-to-stain surface. Wipe with a tack cloth and, if you’re working with blotch-prone woods like pine or birch, brush on a pre-stain conditioner. Choose your wood stain based on the vibe: gel stain for even coverage on tricky grain, a traditional oil-based stain for depth and glow, or water-based if you want faster dry times and easier cleanup. Apply with a lint-free cloth or foam brush, working in the direction of the grain, and wipe back to control intensity. I love layering a light “driftwood” pass under a deeper walnut for coastal-with-a-twist dimension. For a chic two-tone look, keep the top stained and paint the base with chalk paint—creamy whites or inky charcoals let the wood sing while still giving the piece that custom, designer feel.
Seal the beauty with a clear topcoat—satin polycrylic for low-yellowing on lighter tones or oil-based polyurethane for that classic amber warmth. Then finish the transformation with jewelry: crisp furniture hardware pulls and, if the silhouette needs a lift, swap in tapered furniture legs for instant modern charm. The result is a polished, personal statement that feels high-end yet mindful—proof that an artful thrift flip can elevate your space and your sustainability game. With a little patience and the right touches, stain turns everyday finds into soulful stars of your furniture makeover story.
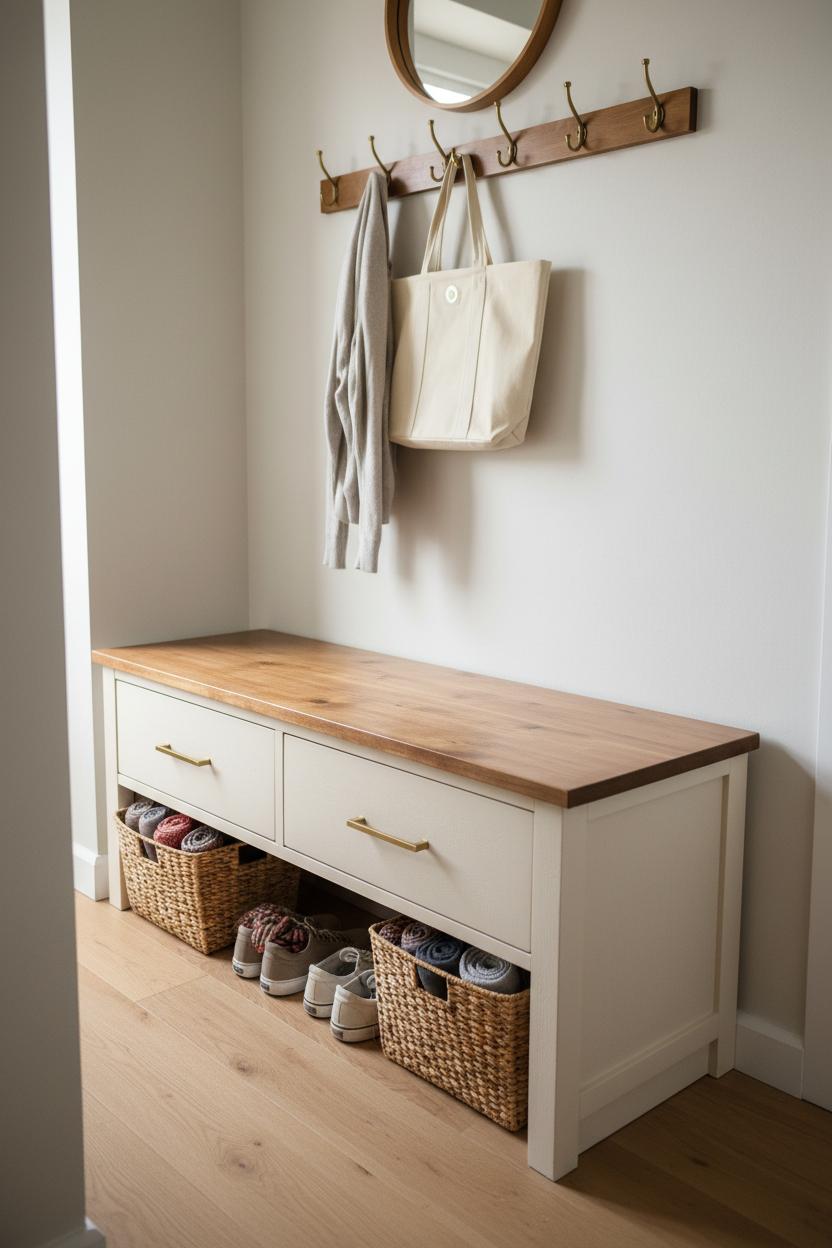
Small spaces love hardworking pieces, and that’s where a good thrift flip really shines. For an instant entry upgrade, look for a low dresser or a sturdy coffee table at the thrift store and imagine it as an entryway bench with hidden storage. Give the top a smooth start with an orbital sander, then stain it with a warm wood stain for that rustic-meets-modern look. Paint the base in a creamy chalk paint to keep things light in a narrow hallway, and finish with fresh furniture hardware pulls on any drawers or cubbies for a polished detail. Slide a few baskets underneath for shoes and scarves, add a row of hooks above, and you’ve got a tidy landing zone that doubles as upcycled furniture and beautiful, sustainable decor.
Nightstands are another tiny-footprint hero you can easily reinvent. Stack two vintage crates, secure them, and add sleek furniture legs for a custom height that fits your bedside perfectly. A quick furniture makeover with chalk paint keeps the outside cohesive, while a contrasting wood stain inside the crates adds depth and warmth. If you find a mismatched pair of nightstands, unify them with the same paint color and swap in matching furniture hardware pulls—suddenly they’re a set. Bonus: add a charging grommet on the back so cords disappear, a little DIY home decor trick that keeps your bedroom calm and clutter-free.
Think vertically for small-space solutions beyond benches and nightstands. A narrow console can become a mini mudroom when you add a low shelf for baskets and a row of hooks above; a petite cabinet turns into a bar or coffee station with new handles and a stained top; even a lonely drawer can become wall-mounted storage with legs removed and a painted interior. The beauty of upcycled furniture is that it invites creativity while keeping budgets—and footprints—in check. Start with solid bones, smooth things out with the orbital sander, layer chalk paint or wood stain for personality, then finish with statement furniture hardware pulls or tapered furniture legs to elevate the silhouette. Little flips, big function: that’s the magic of a thoughtful thrift flip for small spaces.
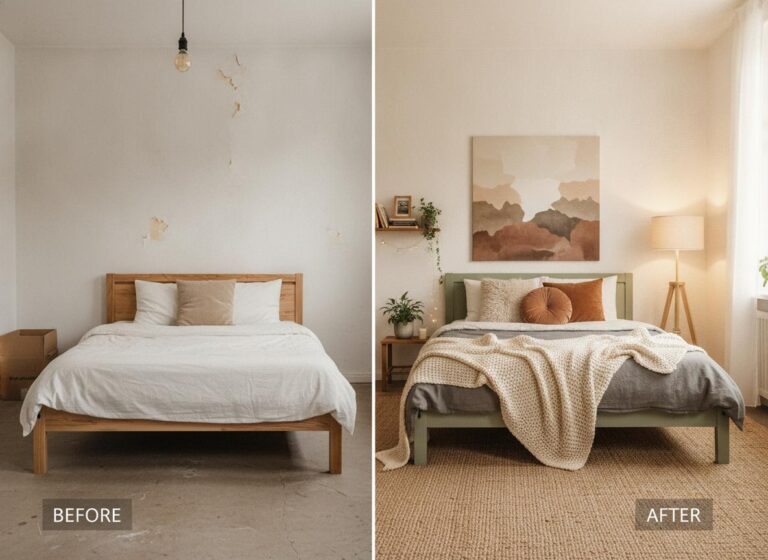
If you’ve ever walked past a scuffed dresser or wobbly nightstand at the thrift store and thought “Nope,” here’s your nudge to look again. The magic of a good thrift flip lives in that moment you picture the after. Take a scratched, orangey oak dresser: the before is dull and dated, but a quick pass with an orbital sander to smooth the top, a rich wood stain to warm the grain, and a coat of chalk paint on the base can turn it into a boutique-worthy focal point. Swap out the tired knobs for fresh furniture hardware pulls—think brushed brass, matte black, or ceramic—to add instant polish. It’s a simple furniture makeover that reads custom, all while keeping your budget (and the planet) happy with sustainable decor.
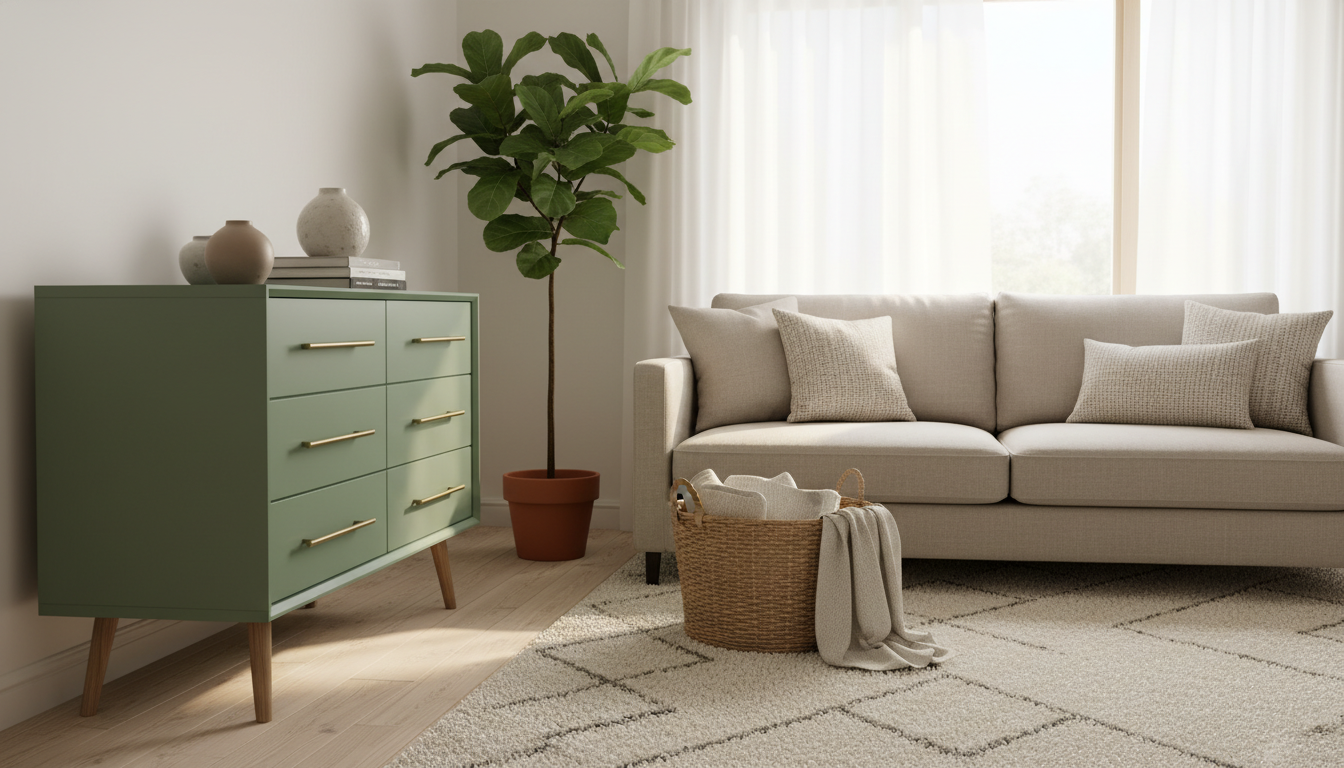
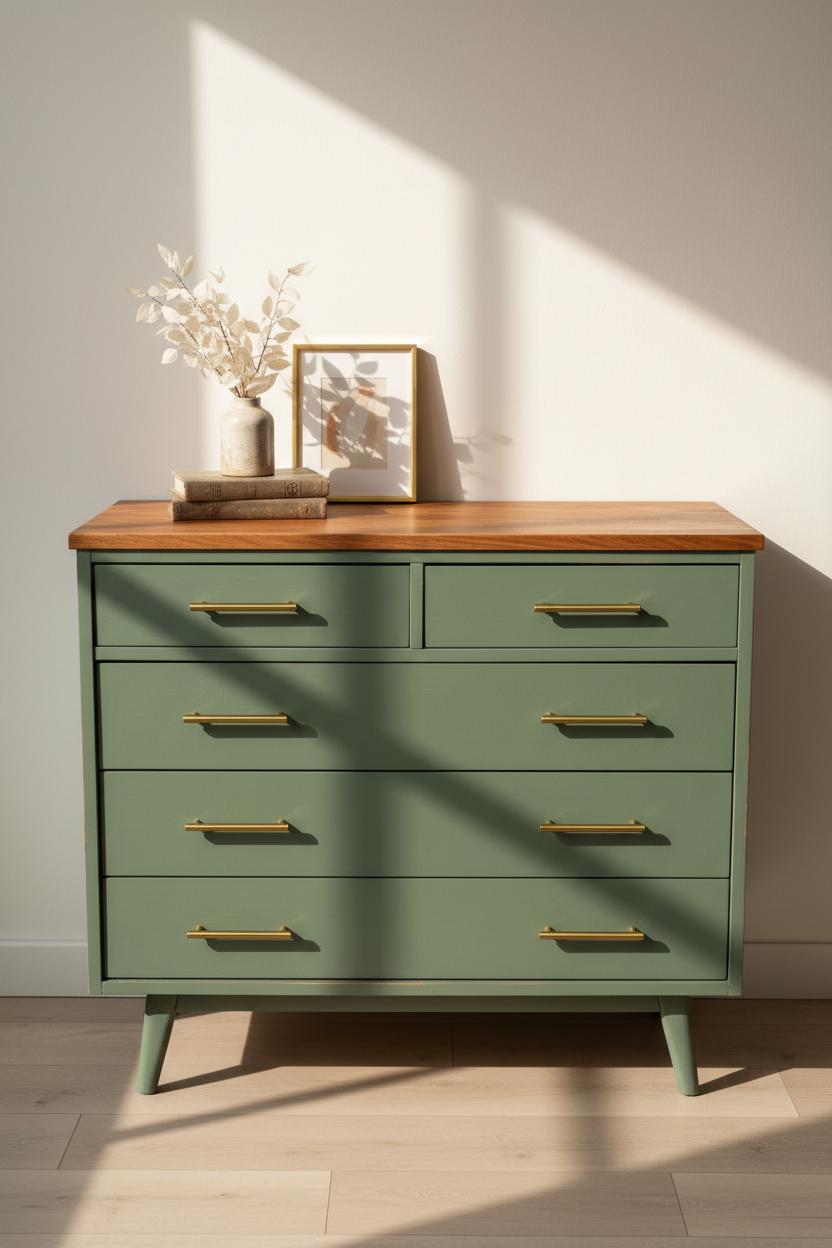
I love pairing a natural wood top with a painted body for contrast, and chalk paint makes it wonderfully foolproof. Layer two soft tones and lightly distress the edges to hint at age, or keep it modern with a velvety, solid finish. A petite side table that once felt too squat? Add sleek, tapered furniture legs for height and presence, then finish with a deep walnut wood stain and clean, mid-century pulls. The transformation is all about details: softened corners, updated hardware, and a finish that suits your space. Imagine the before—yellowed varnish, sticky drawers, clunky feet—and the after: a matte sage green base, warm stained top, and gleaming pulls catching morning light beside a stack of books. That’s upcycled furniture doing its glamorous thing.
Chairs are another easy win. Sand away the shiny factory finish, brush on a fresh coat of chalk paint, and seal; re-cover the seats in a cozy fabric and watch the whole room lift. Even a dated coffee table can become a statement piece with a two-tone stain-and-paint treatment and new legs. These DIY home decor projects prove that a thoughtful thrift flip isn’t about perfection; it’s about personality and smart choices. Start small, trust your eye, and don’t be afraid of the sander. With a weekend, a quart of paint, and a handful of hardware, you’ll go from budget to boutique—one beautifully reinvented piece at a time.
From curbside treasures to chic statement pieces, you’ve seen how a simple thrift flip can become a stunning furniture makeover. With paint, new hardware, and a little imagination, upcycled furniture turns tight budgets into beautiful, DIY home decor while keeping your space uniquely you. As you hunt your next find, choose sustainable decor that tells a story—sand, stain, stencil, and style with heart. Brew a cozy coffee, queue your playlist, and start small. Your home is ready for charm, character, and creativity—one mindful brushstroke at a time.